Do you have a question about the Craftsman 113.20680 and is the answer not in the manual?
Read the owner's manual carefully to learn its application, limitations, and potential hazards.
Ensure the tool is equipped with a 3-conductor cord and 3-prong grounding plug for safety.
Ensure guards are in place, working order, proper adjustment, and alignment.
Form the habit of checking and removing keys/wrenches before turning the tool on.
Cluttered areas invite accidents; ensure the floor is not slippery due to wax or sawdust.
Do not use power tools in damp/wet locations or rain; ensure adequate lighting and workspace.
All visitors should be kept a safe distance from the work area.
Secure workshop with padlocks, master switches, or by removing starter keys.
Use the tool at its designed rate; it will perform better and safer.
Do not force the tool or attachment to do a job it wasn't designed for.
Avoid loose clothing, jewelry; wear nonslip footwear and protective hair covering.
Wear safety goggles (ANSI Z87.1 compliant) at all times; use face/dust mask and ear protection as needed.
Use clamps or a vise to hold work for safer operation, freeing both hands.
Maintain proper footing and balance at all times.
Keep tools sharp and clean; follow instructions for lubrication and accessory changes.
Disconnect tools before servicing or changing accessories.
Ensure the switch is in the 'OFF' position before plugging in.
Consult manual for recommended accessories and follow their instructions.
Avoid standing on the tool to prevent serious injury from tipping or accidental contact.
Carefully check damaged parts for proper operation, alignment, and function before further use.
Feed work into a blade or cutter against the direction of rotation.
Turn power off and wait for the tool to stop completely before leaving.
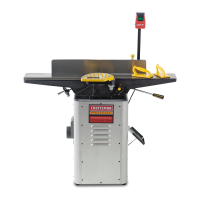
Familiarize yourself with the components and features of the jointer-planer.
Learn the fundamental procedures for operating the jointer-planer.
Learn the proper usage of hold-down and push blocks for safety and control.
Ensure the machine is stable; bolt to the floor if it tends to tip or move.
Position the jointer-planer to avoid operator alignment with wood and ensure adequate lighting.
Understand causes of kickbacks and methods to avoid serious injury.
Adhere to safety guidelines for protecting eyes, hands, face, ears, and body during operation.
Instructions for safely connecting the jointer-planer to a properly grounded power outlet.
Verify the motor's rotation direction before connecting to power.
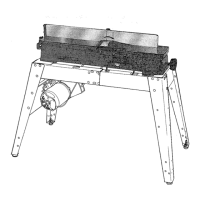
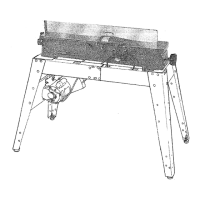
Instructions for mounting the jointer-planer onto the recommended Craftsman stand.
Procedure to check and adjust cutter blades and their securing screws.
Step-by-step instructions for installing the sliding guard onto the jointer-planer.
Instructions for mounting the motor and belt guards for safety and protection.
Description of the handwheel used to adjust the infeed table for depth of cut.
Instructions for positioning, locking, and using the fence stops for accurate cuts.
Explanation of how to read and adjust the fence tilt scale for precise angles.
Information on the cutter guard's purpose, function, and proper operation.
Ensuring the infeed table is parallel to the outfeed table for accurate cuts.
Details on the operation and safety features of the on-off switch, including the key lock.
Proper technique for feeding the workpiece smoothly and safely across the cutterhead.
Detailed instructions on how to properly use hold-down and push blocks for safety.
Instructions for performing bevel cuts using the jointer-planer.
Detailed steps for safely removing, cleaning, and replacing the cutter blades.
Step-by-step guide for correctly installing the cutter guard spring.
Guidance on how to sharpen cutter blades using an oilstone, and when to regrind or replace them.
Schematic showing the electrical connections for the jointer-planer.
Information on which parts require occasional oiling and which parts are pre-lubricated.
Diagnosing and resolving issues when the motor fails to operate.
Troubleshooting problems where the workpiece contacts the outfeed table after the cut.
Identifying and fixing causes of rippled surfaces on planed wood.
Correcting issues causing the planed surface to be uneven or not straight.
Resolving problems that cause deep gouges at the end of a cut.
Troubleshooting inaccurate 90° and 45° fence angle cuts.
Addressing issues with the infeed table becoming loose or unstable.
Diagnosing and fixing problems with the cutter guard's operation.
Instructions on how to order replacement parts and necessary information to provide.