Do you have a question about the Craftsman 113.244401 and is the answer not in the manual?
Understand the tool's application, limitations, and specific hazards.
Ensure the tool is properly grounded via a 3-conductor cord and plug.
Avoid loose clothing and wear appropriate footwear and eye protection.
Wear safety gear, avoid awkward positions, clear workspace, and ensure proper blade alignment.
Specific warnings about cutting certain materials or shapes to avoid blade binding.
Guidelines for connecting the tool to a properly grounded power outlet.
Warnings and instructions regarding proper electrical grounding to prevent shock.
Lists the required tools for unpacking and assembling the band saw.
Itemized list of all included parts with quantities for verification.
Step-by-step guide for securely fastening the saw to a workbench.
Alternative method for mounting using a separate board and clamps.
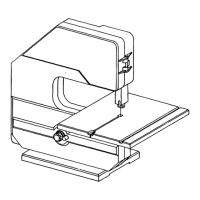
Instructions for attaching the saw table to the trunnion assembly.
Steps to properly mount the saw blade onto the wheels.
How to set the upper guides and thrust roller for blade support.
How to set the lower guides and thrust roller for blade support.
Procedure to align the blade to run centrally on the wheel tires.
How to ensure the saw table is perpendicular to the blade.
Steps to ensure the guide bar is parallel to the blade.
Procedure to align the guide bar front-to-back relative to the table.
Procedure to align the guide bar side-to-side relative to the table.
Setting the upper blade guides to support the blade correctly.
Setting the upper thrust roller for proper blade support from the rear.
Setting the lower blade guides for proper blade support.
Fine-tuning the lower blade guides to support the blade.
Setting the lower thrust roller for proper blade support from the rear.
Final steps for securing the table insert and ensuring alignment.
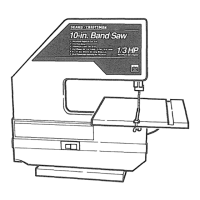
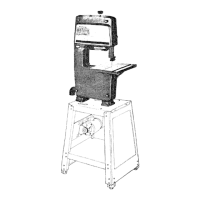
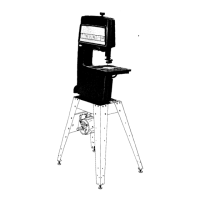
Overview and labeling of key parts of the band saw.
Instructions for operating the safety lockable on-off switch.
Guidance on how to properly feed material and cut with the saw.
Information on choosing the correct blade width for cutting circles.
How to clean, maintain, and replace the saw's tires.
Instructions for keeping the saw clean and its lubrication needs.
Guidance on cleaning and maintaining the saw's motor.
Solutions for common problems like the motor not running or blade misalignment.
Causes and remedies for the saw slowing down or blades breaking during cuts.
Visual representation of the band saw with numbered parts.
Detailed list of parts for Figure 1 with part numbers.
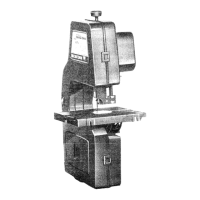
Visual representation of the band saw's motor and frame with numbered parts.
Detailed list of parts for Figure 2 with part numbers.
Information on how to order replacement parts and service.
| Model Number | 113.244401 |
|---|---|
| Type | Table Saw |
| Blade Diameter | 10 inches |
| Motor | 1.5 HP |
| Arbor Size | 5/8 inch |
| Voltage | 120V |
| No Load Speed | 3450 RPM |
| Max Cut Depth at 90° | 3 inches |
| Amps | 15 A |