Do you have a question about the Craftsman 113.244513 and is the answer not in the manual?
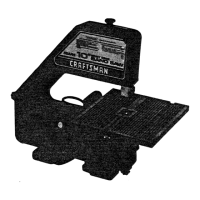
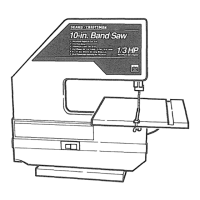
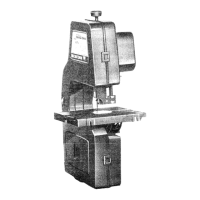
Identifies the specific model number of the Craftsman 10-inch band saw.
Detailed safety advice covering 21 essential points for safe power tool operation.
Specific safety procedures for band saw use, installation, and moving.
Lists the essential tools required for assembling the band saw.
Instructions for securely fastening the band saw to a workbench.
Steps for attaching and securing the saw table to the band saw frame.
Detailed steps for safely removing and installing a new band saw blade.
Procedures for setting correct blade tension and compensating for wear.
Instructions for tracking the blade and aligning the table square to the blade.
Detailed steps for adjusting upper and lower blade guides and thrust bearings.
Procedure for adjusting the drive belt tension for optimal performance.
Steps to properly install the table insert and secure the table.
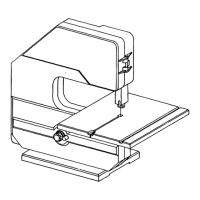
Explanation of key components like tension knob, guides, and on-off switch.
How to use the switch, its locking feature, and safety precautions.
Techniques for general scroll cutting and handling workpieces for curves.
Method of using relief cuts for complex curve cutting.
Instructions for cleaning tires, table, and internal parts of the band saw.
Information on motor care, electrical safety, and bearing lubrication.
Identifies common problems and provides remedies for the band saw.
Visual diagram showing all parts of the band saw with corresponding numbers.
Comprehensive list of parts with part numbers, key numbers, and descriptions.
Guidance on contacting Sears for service and ordering replacement parts.
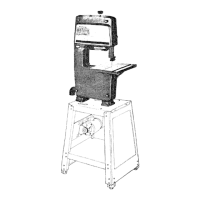
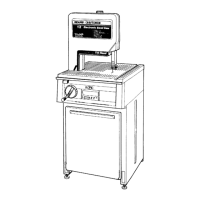
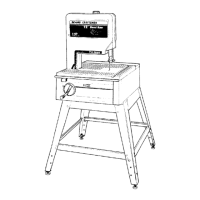
The Craftsman 10-Inch Band Saw, Model No. 113.244513, is a versatile power tool designed primarily for "curve cutting" operations, but also capable of straight-line cutting tasks such as crosscutting, ripping, mitering, beveling, compound cutting, and resawing. It is specifically engineered to cut wood and wood-like products, as well as plastic. This band saw is not intended for inside cutting.
Before operating the band saw, several critical steps must be completed to ensure safety and proper function. These include assembly and alignment, familiarization with the on-off switch, upper and lower blade guides, tension adjusting knob, table lock knobs, bevel scale, guide bar lock knob, and blade thrust bearing adjustment. Users must thoroughly read and understand all safety instructions and operating procedures outlined in the manual, paying close attention to the warning labels on the front of the band saw and blade guard.
For safe operation, the band saw should be securely bolted or clamped to a sturdy, level workbench or stand, ensuring it does not tip, slide, or rock during use. If the workbench itself tends to slip, slide, or tip, it should also be bolted to the floor. The tool is designed for indoor use.
Prior to each use, a thorough inspection of the saw is necessary. Any missing, bent, or failed parts, or electrical components that do not work properly, must be addressed before turning on the saw. This involves turning the saw off, removing the switch key, unplugging the saw, and replacing or repairing damaged components.
Personal protective equipment is mandatory. Safety goggles that comply with ANSI Z87.1 must be worn at all times to protect against thrown objects. For dusty operations, a face shield should be used in conjunction with safety goggles. Ear plugs or muffs are recommended for extended periods of operation to prevent hearing damage. Loose clothing, gloves, neckties, and jewelry should be avoided as they can get caught in moving parts. Nonslip footwear is recommended, and long hair should be tied back. Long sleeves should be rolled above the elbow.
When handling workpieces, extra caution is advised for large, very small, or awkward items. Additional supports like tables or saw horses should be used for workpieces large enough to tip. Small pieces that require fingers to be under the guard area should be held with jigs or fixtures to keep hands away from the blade. For irregularly shaped workpieces, the cutting plan should prevent pinching the blade; for example, molding must lay flat or be held by a fixture. Round materials like dowel rods or tubing, which tend to roll, should always be supported with a "V" block or clamped to a miter gauge.
The blade teeth must point downward toward the table, and the blade tracking guides and thrust bearings must be properly adjusted. Blade tension should always be checked and correctly adjusted. To minimize accidental blade contact and maximize blade support, the upper blade guide and blade guard should be adjusted to just clear the workpiece. Hand placement should be planned to keep fingers away from the blade path in case of a sudden slip. All clamps and knobs must be tight, and there should be no excessive play in any parts. To avoid electrical shock, fingers should not touch the metal prongs of the plug when inserting or removing it from an outlet. The band saw should never be turned on before clearing everything except the workpiece and related feed or support devices from the table.
During operation, if the saw makes an unfamiliar noise or vibrates excessively, it should be stopped immediately, turned off, unplugged, and the switch key removed. Do not restart until the problem is identified and corrected. Awkward hand positions that could lead to hands moving into the blade should be avoided. The workpiece should be fed only fast enough to allow the blade to cut without bogging down or binding. If material jams, the saw must be turned off, unplugged, and the switch key removed, allowing all moving parts to stop before attempting to free the material. If the blade binds when backing up the workpiece (due to sawdust or the blade coming out of the guides), the saw must be turned off, unplugged, and the switch key removed. After all moving parts stop, a flat blade screwdriver or wedge can be used in the kerf, and the upper wheel turned by hand to back up the workpiece. Loose pieces should not be removed from the table until the saw is off and all moving parts have stopped. Only recommended accessories listed in the manual should be used.
The On-Off Switch features a locking mechanism to prevent unauthorized and potentially hazardous use, especially by children. To turn the machine on, the yellow plastic key must be inserted into the switch, and a finger inserted under the switch lever to pull it out. To turn the machine off, the lever is pushed in. To lock the switch in the OFF position, the switch is held in, and the key is removed and stored in a safe place. This also prevents accidental starting after a power failure. The machine should never be left running unattended until it has come to a complete stop.
For curve cutting, follow the pattern lines by pushing and turning the workpiece simultaneously. Do not force the workpiece or try to turn it while the blade is engaged without pushing, as this can cause binding or twisting of the blade. The blade should cut in the middle of the pattern line. Relief cuts are made for intricate curves by cutting through scrap sections of the workpiece to the pattern line, then carefully backing the blade out. Several relief cuts may be needed before following the pattern line.
Regular maintenance is crucial for the longevity and safe operation of the band saw. Before any maintenance or lubrication, the saw must be turned off, unplugged, and the switch key removed.
The tires should be kept free of pitch and sawdust, which can be removed with a stiff brush or scraped off with a piece of wood. Sharp knives or solvents should not be used. Worn tires should be replaced by applying a thin layer of rubber cement to the outside of the wheels and inside of the new tires, allowing it to dry, then sliding the tires onto the wheels, aligning them with the wheel edges.
The band saw should be kept clean, with sawdust removed frequently from the inside. Pitch should not be allowed to accumulate on the table, blade insert, blade guides, or thrust bearings; these should be cleaned with Craftsman Gum and Pitch Remover. A thin coat of automobile-type wax should be applied to the table to allow wood to slide easily during cutting, and also to the inside surfaces of the trunnion.
For the motor and electrical components, sawdust should be frequently vacuumed or blown out. If the power cord is worn, cut, or damaged, it must be replaced immediately.
All ball bearings are permanently lubricated and do not require further lubrication.
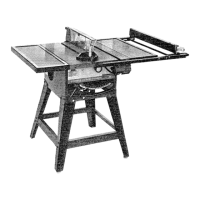
| Type | Table Saw |
|---|---|
| Blade Diameter | 10 inches |
| Voltage | 120V |
| No Load Speed | 5000 RPM |
| Table Size | 20 x 26 inches |