Do you have a question about the Craftsman 139.54985 and is the answer not in the manual?
Read safety rules, fasten manual, periodic checks, and Timer-to-Close warnings for safe use.
Ensure door is balanced, moves freely, and has a proper bottom seal before installation.
Lists all necessary hand tools for assembly, installation, and adjustment.
Details planning for sectional doors, including reinforcement and header bracket placement.
Outlines planning for one-piece doors, noting reinforcement and bracket placement.
Lists all parts included in the garage door opener package.
Details specific hardware components for assembly procedures.
Lists specific hardware components for installation procedures.
Step-by-step guide to assemble the opener's rail and install the trolley.
Securely attach the assembled rail to the main motor unit.
Guides on installing the idler pulley and connecting the drive chain or cable.
Properly tension the drive chain for optimal opener performance.
Guidance on selecting the correct mounting position for the header bracket.
Detailed steps for mounting the header bracket to the wall or ceiling.
Connects the assembled rail to the mounted header bracket.
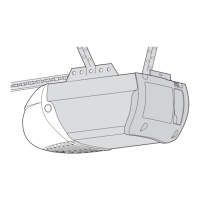
Guides on placing the opener unit and hanging it from installed brackets.
Instructions for installing opener lights and attaching the emergency release rope.
Steps for attaching the door bracket to sectional doors, including reinforcement.
Instructions for attaching the door bracket to one-piece doors.
Links the door arm sections and connects them to the opener trolley.
Placement instructions for crucial safety and operational labels.
Guides on wiring and mounting the wall-mounted door control panel.
Detailed steps for installing and aligning the safety reversing sensor system.
Instructions for installing sensor brackets and running sensor wires.
Steps to connect sensor wires to the opener's terminals.
Ensures proper outlet type and grounding for safe electrical connection.
Steps for making a hardwired electrical connection to the opener unit.
Procedures for aligning sensors and diagnosing issues with sensor indicator lights.
Steps to set the open (UP) and close (DOWN) travel limits for the garage door.
Verifies the door reverses correctly upon encountering an obstruction.
Ensures the safety reversing sensors are functioning properly.
Critical safety rules for operating the opener, including child safety and door path awareness.
Explains features like Timer-to-Close, AssureLink™, and remote/door control functions.
Details on operating the opener using the wall-mounted control panel, including lock feature.
Instructions for adding or reprogramming remote controls and keyless entry devices.
Procedure to manually disconnect the trolley and move the garage door.
Recommended monthly and yearly checks for opener lubrication and safety system tests.
Guides on how to replace the battery in the remote control transmitter.
Identifies common opener problems using flashing light codes and provides solutions.
Addresses issues like unresponsive remotes, lights not turning off, and neighbor's remote control interference.
Identifies components of the opener's rail assembly with part numbers.
Lists parts used specifically during the installation process with part numbers.
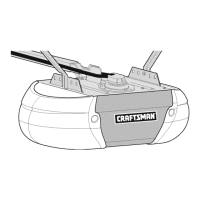
Details the components of the opener's motor unit with part numbers.
Lists optional accessories like rail extensions, keypads, and control panels.
Outlines the terms and conditions of the product's limited warranty, including coverage periods.
| Brand | Craftsman |
|---|---|
| Model | 139.54985 |
| Category | Garage Door Opener |
| Language | English |