Do you have a question about the Craftsman 315.218060 and is the answer not in the manual?
Details the terms and conditions of the manufacturer's warranty for the tool.
Guidelines for selecting and using appropriate extension cords for the tool.
Details power requirements and connection procedures for safe operation.
Information on the tool's operating speed and wiring considerations.
Explains the importance and method of grounding the tool for electrical safety.
Lists technical specifications such as blade size, power, and dimensions.
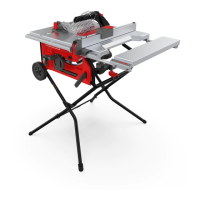
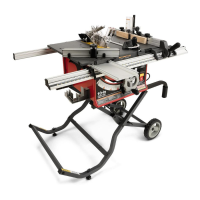
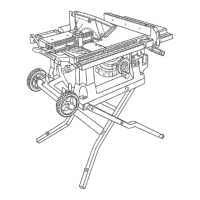
Familiarizes the user with the various operating features and components of the table saw.
Describes the functional parts of the table saw and their roles in operation.
Explains the operation and safety features of the power switch, including the key lock.
Provides recommendations and warnings regarding the use of saw blades.
Instructions for safely unpacking the table saw and checking for damage.
Details the process and requirements for securely mounting the table saw.
Step-by-step guide for attaching the bevel handle assembly.
Instructions for setting up and taking down the table saw's leg stand.
Guidance on leveling the saw for stability and safe operation.
Instructions on how to store the saw's accessories in designated areas.
Describes the procedure for moving the table saw using its leg stand and wheels.
Details the steps for removing and reinstalling the throat plate.
Steps to verify correct saw blade installation and orientation.
Instructions for attaching the miter fence to the sliding miter table.
Guide on installing the blade guard, ensuring proper alignment with the spreader.
Steps for connecting the dust bag to the saw's dust chute.
Lists the various cutting operations the table saw is designed for.
Explains fundamental setup and electrical connection for using the table saw.
Identifies common reasons why kickback occurs during operation.
Provides essential safety tips and practices to prevent kickback.
Describes the use and function of push sticks and push blocks.
Details the six basic types of cuts that can be performed with the table saw.
Offers advice and considerations for performing cuts, such as kerf allowance.
Explains what a featherboard is and its use in guiding workpieces.
Provides instructions and dimensions for creating a custom featherboard.
Details the steps for properly attaching and positioning a featherboard for safe use.
Instructions for setting the appropriate cutting depth of the saw blade.
Guidance on adjusting and locking the blade's bevel angle.
Covers checking and adjusting the sliding miter table for proper alignment and function.
Instructions for correctly positioning and locking the sliding miter table.
Steps to check if the miter base is parallel to the saw blade for accurate cuts.
Procedure for aligning the miter base to ensure square cuts.
Method to verify that the miter fence is perpendicular to the blade.
Instructions for adjusting the quick-stop mechanism for the miter fence.
Guidance on correctly installing and using the rip fence for lengthwise cuts.
Steps to calibrate the rip fence scale to the blade's position.
How to extend and use the outfeed support for long workpieces.
Instructions for extending and retracting the table extension for wider support.
Step-by-step instructions for performing a cross cut operation.
Step-by-step instructions for performing a rip cut operation.
Instructions for making angled cuts using the miter gauge.
Guide for performing a cross cut with the blade set at an angle.
Instructions for performing a rip cut with the blade set at an angle.
Guide for performing cuts with both an angled blade and an angled workpiece.
Procedures for cutting large panels safely, requiring proper support.
Instructions for making cuts that do not pass completely through the material.
Guide for making dado cuts using an optional dado throat plate and blade.
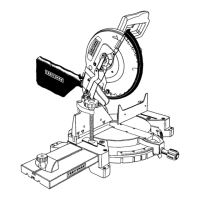
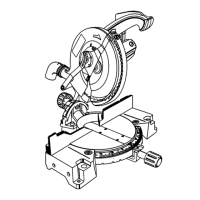
Step-by-step guide for safely removing and installing saw blades.
Procedure to ensure the spreader, blade, and guard are properly aligned.
Method to verify the rip fence is parallel to the saw blade.
Instructions for setting and verifying the 0° and 45° blade angles.
General care instructions, including cleaning and plastic part maintenance.
Information on lubricating moving parts for smooth operation.
| Model Number | 315.218060 |
|---|---|
| Type | Circular Saw |
| No Load Speed | 5000 RPM |
| Cord Length | 6 feet |
| Amperage | 15 Amps |
| Bevel Capacity | 0-45 degrees |
| Depth of Cut at 45 degrees | 1-3/4 inches |
| Blade Diameter | 7-1/4 inch |