Do you have a question about the Craftsman 315.214770 and is the answer not in the manual?
Guidelines for using extension cords safely and effectively with the tool.
Details on connecting the tool to a 120V, 60Hz AC power supply.
Information on the tool's speed and the importance of proper wiring.
Proper grounding procedures to reduce the risk of electric shock.
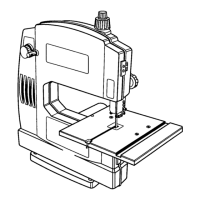
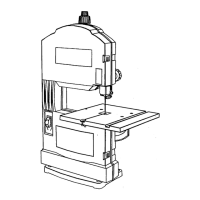
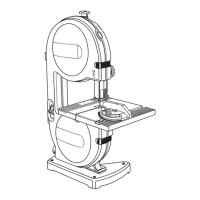
Technical specifications and dimensions of the Craftsman band saw.
Instructions for safely unpacking the band saw and checking for damage.
Steps to securely attach the band saw to a workbench for stable operation.
Method for temporarily securing the saw to a workbench for portability.
How to set the blade guides to prevent twisting or breaking during cuts.
Procedures for safely installing and adjusting the saw blade.
Methods for properly setting blade tension for optimal cutting performance.
How to align the blade on the wheels to ensure straight cuts.
Steps to align the saw table perpendicular to the blade for accurate cuts.
Fine-tuning blade guides and thrust bearings for support and preventing damage.
Designed uses for the band saw, including scroll and relief cutting.
General principles and initial checks for operating the band saw safely.
Guidelines for holding workpieces and feeding them into the blade for effective cutting.
Technique for making intricate curves by cutting relief slots.
How to perform general scroll cutting by pushing and turning the workpiece.
Safe procedure for clearing jammed cutoff pieces from the saw.
Safety precautions to prevent accidents and injuries during operation.
Steps to take before leaving the saw unattended or finishing operation.
How to secure the saw by removing the switch key to prevent unauthorized use.
Instructions for adjusting the saw table angle for bevel cuts.
How to use the miter gauge for angled cuts on the saw.
General care and cleaning advice, including avoiding solvents on plastic parts.
Procedures for cleaning and replacing the band saw tires.
How to check, clean, or replace worn blade guides.
Maintenance tips for the motor and electrical components, including cord safety.
How to check and replace worn motor brushes.
Steps for replacing the drive belt on the band saw.
| Model Number | 315.214770 |
|---|---|
| Type | Circular Saw |
| Blade Diameter | 7-1/4 inch |
| No Load Speed | 5000 RPM |
| Corded/Cordless | Corded |
| Voltage | 120V |
| Depth of Cut at 45 degrees | 1-3/4 inch |
| Blade Size | 7-1/4 inches |
| Depth of Cut at 90 degrees | 2-3/8 inch |
| Motor Amps | 13 amps |