Do you have a question about the Craftsman 315.228110 and is the answer not in the manual?
Overview of the table saw's design prioritizing safety, performance, and dependability for ease of operation and maintenance.
Emphasizes familiarizing oneself with the manual, applications, limitations, and potential hazards of the power tool.
Guidelines for selecting and using appropriate extension cords, including wire size and condition.
Explains the importance of grounding for reducing electric shock risk and proper connection procedures.
Details on connecting the saw to a 120V, 60Hz AC power supply and avoiding voltage drops.
Discusses the saw's no-load speed and the importance of adequate shop wiring for power tool motors.
Lists recommended accessories available for the table saw and provides safety warnings for their use.
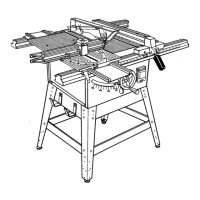
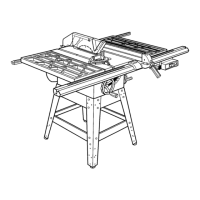
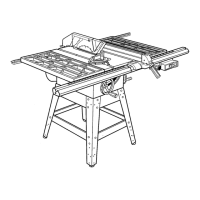
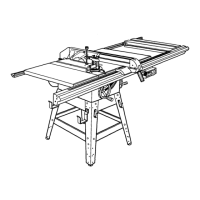
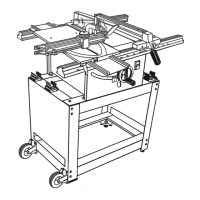
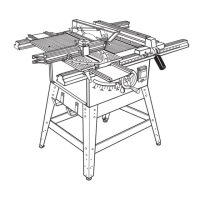
Describes key parts like the throat plate, blade adjustment handle, miter table, and rip fence.
Details the blade guard, anti-kickback pawls, and riving knife for user protection.
Explains the saw's no-load speed and the impact of shop wiring on performance.
Identifies all components of the table saw with a detailed diagram and labels.
Explains the operation of the switch with a lockable cover to prevent unauthorized use.
Recommends the use of the provided carbide tipped combination blade and lists specifications for other blades.
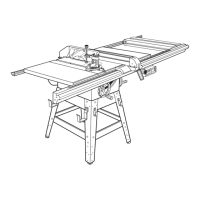
Steps to assemble the leg stand, attach storage brackets, and mount the table saw base onto the stand.
Instructions for installing the front and rear rails, sliding miter table, and miter fence.
Procedure for installing the accessory table and rip fence, including scale indicator setup.
Steps to check the saw blade installation and assemble the blade guard for safety.
Detailed instructions for installing the blade guard, ensuring proper alignment with the riving knife.
Covers essential operating principles like grounding, power connection, and types of cuts.
Defines and illustrates six basic cut types: cross, miter, rip, bevel cross, bevel rip, and compound miter cuts.
Step-by-step guide for safely removing the saw blade using the provided wrenches.
Procedure for checking, replacing, or adjusting the riving knife and blade guard for optimal safety.
Identifies kickback causes and provides critical precautions to prevent serious injury.
Offers guidelines for preventing kickback through proper blade depth, support, and safety accessory usage.
Instructions for creating and mounting a featherboard to guide workpieces securely against the table or fence.
Guide on making a push stick, a safety device for safely feeding workpieces through the blade.
Procedure for setting the blade depth correctly for various cutting operations.
Instructions for adjusting the blade angle for bevel cuts using the bevel indicator and locking lever.
Steps to align the rip fence and rails with the blade and set the scale indicator for accurate measurements.
Instructions on how to lock the miter table for stable cutting and precise positioning.
Detailed steps for performing a straight cross cut, including safety checks and workpiece handling.
Procedure for executing a miter cut, covering miter fence angle setting and workpiece support.
Steps for performing a straight rip cut, emphasizing rip fence usage and safe workpiece feeding.
Guide for performing a bevel cross cut, including blade angle adjustment and miter fence setup.
Instructions for executing a bevel rip cut, requiring blade angle adjustment and proper rip fence positioning.
Procedure for performing a compound miter cut, combining miter fence and blade angle adjustments.
Steps for cutting large panels, focusing on saw stability and support systems.
Instructions for non-through cuts like grooves, rabbets, and dadoes, with mandatory safety precautions.
Detailed guide for making dado cuts, including specific blade and throat plate requirements.
Routine checks for clamps, nuts, bolts, screws, and belts, plus cleaning of plastic parts and blade.
Maintenance procedures for specific table saw components, focusing on alignment and adjustments.
Procedure for setting the blade angle to 0 or 45 degrees using a combination square and adjustment bolts.
Steps to check and ensure the rip fence is parallel to the saw blade for accurate ripping.
Instructions for adjusting the bevel locking lever mechanism to ensure secure blade angle positioning.
Procedure for aligning miter locking clamps to properly secure the sliding miter table.
Steps to adjust front and rear rail clamps to ensure secure attachment of the rails.
Instructions for tightening the accessory table if it becomes loose on the rails.
Overview of checks and adjustments for the sliding miter table assembly to ensure precise and accurate cuts.
Procedure to check if the miter base is parallel to the saw blade using a framing square for accuracy.
Steps to verify the miter fence is perpendicular to the blade using a framing square for precise cuts.
Procedure for adjusting the miter base to ensure it remains parallel to the saw blade after use.
Instructions for adjusting the miter fence for squareness to the blade and maintaining scale accuracy.
Procedure to adjust the quick-stop so the miter fence accurately stops at zero degrees.
Lubrication points for the locker bracket assembly, including bevel gears and the threaded elevating shaft.
Lubrication points for the tilt/elevating mechanism, focusing on the handle shaft and bevel locking lever.
Troubleshoots excess vibration by checking blade balance, mounting security, and work surface evenness.
Addresses issues with rip fence smoothness and locking, suggesting remounting or adjusting clamp screws.
Solves cutting issues like binding or burning by checking blade condition, alignment, and feed rate.
Troubleshoots wood drifting away from the rip fence during ripping operations, often due to misalignment.
Addresses smooth movement problems for the sliding miter table, suggesting base or slide adjustments.
Resolves inaccuracies in 90 or 45 degree cuts by adjusting positive stops or the miter gauge.
Troubleshoots a stiff blade adjusting handle, often caused by sawdust clogging internal components.
Guides troubleshooting for a saw that won't start, checking power, fuses, and switches.
Addresses poor cut quality by checking blade condition, type, and mounting orientation.
Troubleshoots the blade not lowering by checking the riving knife and locking lever position.
Solutions for motor laboring during rip cuts, often involving selecting the correct blade type.
| Type | Circular Saw |
|---|---|
| Power Source | Corded Electric |
| Arbor Size | 5/8 inches |
| Motor Power | 15 Amp |
| Blade Diameter | 7-1/4 inches |
| Max Cutting Depth at 45 degrees | 1-3/4 inches |
| Amperage | 15 Amp |