5
TOOLS REqUIRED FOR ASSEMBLY
(1)Hammer
(2)1/2"Wrenches
(2)7/16"Wrenches
ASSEMBLY
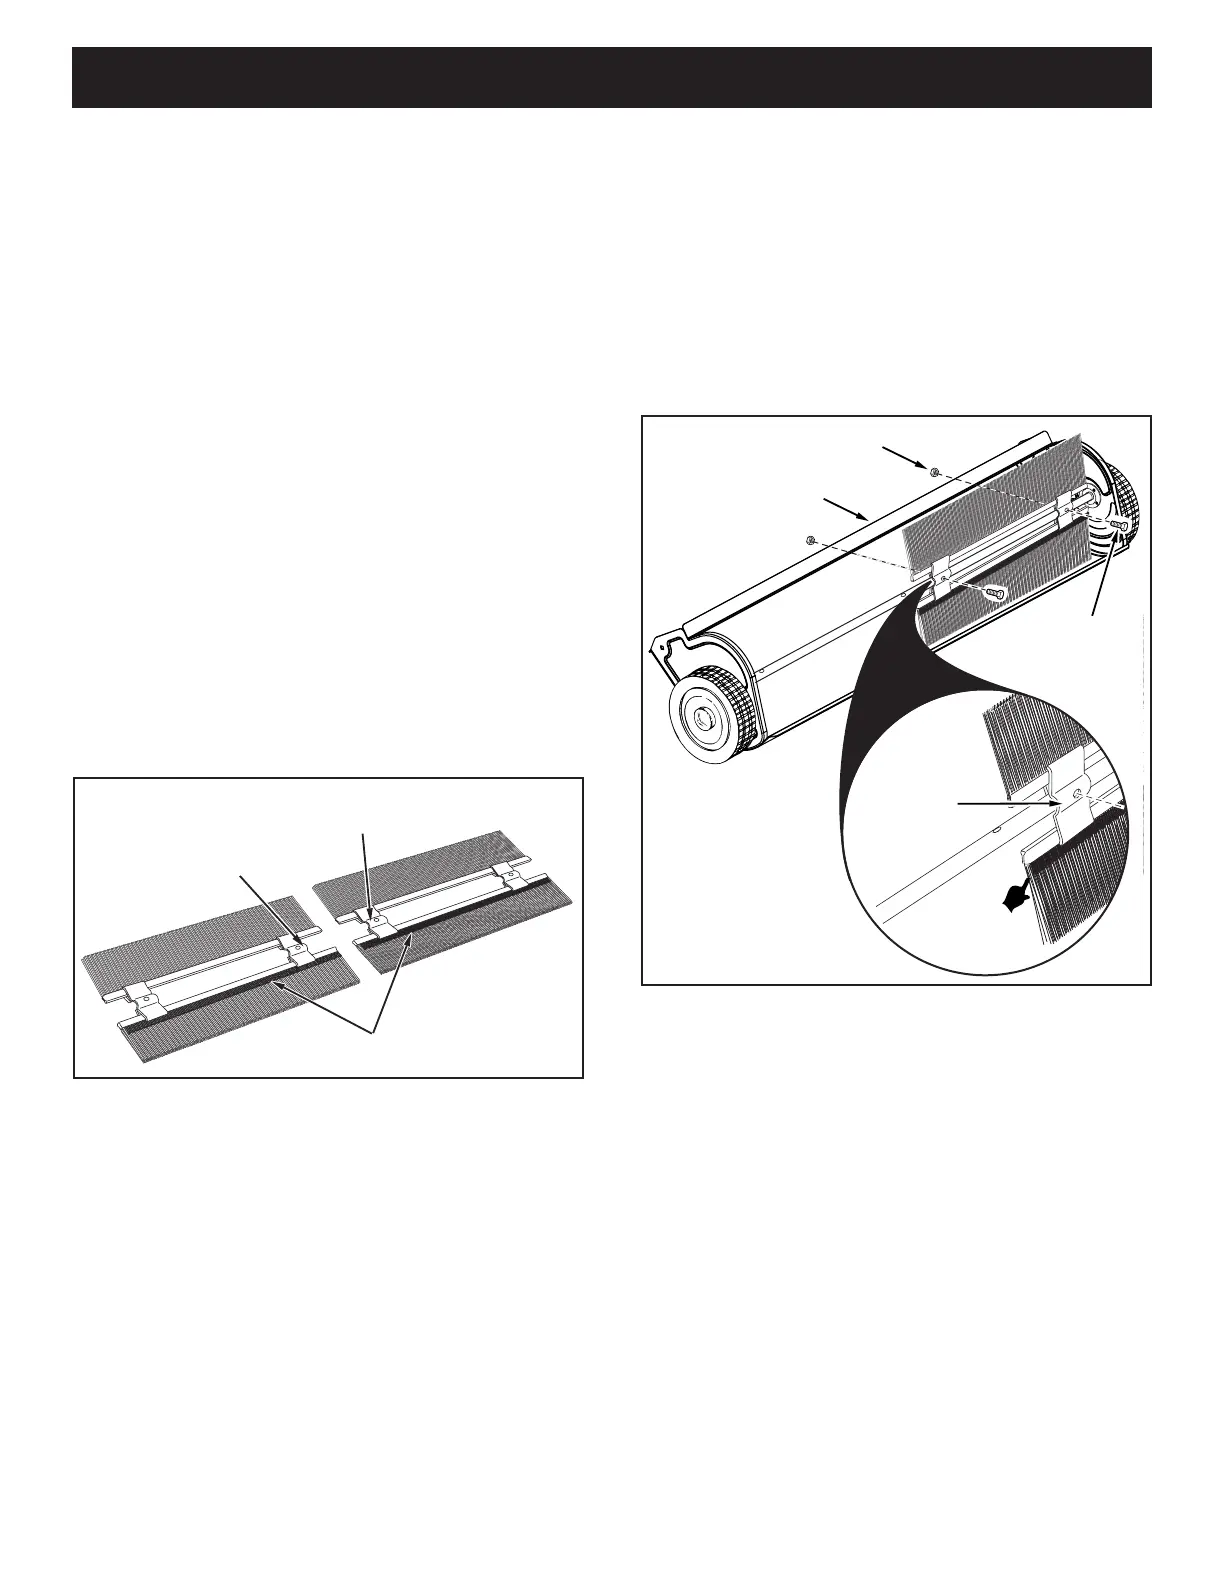
STEP 2 - IDENTIFY BRUSH ASSEMBLIES
• Eachbrushassemblyhasonebrushretainermarked
witheitherredorblackink.Layoutthebrushassemblies
asshownsothatthebrushretainersmarkedwithink
areinthemiddlewiththeblackoneonyourrightand
theredoneonyourleft.Seegure1.
OVERLAP BRISTLES
BRUSH RETAINER
MARKED RED
BRUSH RETAINER
MARKED BLACK
STEP 3 - ATTACH R.H. BRUSH ASSEMBLY
IMPORTANT:Theoverlapbristlesatthebottomofeach
brush help support the back sideof the brush forbetter
sweeper performance. Be sure the sweeper is turned as
showningure2tocorrectlyassemblethebrushes.
• Attachthebrushassemblywiththeblackbrushretainer
totherightendofthebrushshaftusingtwohexbolts
(D)andnylocknuts(H).Thebrushretainermarkedwith
blackinkmustbeplacedtothemiddle of the sweeper.
Seegure2.
STEP 1 - REMOVE PARTS FROM CARTON
• Toprotectpaintedparts,laythemoncardboardora
mat.
• Removethesweeperhousing,theloosepartsandthe
hardwarepackagefromthecarton.Layouttheparts
andhardwareasshownonpages3and4.
• Placethesheetofcardboardfrominsidethecartononto
yourworksurfacetopreventscratchingthesweeper.
FIGURE 1
FIGURE 2
NYLOCK NUT (H)
BRUSH
RETAINER
MARKED
BLACK
OVERLAP
BRISTLES
HEX BOLT (D)
WELDED BRACE