ENGLISH
6
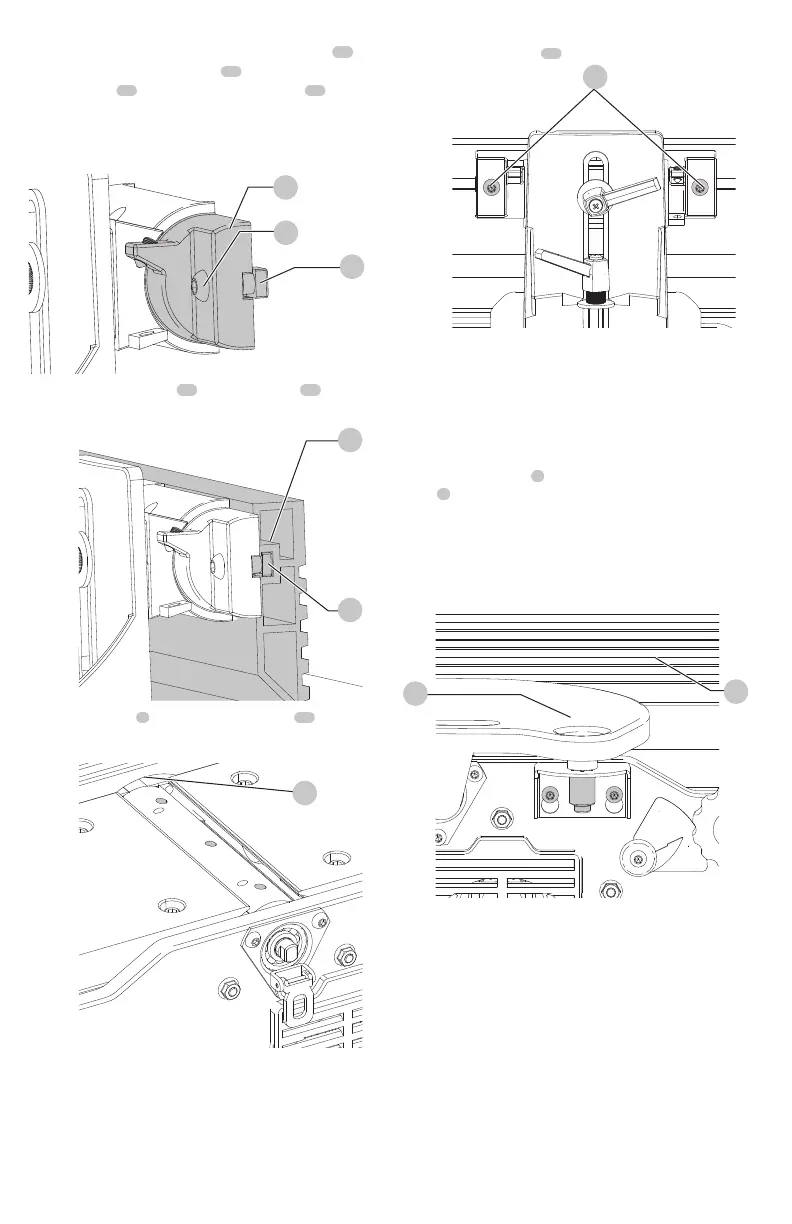
3. Insert a M6 x 1 mm x 16 mm button head screw
16
through fence tilting bracket
15
and thread a M6 x 1
square nut
17
onto threaded end of screw
16
. DO NOT
COM PLETE LY TIGHTEN SCREW AT THIS TIME. Assemble
screw and square nut to opposite end of tilting bracket
in the samemanner.
15
Fig. G
16
17
4. Slide groove of fence
18
over square nuts
17
.
Fig.H
18
17
5. Position fence
1
so that rounded section
45
on
bottom of fence is over cutterheadopening.
Fig.I
45
6. Tighten two screws
16
using included hexwrench.
Fig.J
16
Cutterhead Guard (Fig. K1)
WARNING: Keep hands away from the
cutterhead during use.
WARNING: Do not remove the cutterhead guard, do
not block the cutterhead guard, make sure cutterhead
guard spring back freely and touch the fence.
The cutterhead guard
2
is designed to rest against the
fence
1
. It will automatically move as the workpiece is
advanced toward the cutterhead and spring back against
the fence after the workpiece passes the cutterhead. With
the jointer off check for proper position and motion prior to
each operation. Always use the cutterhead guard.
2
1
Fig.K1

 Loading...