ENGLISH
10
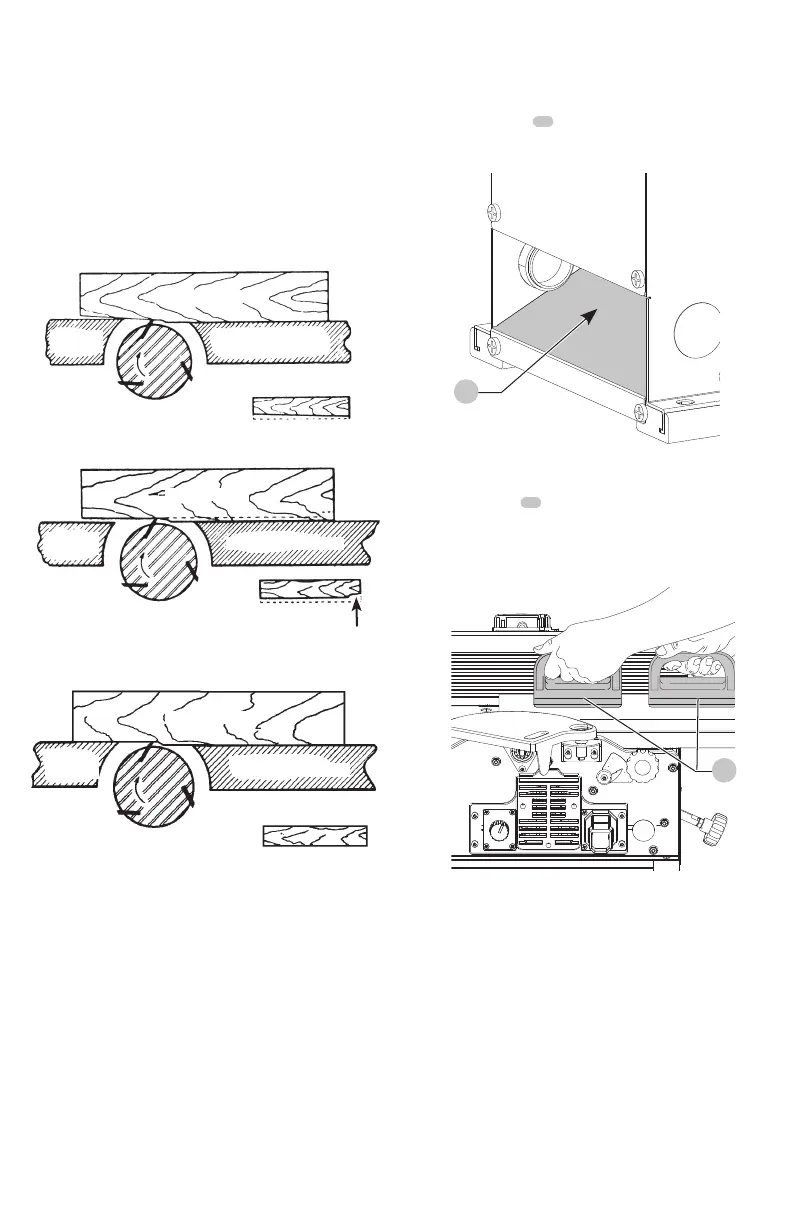
6. If the knives are set too low, the result will be as shown
in Fig. W, and the finished surface will becurved.
7. If the knives are set too high, the work will be gouged at
the end of the cut, as shown in Fig.X.
8. As a final check, run a piece of work slowly over the
knives for 6" to 8" (152 mm to 203 mm). The wood
should rest firmly on both tables as shown in Fig. Y, with
no open spaces under the finishedcut.
KNIVES SET TOO LOW
OUT-FEED
TABLE
IN-FEED TABLE
CUTTER
MATERIAL
Fig. W
KNIVES SET TOO HIGH
GOUGE
MATERIAL
IN-FEED TABLE
OUT-FEED
TABLE
CUTTER
Fig. X
KNIVES AT CORRECT HEIGHT
CUTTER
IN-FEED TABLE
OUT-FEED
TABLE
MATERIAL
Fig. Y
Chip and Dust Chute (Fig. AA)
WARNING: Keep hands out of chip and dust chute
at alltimes.
A chip and dust chute
10
is provided on the outfeed end of
the jointer base for efficient chip removal.
Fig.AA
10
Push Blocks (Fig. BB)
A set of push blocks
39
is supplied with your jointer
and should be used whenever possible to minimize all
danger to your hands. Fig. BB illustrates using the push
blocksproperly.
Fig.BB
39
MACHINE USE
WARNING: To reduce the risk of serious personal
injury, turn unit off and disconnect it from
power source before making any adjustments or
removing/installing attachments or accessories.
An accidental start-up can causeinjury.
WARNING: Always use cutterhead guard and
keep hands away from cutterhead. Use push blocks
wheneverpossible.
The following directions will give the beginner a start on
jointer operations. Use scrap pieces of lumber to check
the settings and to get the feel of the operations before
attempting regular work.
 Loading...