Do you have a question about the Crane Merchant Six 180 and is the answer not in the manual?
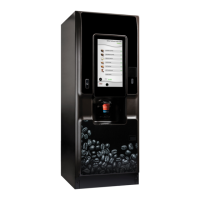
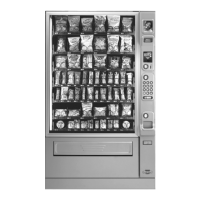
Displays the external views of the merchandiser's front panels.
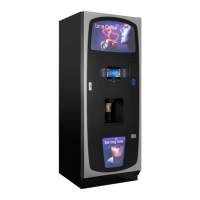
Shows the exterior view of Model 181, with notes for similar models.
Illustrates the monetary components for all merchandiser models.
Provides a view of the merchandiser's interior components and layout.
Details the electrical power requirements and checks for the merchandiser.
Instructions for removing packing materials and documents from the merchandiser.
Identifies and explains the various controls and indicators on the merchandiser.
Continues the explanation of controls and indicators, focusing on PCB display.
Provides instructions on how to power the merchandiser on and off using the main power switch.
Step-by-step guide for safely moving the merchandiser through narrow openings.
Continues the procedure for moving the merchandiser through narrow openings, including tray removal.
Guidelines for placing the merchandiser in its final location, considering clearance and surroundings.
Instructions for setting up the snack section of the merchandiser.
Details on how to place trays into the loading position within the merchandiser.
Guide on configuring trays to properly vend different types of products.
Specific instructions for setting up trays to accommodate wider products.
Procedure for safely removing standard trays from the merchandiser.
Procedure for correctly installing standard trays back into the merchandiser.
Instructions for removing a bottle tray from the merchandiser.
Instructions for installing a bottle tray into the merchandiser.
Steps for removing and installing column dividers within the trays.
Guidance on how to handle and operate trays when they are removed from the merchandiser.
Procedure for replacing a motor with a spiral bearing assembly.
Detailed steps for connecting and disconnecting motor harnesses safely.
Instructions on how to remove and install spiral mechanisms for product vending.
Continues the procedure for removing and installing spirals, including coupler interaction.
Steps for removing the spiral coupler from the spiral motor assembly.
Procedure for removing and installing the spiral motor.
Instructions on how to install gears for mechanically coupling spirals.
Steps for installing the spiral coupler onto the motor or bearing.
Continues the procedure for installing spiral couplers.
Guide on adjusting the vertical position of trays for product vending.
Continues the procedure for adjusting tray positions and performing test vends.
Instructions for installing and removing product spacers to support tall items.
Comprehensive guide on loading products into the merchandiser trays correctly.
Continues guidance on loading products, detailing spiral wall retainer usage.
Further instructions on product loading, including special considerations like "Lunch Bucket".
Steps for installing selection ID labels onto the product trays.
Instructions for leveling the merchandiser using a spirit level for stability and proper operation.
Steps for installing the base plate, with a crucial warning for specific models.
Guide for setting up and loading the coin mechanism for payment processing.
Contact information for service issues related to TriTeq locks.
Procedures to ensure the merchandiser is ready for operation after setup.
Steps for indexing spirals with one motor to ensure proper product dispensing.
Steps for indexing spirals with two motors for correct product dispensing.
Instructions for testing the functionality of the bill validator.
Description of the merchandiser's interactive menu display and its navigation.
Explanation of the service and customer keypads and their functions.
Lists shortcut keys on the service keypad for direct access to programs.
Describes the function of other keys used for menu navigation and selection.
How to view sales and vend data that cannot be reset.
Continues the procedure for viewing non-resettable sales and vend data.
Method to view non-resettable sales data broken down by individual product.
Continues the procedure for viewing product-specific non-resettable sales data.
How to view non-resettable sales and vend data specifically for cash transactions.
Continues the procedure for viewing cash-related non-resettable sales data.
How to view non-resettable sales and vend data for cashless transactions.
Continues the procedure for viewing cashless non-resettable sales data.
How to view non-resettable sales and vend data for token transactions.
Continues the procedure for viewing token non-resettable sales data.
How to view sales and vend data that can be reset.
Continues the procedure for viewing resettable sales and vend data.
Method to view resettable sales data broken down by individual product.
Continues the procedure for viewing product-specific resettable sales data.
How to view resettable sales and vend data specifically for cash transactions.
Continues the procedure for viewing cash-related resettable sales data.
How to view resettable sales and vend data for cashless transactions.
Continues the procedure for viewing cashless resettable sales data.
How to view resettable sales and vend data for token transactions.
Continues the procedure for viewing token resettable sales data.
Procedure to erase all resettable sales and vend data from the merchandiser.
How to view a log of main door opening events, including dates and durations.
How to view a log of power loss events, including dates and durations.
How to view the date and time of the last data clearing event.
How to view the date and time when the last price setting was performed.
How to view the date and time of the last product vend.
How to view the date and time when the merchandiser's clock was last set.
How to view the date and time of the last timed backup operation.
How to view identification numbers for the main PCB, including serial, model, and version.
How to view identification numbers for the coin mechanism, including S/N, manufacturer, model, and version.
How to view identification numbers for the bill validator, including S/N, manufacturer, model, and version.
How to view identification numbers for the card reader, including S/N, manufacturer, model, and version.
Instructions on how to print data from the merchandiser using an external printer.
Procedure to check the merchandiser for any diagnostic errors.
How to perform a test vend for a specific product selection.
Procedure to test vending without the SureVend system engaged.
Steps to calibrate the SureVend system to ensure proper operation.
How to run a motor test summary to check the status of all motors.
Procedure to home motors and view their detailed status.
Continues the procedure for viewing motor status details.
Continues the procedure for viewing motor status details, including table references.
How to test the functionality of the coin return motor.
Procedure to test the operation of the light relay.
How to view and test the cabinet and component temperatures.
Procedure to test the merchandiser's display for any flaws or issues.
How to test the functionality of the main and service keypads.
Guide on how to set prices for each individual product selection.
Method to set a single price for all selections on the entire machine.
Instructions for setting prices for all selections within a specific tray.
Overview of product configuration settings for the merchandiser.
How to view the current configuration version of the merchandiser's software.
Instructions for enabling or disabling the SureVend system on the merchandiser.
How to configure options for the SureVend system, such as Option or Must SureVend.
Continues the procedure for setting SureVend options.
How to set the timer for the SureVend anti-jackpot feature.
How to configure the trigger settings for the SureVend anti-jackpot feature.
Guide on configuring individual product selections, including enabling/disabling.
Explanation of the FIFO feature for managing product inventory and sales.
Steps for adding product groups to the FIFO system for sequential vending.
Continues the procedure for adding FIFO groups.
Steps for removing product groups from the FIFO system.
Instructions for editing existing product groups within the FIFO system.
How to view the current FIFO mappings for product selections.
Procedure for electronically coupling adjacent tray motors for synchronized vending.
How to program time-based events like Inhibit, Free Vend, Discount, and Combo Vend.
Continues the procedure for programming time-of-day events.
Continues the procedure for programming time-of-day events, focusing on start/stop times.
Continues the procedure for programming time-of-day events, covering days of week and selections.
Continues the procedure for programming time-of-day events, including messages.
How to set time intervals for the merchandiser to enter a low power mode.
Continues the procedure for setting Powersave mode intervals.
Continues the procedure for setting Powersave mode, focusing on start/stop times.
Continues the procedure for Powersave mode, covering days of week and lighting timeout.
Continues the procedure for Powersave mode, detailing lighting timeout settings.
How to configure timed backup events for data saving.
Continues the procedure for configuring timed backup events.
Continues the procedure for timed backup events, covering days of week.
How to set up the Winner Mode to occasionally award free products or prizes.
Continues the procedure for Winner Mode, covering frequency and prize spiral selection.
Continues the procedure for Winner Mode, focusing on selecting winning products.
How to program Combo Vends for selling product combinations at a discounted price.
Continues the procedure for Combo Vends, covering product selection and discount.
Continues the procedure for Combo Vends, focusing on message display.
How to program token vending for specific products.
How to configure whether the OK button requires a press to vend or not.
Instructions for enabling or disabling the Free Vend mode.
Overview of system settings configurations available for the merchandiser.
How to set or change the merchandiser's identification number or asset number.
Continues the procedure for setting the merchandiser's ID number.
How to set or change the merchandiser's location information.
Continues the procedure for setting the merchandiser's location.
Instructions for setting the current date on the merchandiser.
Instructions for setting the current time on the merchandiser.
How to configure daylight saving time settings for the merchandiser.
How to select the display language for the merchandiser's interface.
Guide on selecting the type of coin mechanism installed in the merchandiser.
How to view the count and value of coins currently in the merchandiser.
How to set the maximum amount of change to be dispensed without a purchase.
How to configure the threshold for displaying a "Low Change" message.
Guide on selecting the type of bill validator installed in the merchandiser.
How to set the value for accepting bills/coins when low on change.
Continues the procedure for setting the accept on low change value.
How to enable or disable bill acceptance for specific denominations.
How to configure acceptance of tokens and coupons for vending.
Guide on selecting the type of card reader installed in the merchandiser.
How to enable or disable the card revalue feature for customer credit.
Continues the procedure for setting the card revalue feature.
How to configure the merchandiser for single or multi-vend purchase modes.
Continues the procedure for setting the multiple vend mode.
How to configure whether credit is held or returned for failed vends.
Continues the procedure for setting credit for failed vends.
How to configure data transfer settings for the merchandiser.
How to set the communication mode for data transfer (e.g., DEX, DDCMP).
How to configure which data items are included in data transfers.
How to set the data type format for CA304 transfers (Currency or Numeric).
How to set whether data is reset on transfer or not.
How to set whether events are reset on transfer or not.
How to set the baud rate for the printer to ensure legible data output.
Instructions for connecting and disconnecting the Data Key for firmware and data management.
Information regarding firmware selection via the Serial Flash menu.
How to copy configuration data to the Data Key for backup or transfer.
Continues the procedure for saving configuration data to the Data Key.
How to copy configuration and sales data to the Data Key for backup.
Continues the procedure for saving configuration and sales data to the Data Key.
How to view image information or data descriptions saved on the Data Key.
Continues the procedure for viewing image info on the Data Key.
How to load configuration data from the Data Key back into the merchandiser.
Continues the procedure for loading configuration data from the Data Key.
How to delete configuration or sales data from the Data Key.
Continues the procedure for deleting data from the Data Key.
How to view information about the last backup of the merchandiser's settings and data.
Procedure for backing up all settings and data from the merchandiser.
Procedure for restoring saved data from a backup to the merchandiser.
How to adjust the screen contrast for improved menu readability.
How to view the software version, date, time, and checksum of the merchandiser.
How to view the software version number of the SureVend system.
How to view the software version of the IO Board.
How to set the temperature for the merchandiser, applicable to Chilled Snack models.
How to select trays and product selections for health control monitoring.
Continues the procedure for setting health controls for trays and selections.
How to set the temperature units to Celsius or Fahrenheit.
How to configure what information (time, temp) appears on the idle display.
Continues the procedure for setting idle screen options.
How to set the message displayed on the merchandiser's idle screen.
Continues the procedure for setting idle screen messages, including custom messages.
How to program custom messages to be displayed on the merchandiser screen.
Continues the procedure for setting custom messages using the keypad.
Procedure to erase all custom messages and restore factory defaults.
How to turn the merchandiser's speaker on or off.
How to enter the security code (Supervisor PIN) to access protected menus.
Procedure to change the Supervisor PIN code for security access.
How to lock or unlock various menu selections for security purposes.
Continues the procedure for locking and unlocking menu items.
Step-by-step guide for removing the refrigeration unit from models 448/449.
Step-by-step guide for installing the refrigeration unit in models 448/449.
| Model | Merchant Six 180 |
|---|---|
| Manufacturer | Crane |
| Dimensions | 72" H x 39" W x 35" D |
| Power Supply | 115 VAC, 60 Hz |
| Dispenser Type | Spiral |
| Type | Snack and Drink Vending Machine |
| Selections | 6 |
| Cooling System | Refrigeration |
| Payment Options | Coin, Bill, Credit/Debit Card |