10
ENGLISH
Before installing the mounting bracket you should check the ceiling where the fan is to be
installed and check if it is suitable for it.
INSTALLING THE MOUNTING BRACKET
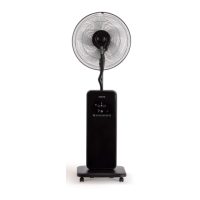
Concrete ceiling
Drill 2 holes with an 8mm drill bit, accord-
ing to the length of the expansion bolts.
Next, x the mounting bracket to the ceil-
ing with the screws.
Wood roof
Attach the mounting bracket to the wood
ceiling with 4 minimum 7mm thick screws.
Do not x the mounting bracket directly on ceilings less than 10mm to avoid the risk of the
screw loosening and coming out.
• Choose the suspension bar that best suits your situation.
• Remove the bar bolt, removing the pin, and pass the canopy (roof trim) and the engine
canopy through the suspension bar. Next, route the fan motor cables through the in-
side of the suspension bar. Tighten the suspension bar to the engine and insert the
bolt and pin.
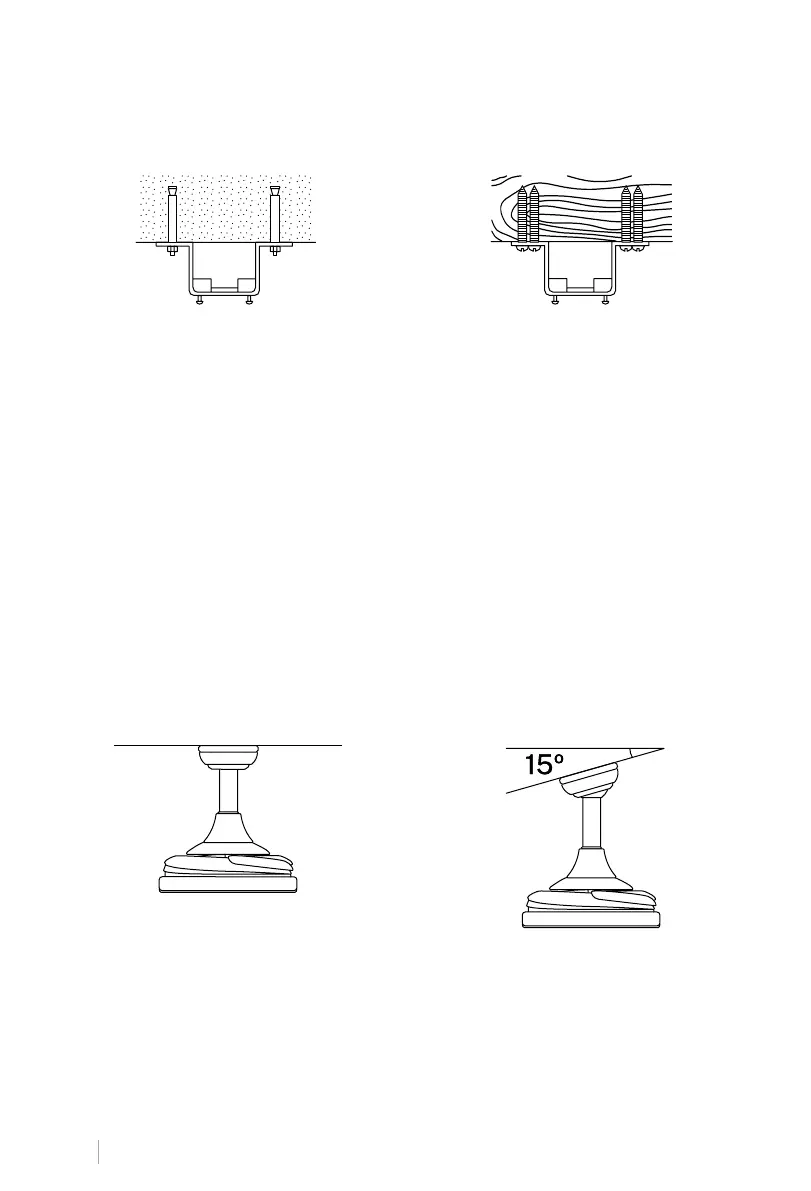
DOWNROD INSTALLATION
Standard mounting Angle mounting
Standard mounting hangs from the ceiling
by a downrod.
Angled mounting recommended for a vault-
ed or angled ceiling.
This fan can be installed on both a regular and vaulted ceiling, and can extend the hanging
length with the longer hanging rod (supplied). To install the hanger bar you will need the
following tools: a screwdriver, at head screwdriver, adjustable pliers or wrench, step ladder,
wire cutters, and electrical tape.
NOTE: This fan can also be installed in a false ceiling, for this you must use xing screws
with a spring lever (not included).