Crestron C2N-RTHS Remote Temperature/Humidity Sensor
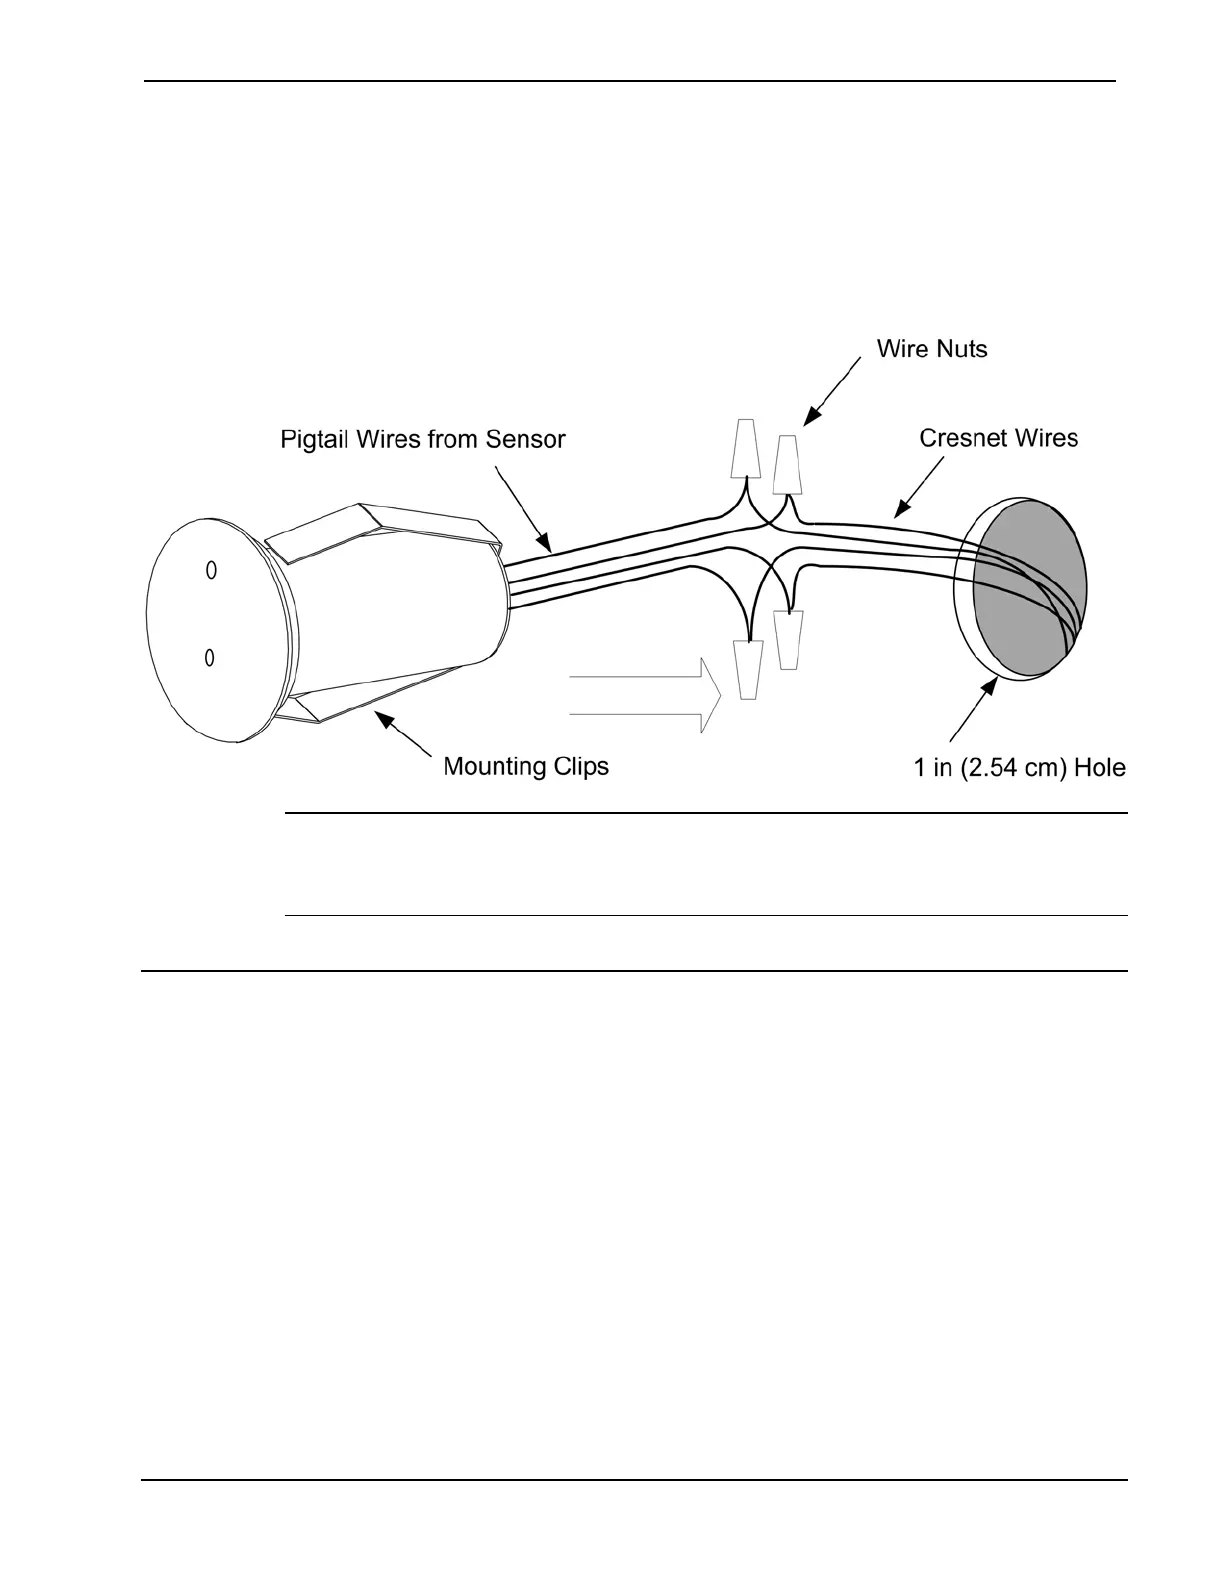
5. Route the Cresnet wires to the sensor. Use the four wire nuts
included to connect the wires (red to red, white to white, blue
to blue, and black to black).
6. Press fit the sensor into the hole; the clips on either side of the
sensor hold it in place.
NOTE: The face of the sensor may be painted or wallpapered to match
the wall. However, keep the small gap around the outer edge clear of any
obstructions.
Identity Code
Refer to
the note
on page
16 for a
definition
of
Viewport.
Every equipment and user interface within the network requires a unique
identity code (Net ID). These codes are two-digit hexadecimal numbers
from 03 to FE. The Net ID of each unit must match an ID code specified
in the SIMPL Windows program. The Net ID of the C2N-RTHS has
been factory set to 2B. The Net IDs of multiple C2N-RTHSs in the same
system must be unique. Net IDs are changed from a personal computer
(PC) via the Crestron Viewport.
There are two different methods—Method A or Method B—for setting the
C2N-RTHS Net IDs:
Method A (Cresnet address-settable ID), described on the next page,
applies to C2N-RTHSs in a Cresnet system with a CNX control system or
Operations & Installation Guide - DOC. 6232A Remote Temperature/Humidity Sensor • 7
 Loading...