DIN Rail 2 Channel DALI Interface Crestron DIN-DALI-2
6
DIN Rail 2 Channel DALI Interface: DIN-DALI-2 Programming Guide – DOC. 7365A
g. Press and hold the TEST 1 button (for loop 1) or TEST 2 button (for
loop 2) button for 3 seconds to initiate reprogramming of the selected
ballast.
h. Repeat this process for each new ballast on the loop. After the final
new ballast has been reprogrammed, the DIN-DALI-2 returns to
normal operation and displays the Cresnet ID.
DIN-DALI-2 Replacement
The following process allows a failed DIN-DALI-2 controller to be replaced with a
new unit. The ballast addresses and settings are extracted from the network and
stored in the new DIN-DALI-2 controller.
The DIN-DALI-2 controls two independent loops of DALI ballasts. Up to 64 ballasts
can be connected to each loop. Each ballast must be assigned a unique address
(0 – 63). Ballasts typically leave the factory with an “unassigned address” of 255.
The ballasts also store information related to group assignments, presets and fade
times programmed during commissioning.
The DIN-DALI-2 requires a copy of all information within its own internal memory.
The following procedure causes the DIN-DALI-2 to query the network and extract
all information from the existing ballasts. Information is stored within the
DIN-DALI-2 permanent memory for future use.
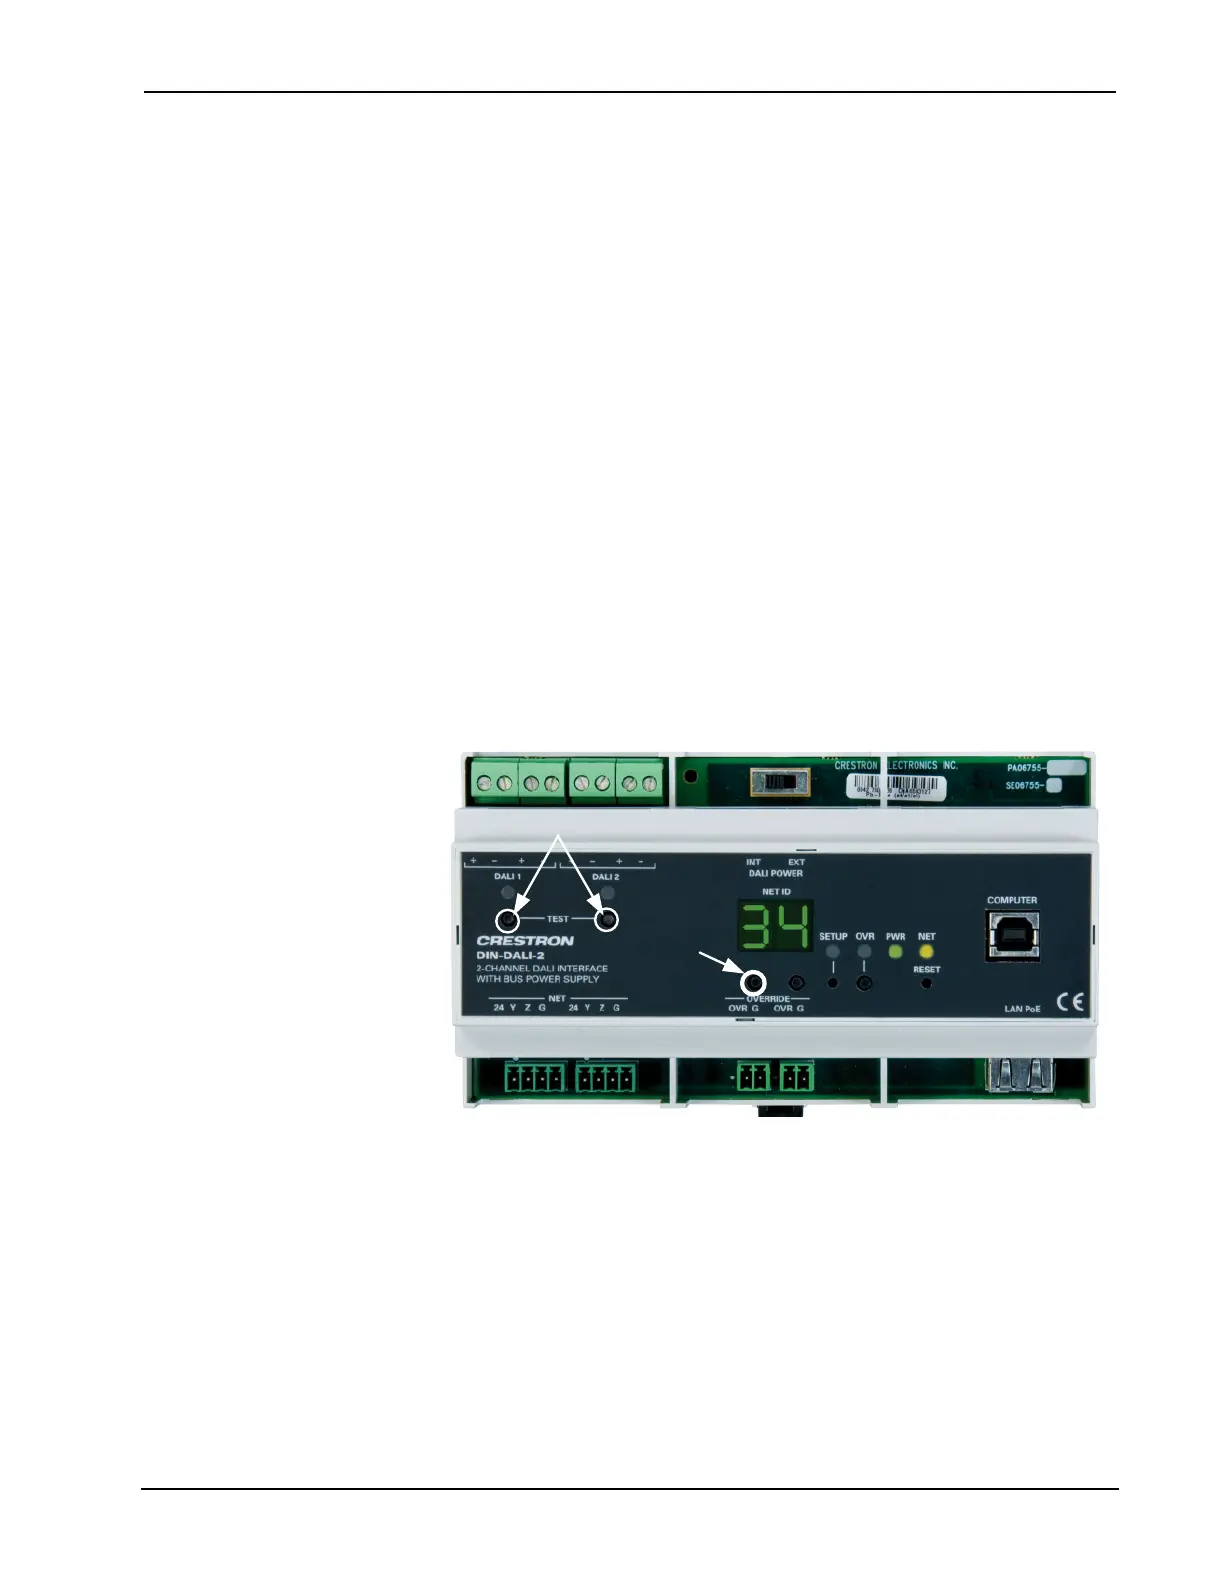
DIN-DALI-2 TEST and ID Up Buttons
Test Buttons
ID Up
Loop 1
Loop 2
1
2
To initiate read back on each loop:
1. Press and hold the ID Up button until the display reads rc, which takes
approximately 5 seconds.
2. Within 10 seconds of entering this mode, tap the TEST 1 button (for
loop 1) or the TEST 2 button (for loop 2). The display blinks rc while the
device discovery process is running. This may take a few minutes to
complete.
Once the data extraction has completed, the DIN-DALI-2 returns to normal
operation and displays its Cresnet ID.