EasyManua.ls Logo

Crestron HD-PS401 User Manual

Crestron HD-PS401
8 pages
To Next Page IconTo Next Page
Page #1 background imageLoading...
Page #1 background image
The HD-PS401 provides a 4K60 4:4:4 AV presentation system with
enhanced HDMI® video switching and audio presentation capabilities for
areas such as conference rooms and classrooms. The HD-PS401 includes
four HDMI inputs and one mirrored HDMI and DM Lite® output.
In the Box
1 HD-PS401 AV Presentation System
Additional Items
1 Power Cord, 6 ft 7 in. (2 m) (2001134)
4 Joining Plate (2056313)
4 Connector, 3-Pin (2003575)
2 Connector, 5-Pin (2003577)
8 Joining Plate Screw, 8-32 x 5/16 in., Undercut Flat Head,
Phillips, Black (2056985)
4 Anchor, Wall, Plastic, Self Drill, 8 x 1-5/8 in., Off-White
(2057959)
4 Screw, 8-15 x 3/4 in., Type A, Flat Head, Phillips, Black
(2057958)
Install the Device
1. Place the device upside down on a flat surface.
2. Attach the four included joining plates to the device using the eight
included 8-32 x 5/16 in. Phillips undercut flat head screws (two screws
for each joining plate).
HD-PS401
QuickStart
4x1 4K60 4:4:4 HDR Presentation System
1

Other manuals for Crestron HD-PS401

Question and Answer IconNeed help?

Do you have a question about the Crestron HD-PS401 and is the answer not in the manual?

Crestron HD-PS401 Specifications

General IconGeneral
BrandCrestron
ModelHD-PS401
CategoryProjector Accessories
LanguageEnglish

Summary

Device Installation

Mounting the Device

Instructions for mounting the device onto a flat surface using anchors and screws.

Device Connectivity

Front Panel Connections

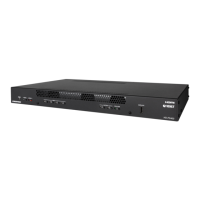
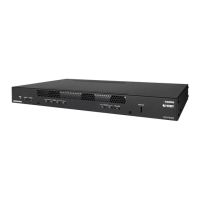
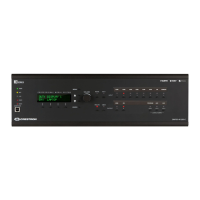
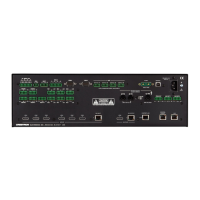
Details on front panel ports including PWR, SETUP, AUTO, INPUT 1-4, and SERVICE.

Rear Panel Connections

Details on rear panel ports including audio, HDMI, DM Lite, and LAN connections.

Audio Output Configuration

Balanced/Unbalanced Audio Output

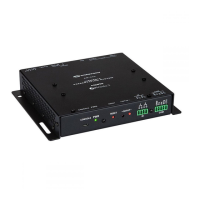
Pin assignments and connection information for analog audio AUX output.

Device Management

Firmware Upgrade

Guidance on upgrading device firmware via the Crestron website.

Device Configuration

Instructions for configuring the device using its web interface.

Cloud Service Integration

Steps to connect the device to the XiO Cloud service for management.

Operational Indicators

LED Indicators Overview

Explanation of LED indicators (PWR, AUTO, SETUP, INPUT, Ethernet, DM Lite) and their meanings.

Product Page Access

Information on how to visit the product page using a QR code.

Additional Information

Original Instructions

Statement regarding the U.S. English version as the original instructions.

Regulatory and Legal

Details on regulatory model, software licenses, warranty, patents, and open source.

Related product manuals