N
nsnowAug 14, 2025
Why is the bridge LED lit on my Crown Amplifier?
- EElizabeth CarrollAug 14, 2025
If the Bridge LED is lit, it indicates that the amplifier is in bridge-mono mode. Verify if the amplifier should be in bridge-mono mode.
Why is the bridge LED lit on my Crown Amplifier?
If the Bridge LED is lit, it indicates that the amplifier is in bridge-mono mode. Verify if the amplifier should be in bridge-mono mode.
Why is my Crown DCi 4|300 Amplifier sound distorted?
Distorted sound from your Crown Amplifier can occur if the load is wired incorrectly, the Stereo/Bridge mode switch is set incorrectly, or the input is overloaded by a signal level that is too high. Check the wiring and the Stereo/Bridge mode switch. If the input signal is too high, turn down your amplifier level controls, or turn down the input signal until the clip light goes out.
What to do if my Crown Amplifier has no sound but the power LED is on?
If your Crown Amplifier has power, the Power LED is on but there's no sound, and the signal indicator is flashing, it could be due to several reasons: the speakers are not connected, there is an open circuit due to speaker failure, or the channel has been set to Sleep mode via the Aux port or Power Save mode. Connect the speakers, check for speaker failure, and change the Aux port or Power Save mode settings.
How to fix a Crown Amplifier when both power and mains indicators are off?
If both the power and mains indicators are off on your Crown Amplifier, it could be due to a few reasons. The power supply fuse may have tripped, the amplifier may have lost AC power, or the amplifier might not be plugged into the power receptacle. Replace the power supply fuse, check the power source, and ensure the amplifier is plugged into the power receptacle.
What to do if the thermal indicator is on in my Crown DCi 4|300 Amplifier?
If the thermal indicator is on, the amplifier is becoming too hot for safe operation. Allow the amplifier to cool down. Check for loads less than 2 ohms and for excessive input levels. Also, check for proper ventilation and the proper mode-switch setting.
Why is the fault indicator flashing on my Crown Amplifier?
The Fault indicator flashes when the temperature is above 98C, DC/LF protection is engaged, HF detect, or an output short circuit is detected. Check all conditions that might cause the Fault indicator to flash and resolve them before sending the amp for service.
Why is the power indicator flashing on my Crown Amplifier?
A flashing power indicator on your Crown Amplifier can mean that the AC line voltage has dropped below or risen above 10% of the nominal line voltage of the power supply, or the amp is in sleep mode as set on the aux port. Check and stabilize the AC line voltage. You can also change the settings on the Aux port to wake up the amp.
How to turn on Crown DCi 4|300 if the power indicator is off but the mains indicator is on?
If the power indicator is off but the mains indicator is on, it means that the amplifier’s Power switch is off. Turn on the amplifier’s Power switch.
What to do if my Crown DCi 4|300 has no input signal?
If there is no input signal and the signal indicator is not flashing, even though audio is applied and the channel is ready, the input signal level may be very low. Increase the input signal level.
Highlights key safety symbols and warnings, including electric shock risks and magnetic field precautions.
Lists the European representative and relevant EMC/Safety standards, confirming product compliance.
Introduces the DCi Series amplifiers, detailing key features like DriveCore technology and power-saving modes.
Guides on unpacking, inspection, and lists necessary tools and materials for amplifier installation.
Provides essential guidelines for maintaining adequate airflow and preventing overheating in rack-mounted installations.
Explains balanced and unbalanced input connector wiring, including pin assignments and cable types.
Details how to connect output wiring, including recommendations for spade connectors and wire gauge.
Describes wiring and settings for dual-mode low-impedance (8, 4, 2 Ohm) operation.
Explains wiring and DIP switch settings for bridge-mono operation at 16, 8, or 4 Ohms.
Details wiring and DIP switch settings for dual-mode high-impedance (70V/100V) operation, including filter settings.
Explains wiring and DIP switch settings for bridged high-impedance (140V/200V) operation.
Covers connecting to AC power, emphasizing safety, and outlines the correct startup procedure for the amplifier.
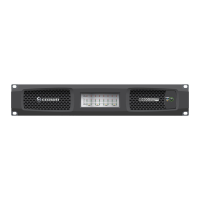
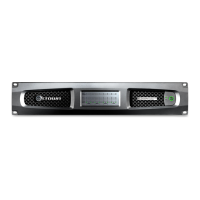
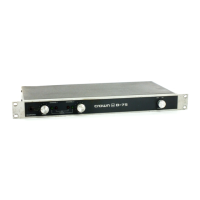
Describes all front panel indicators (Fault, Signal, etc.) and controls like the power button.
Identifies and explains the function of key back panel components such as DIP switches, attenuators, and connectors.
Explains global settings for Hi-Z voltage selection and amplifier status output configuration.
Details the power save switch function, enabling auto-standby mode for reduced power consumption.
Covers per-channel Hi-Z setup and the function of input attenuators for level adjustment.
Explains the amplifier's protection mechanisms against thermal issues, faults, and AC voltage fluctuations.
Provides solutions for issues related to power, thermal, and fault indicators being off, flashing, or on.
Guides on diagnosing and resolving distorted audio or complete loss of sound output from the amplifier.
Addresses troubleshooting for no input signal detection and explains the meaning of the bridge mode indicator.
Lists power output ratings for various loads and modes, along with voltage gain specifications.
Details input sensitivity requirements and permissible load impedances for different operation modes.
Provides physical dimensions for each model and key performance specifications like frequency response and THD.
Presents detailed power consumption and heat dissipation figures for the DCI 2300 in various operating conditions.
Presents detailed power consumption and heat dissipation figures for the DCI 2600 in various operating conditions.
Presents detailed power consumption and heat dissipation figures for the DCI 4300 in various operating conditions.
Presents detailed power consumption and heat dissipation figures for the DCI 4600 in various operating conditions.
Presents detailed power consumption and heat dissipation figures for the DCI 8300 in various operating conditions.
Presents detailed power consumption and heat dissipation figures for the DCI 8600 in various operating conditions.
Guides users on how to get service, contact technical support, and find authorized service centers.
Outlines the specific steps and options for obtaining service within the United States.
Provides detailed instructions for packing and shipping units for repair, ensuring adequate protection.
Explains the payment process and terms for repairs that fall outside the warranty period.
Summarizes the 3-year limited warranty, detailing coverage, exclusions, and disclaimers for damages.
Instructs users on filling out the product registration form with owner and product details for warranty purposes.
| Channels | 4 |
|---|---|
| Power Output (8 Ohms) | 300 W |
| 70V Power per channel | 300 W |
| 100V Power per channel | 300 W |
| Signal-to-Noise Ratio | > 100 dB |
| Input Sensitivity | 1.4 V |
| Damping Factor | > 500 |
| Frequency Response | 20 Hz - 20 kHz |
| Input Impedance | 20k Ohms |
| Power Requirements | 100V-240V~50/60Hz |