9
IMPORTANT NOTES PRIOR TO INSTALLATION
- This device is only suited for a 12 volt system with negative ground.
- Theradiatedheatwhileoperationrequiressufcientaircirculationattheplaceofinstallation.Itis
veryimportantthattheheatsinknsdonothavecontactwithanymetalpartsoranysurfaceswhich
couldimpairaircirculation.Theampliermaynotbeinstalledinsmallclosedlocationorspaces
without air circulation (e.g. spare wheel recess or below the vehicle carpeting). We recommend the
installationinthevehicle’strunk.Ensuresufcientprotectionagainstvibrations,dustanddirt.
- Ensurethattheinputandoutputcablesaresufcientlyseparatedfromthepowersupplycables.
Otherwise interferences may occur.
- Ensure the accessibility of the fuse and the operating elements after installation.
- Thereliabilityandperformanceoftheamplierdependsonthequalityofinstallation.Preferably
consult an expert to install the system, particularly if you want to install several loudspeakers.
POWER SUPPLY AND TURN-ON-CONNECTION
ATTENTION: Before you start with the installation, disconnect the ground connection from the ve-
hicle’s battery in order to prevent short circuits.
Thepowerwiringwhichisusuallyinstalledinon-boardcarnetworksisnotsufcientforapoweramplier‘sde-
mands.MakesurethatthepowerwirestoGNDandtothe+12Vterminalhasbeensufcientlyspecied.Asuf-
cientcablecrosssection(seepage31,g.6)mustbeusedtoconnectthebatterytotheamplier‘sterminals.
FirstconnecttheGNDterminaloftheampliertoanappropriategroundconnectionatthechassis.Toensurea
good connection, residue dirt and dust from the connection point. A loose connection may cause malfunctions
or interferences noise and distortion.
Thenconnectthe+12Vterminaloftheamplierwiththebatterybyusinganappropriatecable(seepage31,
g.6)includinganin-linefuse.Thisfuseshouldbelocatedveryclosetothebattery;forsafetyreasonsnot
more than 30 cm away.
Thenconnecttheremoteturn-on-wirefromtheheadunitwiththeamplier‘sREMterminal.Acablewitha
cross-section of 0.5 mm
2
is adequate.
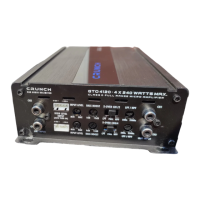
LOUDSPEAKER CONNECTION
- The total impedance must not be lower than 1 ohm.
- Never connect loudspeaker cables with the ground of the chassis or the +12 V supply voltage.
Iftheamplierisoperatedwithatoolowimpedanceorincorrectlyused,theentiresoundsystemmaybedam-
aged. This means a warranty void in such cases.
AUDIO SIGNAL CABLES
When installing the audio cables between the RCA outputs of the head unit and the RCA inputs of the ampli-
er(Fig.1,8),theaudioandpowersupplycablesshould,ifpossible,notberoutedalongthesamesideofthe
vehicle. We recommend a separated installation, e.g. routing the power cable through the cable channel on
the left side and the audio cables through the cable channel of the vehicle on the right side or vice versa. This
prevents interferences due to crosstalk into the audio signal.