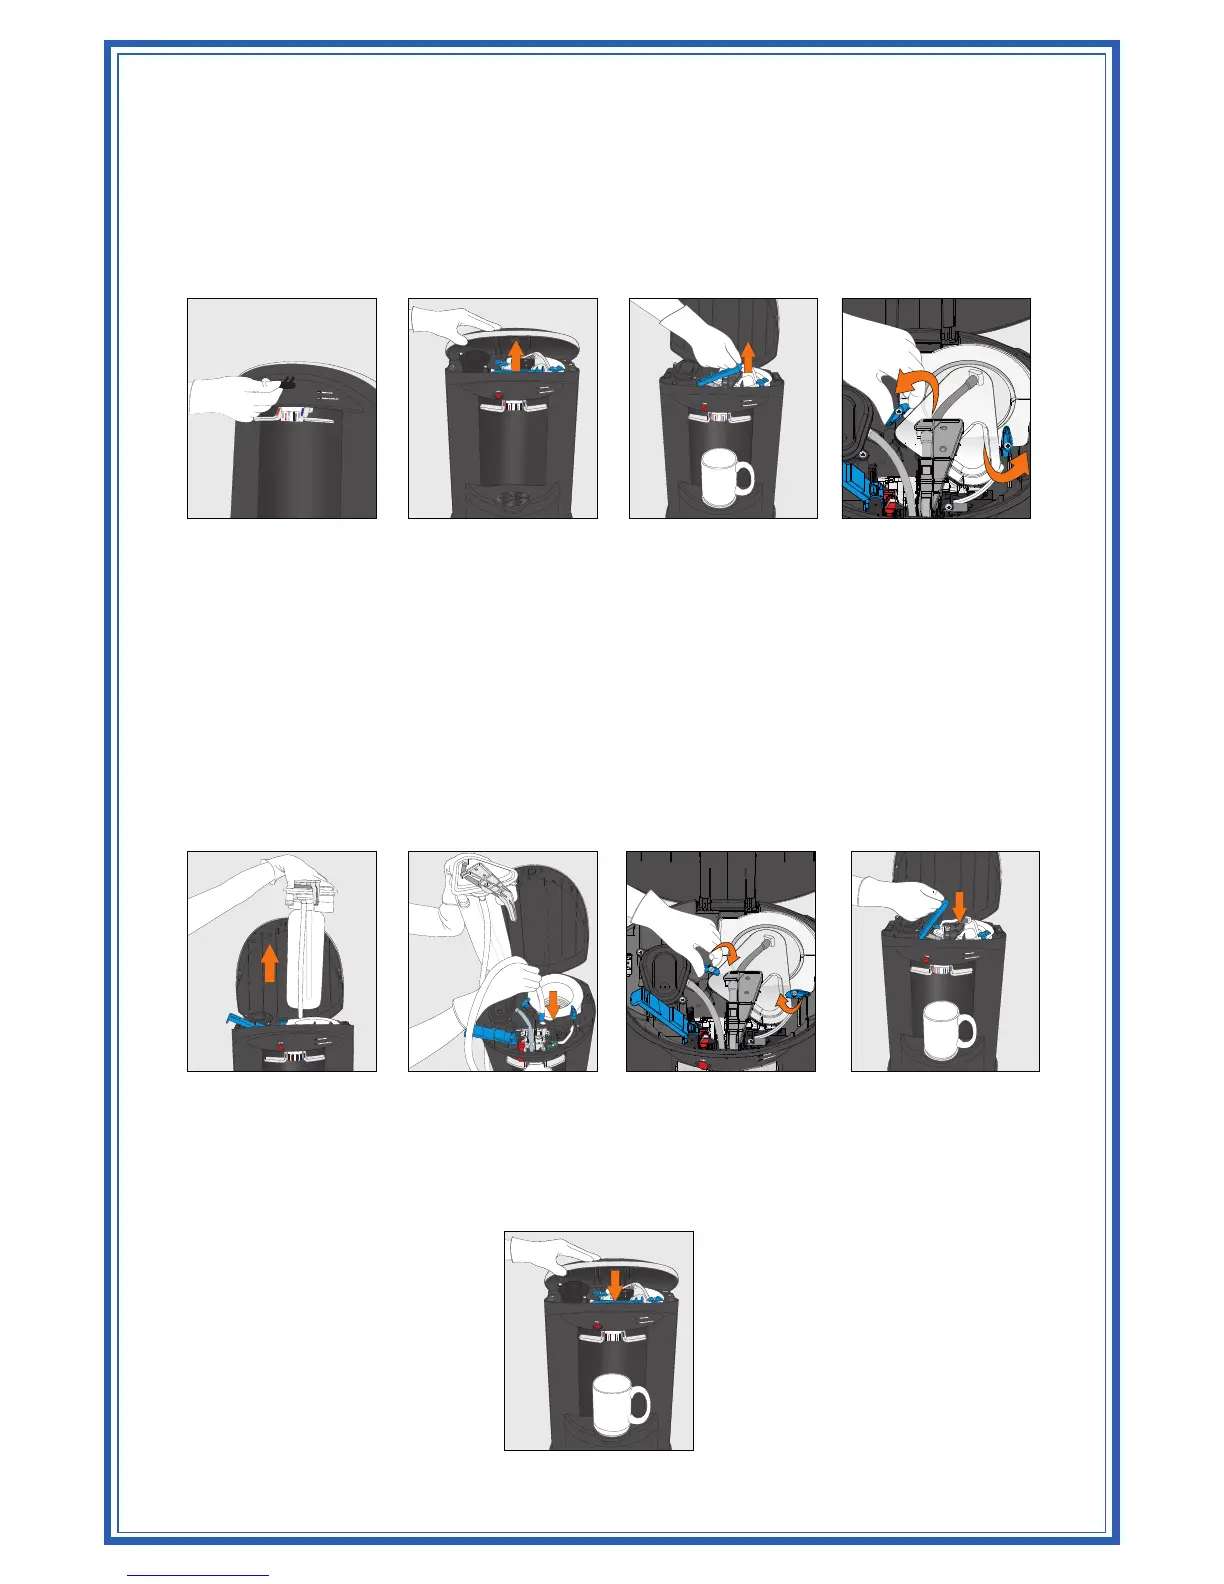
5. Insert the access key into the 2 holes located at the underside of the top edge of the cooler (above water
levers) and push inwards (Figure 32 and Figure 33)(once unlocked, the front of the top cover opens
upwards)
6. Place a glass or other container below the water outlets (to catch drips), and unlatch the locking clip
located near the front of the cooler to release the water tubing (Figure 34)
7. Unlock the turn knobs which hold down the SmartFlo SF-1 Water Cartridge (Figure 35)
8. Pull SmartFlo SF-1 Water Cartridge upwards to remove (Figure 36)
9. Discard used SmartFlo SF-1 Water Cartridge according to local regulations. (Please recycle)
To prevent possible harm to the environment or human health from uncontrolled waste disposal, recycle
it responsibly to promote the reuse of sustainable resources.
10. Insert water line of replacement SmartFlo SF-1 Water Cartridge through the guide tube, and push
through to bottle installation area (Figure 37).
11. Ensure seal is properly installed on the outlet tube of the SmartFlo SF-1 Water Cartridge assembly (may
have shifted during shipment of un-packaging)
12. Align SmartFlo SF-1 Water Cartridge with openings in cooler, and push into place
13. Rotate turn knobs to lock SmartFlo SF-1 Water Cartridge in place (Figure 38)
14. Close the locking clip to secure water outlet tubing in place (Figure 39)
15. Close the top cover of the cooler (Figure 40) (push downwards to lock into place)
16. Place fresh bottle outside of the cabinet
17. Clean the outside of new bottle with a cloth
18. Remove bottle cap completely from the top of the bottle
Figure 32 Figure 33 Figure 34 Figure 35
Figure 36 Figure 37 Figure 38 Figure 39
Figure 40