RS112 Rugged Server
HARD DRIVE REMOVAL AND REPLACEMENT
Removing and Replacing the Carrier/Hard Drive Assembly
The procedure below may be different depending on the explicit drive contained in the
product.
Steps:
1.
Power the system down (unless a drive controller supporting hot-swap has been
installed- contact Technical Support with any questions).
2.
Unscrew both thumbscrews on the face of the carrier to be removed (please see circled
area in Figure 7 below). If thumbscrews are too tight, use a flathead screwdriver to
loosen.
3.
Grasp the handle and pull the carrier/drive assembly straight out of the face of the
system.
4.
Remove the drive by removing the four Phillips head screws from bottom of the carrier
sled.
5.
Install replacement drive into carrier and secure with the four Phillips head screws (a
thread-lock solution is recommended).
6.
Re-install carrier/drive assembly into the system.
7.
Tighten thumbscrews to secure the drive.
8.
Reapply power to the server, rebuilding any RAID arrays as necessary.
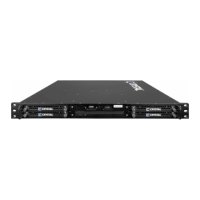
Figure 7. Drive Removal and Replacement
The image above may not depict the product received.
RS112 Rugged Server User Guide Page 20 of 26