Leddura 2Share
1110
Share, inspire, have fun!
With CTOUCH by your side.
ctouch.eu
7
6
4
5
2
1
3
8 9
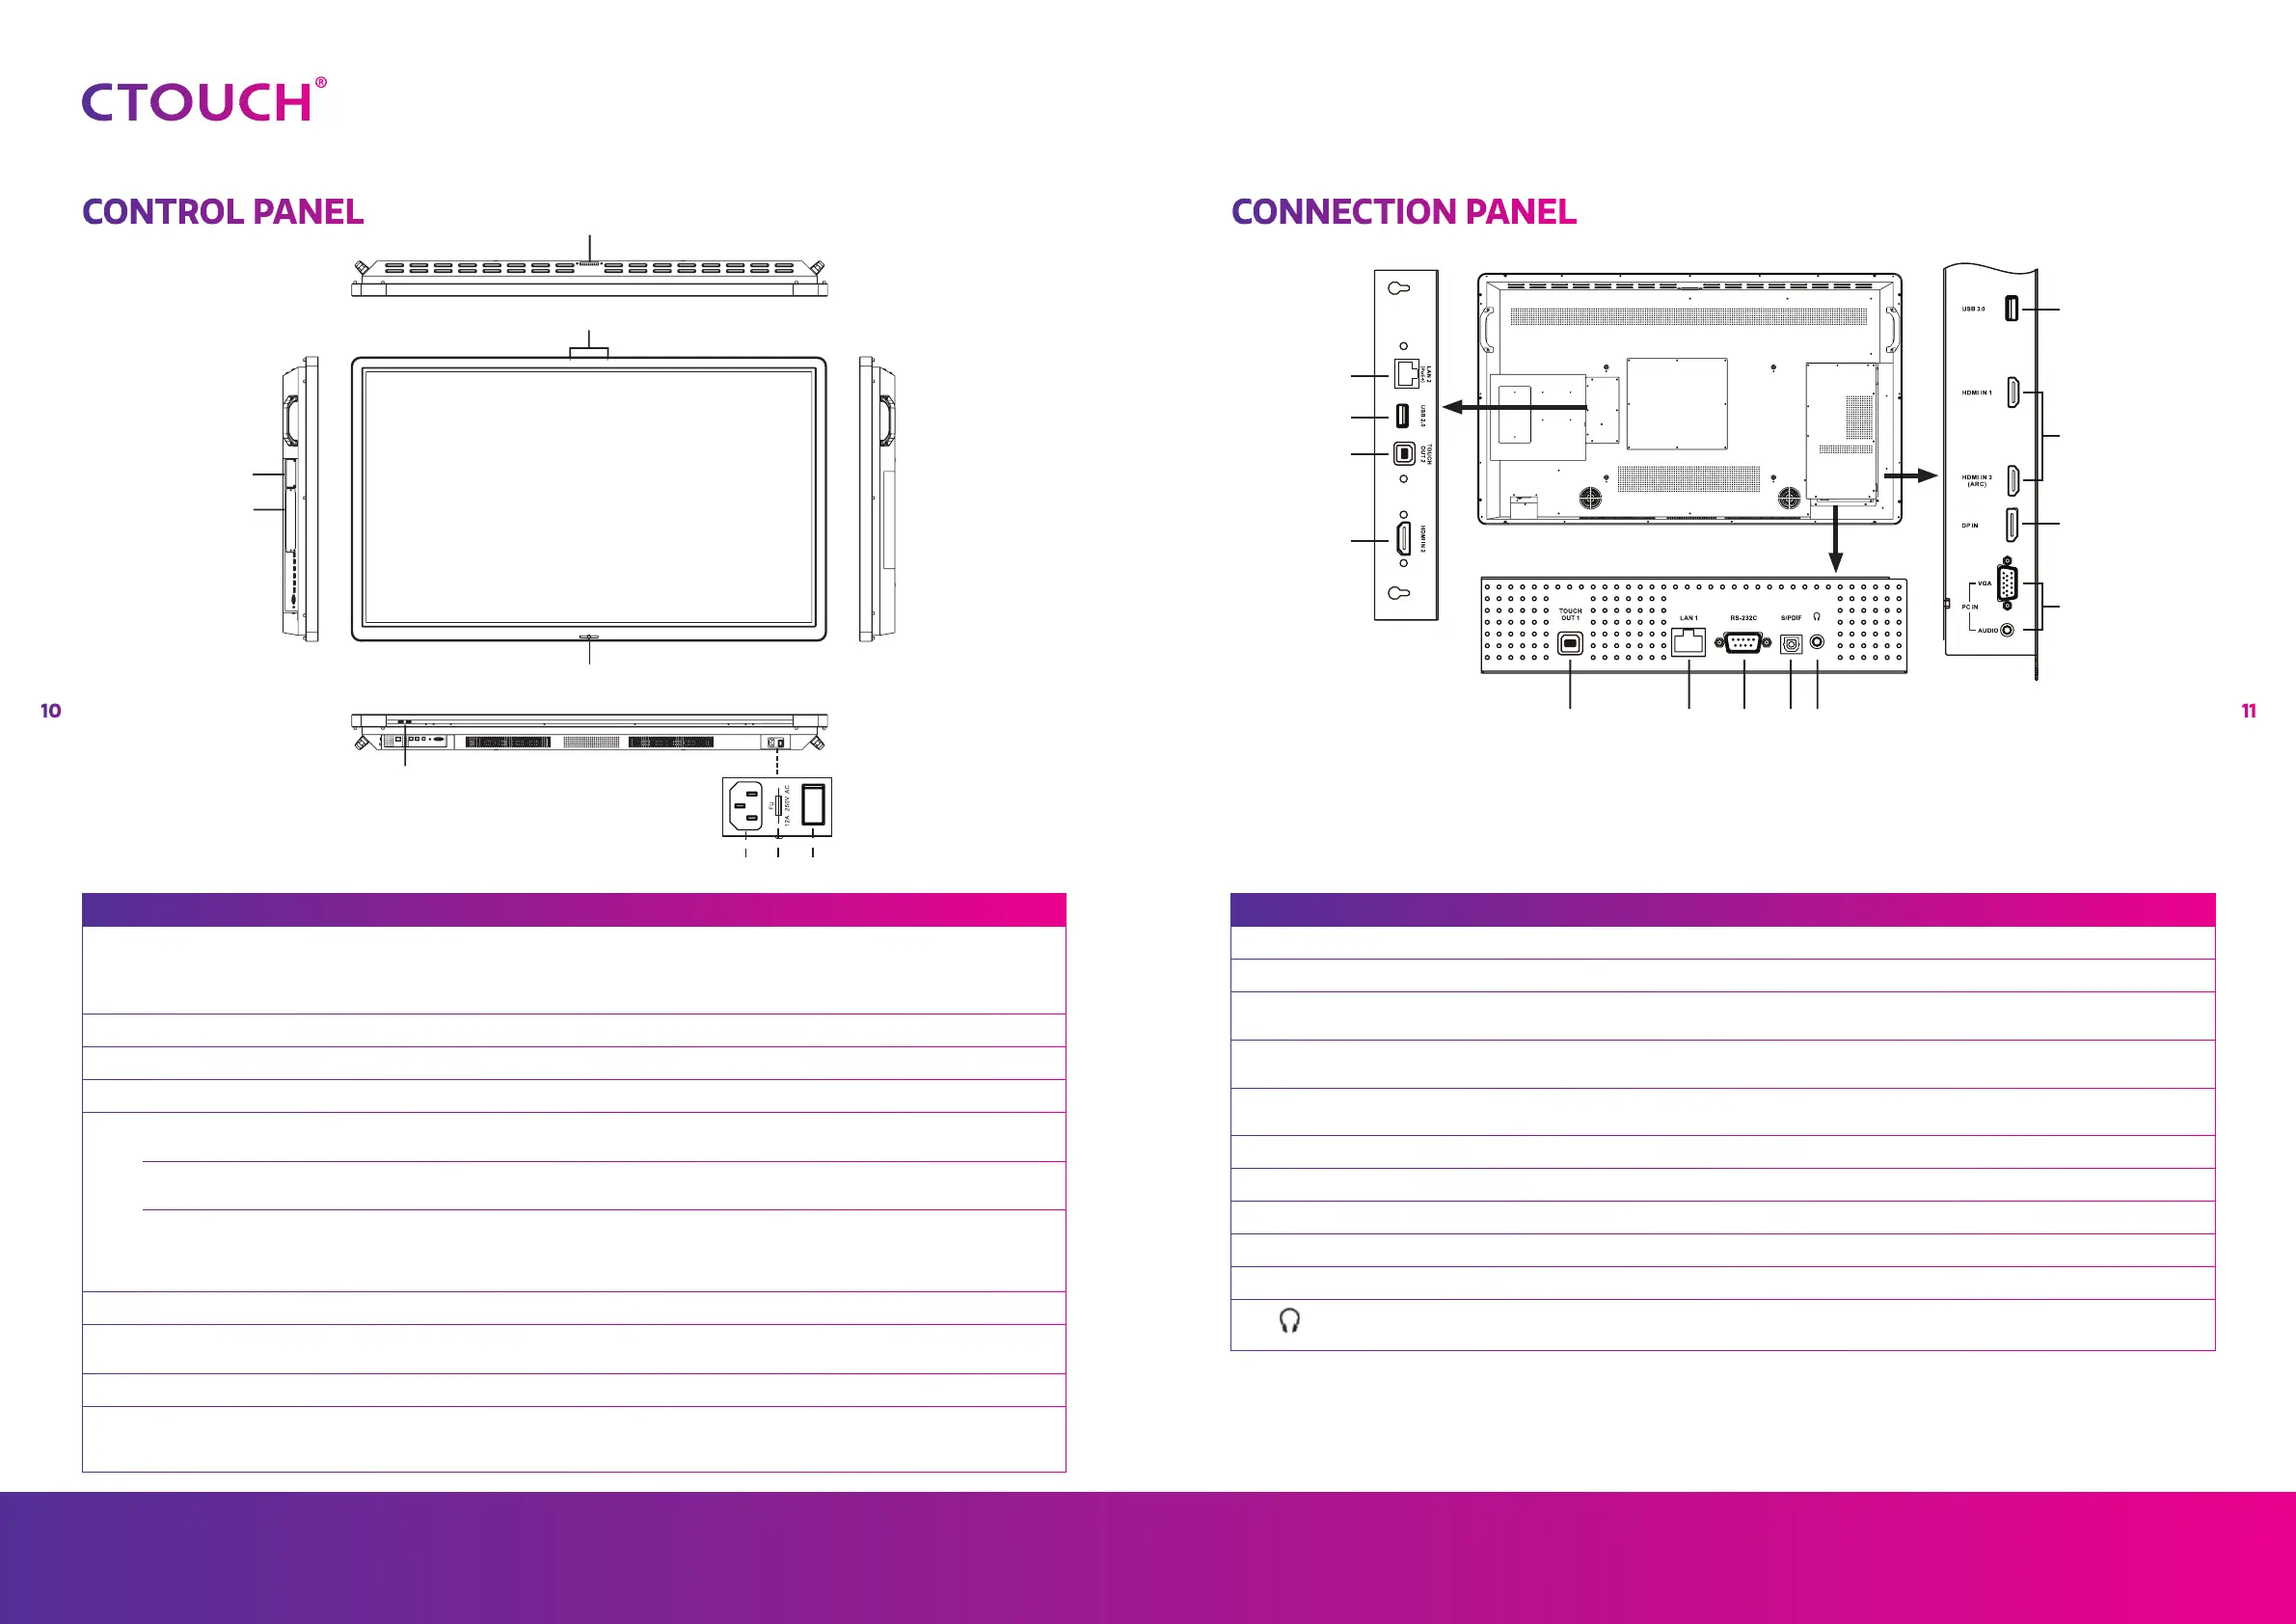
CONTROL PANEL CONNECTION PANEL
NO. DESCRIPTION
1 USB(2.0)(for camera) This port is for connecting a camera.
Notes!
1. Please open the dust cover before being used.
2. It can perfectly support camera’s up to 720p.
2 Microphone Voice input.
3 SCREEN CAST module Insert a SCREEN CAST module (Optional).
4 OPS module slot Insert an OPS module (Optional).
5
CTOUCH Button
Power LED Red: In standby mode.
Blue: In power on mode.
Remote control sensor To control the display with the remote, aim it to this sensor.
Power Press to switch the CTOUCH interactive display on or off.
Note: When the CTOUCH interactive display is turned on, press the button in middle to show the main menu.
Press the button for about 2 seconds and the screen will go into stand-by mode.
6 USB Connect USB devices to these ports.
7 AC IN Plug the AC cord into this jack and into a power outlet.
(AC 100-240V 50/60Hz)
8 Fuse 10A 250V
9 Power Switch Push ( I ) to turn on the power, push (O) to cut off the power.
Note! Don’t cover the power switch.
1
2
3
4
5
4
6
7
8 9 10 113
NO. DESCRIPTION
1 LAN 2(PoE+) LAN port for external devices (placed on the small VESA mount).
2 USB 2.0 Connect USB devices to this port.
3 TOUCH OUT 1/2 Output for external devices connected to HDMIx, DP or VGA ports which support touch
systems.
4 HDMI1/2/3 INPUT Connect an HDMI device to this HDMI port.
HDMI3(ARC): Connect an ARC-enabled device to this HDMI port.
5 USB 3.0 Connect USB devices to this port.
Note! The function differs depending on the model you have.
6 DP(DisplayPort) INPUT Connect a DP device to this DP port.
7 VGA INPUT Connect a VGA device to this VGA port.
8 LAN 1 Connect a LAN cable to this LAN port.
9 RS-232C For remote control.
10 S/PDIF digital audio output Connect a digital sound system to this S/PDIF jack.
11 Connect headphones to this jack.
Note! The current selected source is audible and internal speakers will be disabled.
Note! If the CTOUCH display is on the VGA source and does not get any signal, it will go into
stand-by mode after two minutes. When the CTOUCH display is on others sources and
does not get any signal, it will go into stand-by mode after 10 minutes.
 Loading...