17
Troubleshooting
If engine troubles are experienced that appear to be
fuel system related, check the following areas before
adjusting the carburetor.
• Make sure the fuel tank is filled with clean, fresh
gasoline.
• Make sure the fuel tank cap vent is not blocked and
that it is operating properly.
• If the fuel tank is equipped with a shut-off valve,
make sure it is open.
• Make sure that the in-line fuel filter is clean and
unobstructed. Replace the filter if necessary.
• Make sure fuel is reaching the carburetor. Check
the fuel lines and fuel pump for restrictions or faulty
components, replace as necessary.
• Make sure the air cleaner element is clean and all
air cleaner element components are secure.
If, after checking the items listed above, the engine is
hard to start, runs roughly, or stalls at low idle speed, it
may be necessary to adjust or service the carburetor.
Adjustment
NOTE: Engines may have a fixed idle or limiter cap on
the idle fuel adjusting needle. Step 2 can only be
performed within the limits allowed by the cap.
1. Start the engine and run at half throttle for five to 10
minutes to warm up. The engine must be warm
before performing steps 2 and 3.
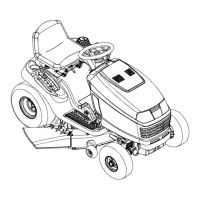
2. Low Idle Fuel Needle Setting: Place the throttle
into the “idle” or “slow” position. Turn the low idle
fuel adjusting needle out (counterclockwise) from
the preliminary setting until engine speed
decreases (rich). Note the position of the needle.
Now turn the adjusting needle in (clockwise). The
engine speed may increase, then it will decrease as
the needle is turned in (lean). Note the position of
the needle. Set the adjusting needle midway
between the rich and lean settings. See Figure 13.
Figure 13
3. Low Idle Speed Setting: Place the throttle control
into the “idle” or “slow” position. Set the low idle
speed to 1200 RPM* (± 75 RPM) by turning the low idle
speed adjusting screw in or out. Check the speed
using a tachometer.
NOTE: To ensure best results when setting the low
idle fuel needle, the low idle speed must not exceed
1200 RPM (± 75 RPM).
Leveling the Deck
NOTE: Check the tractor’s tire pressure before
performing any deck leveling adjustments. Refer to
Tires on page 24 for information regarding tire pressure.
Front To Rear
The front of the cutting deck is supported by a stabilizer
bar that can adjusted to level the deck from front to rear.
The front of the deck should be between 1/4-inch and
3/8-inch lower than the rear of the deck. Adjust if
necessary as follows:
• With the tractor parked on a firm, level surface,
place the deck lift lever in the top notch (highest
position) and rotate the blade nearest the discharge
chute so that it is parallel with the tractor.
• Measure the distance from the front of the blade tip
to the ground and the rear of the blade tip to the
ground.
• The first measurement taken should be between
1/4" and 3/8" less than the second measurement.
• Determine the approximate distance necessary for
proper adjustment and proceed, if necessary, to the
next step.
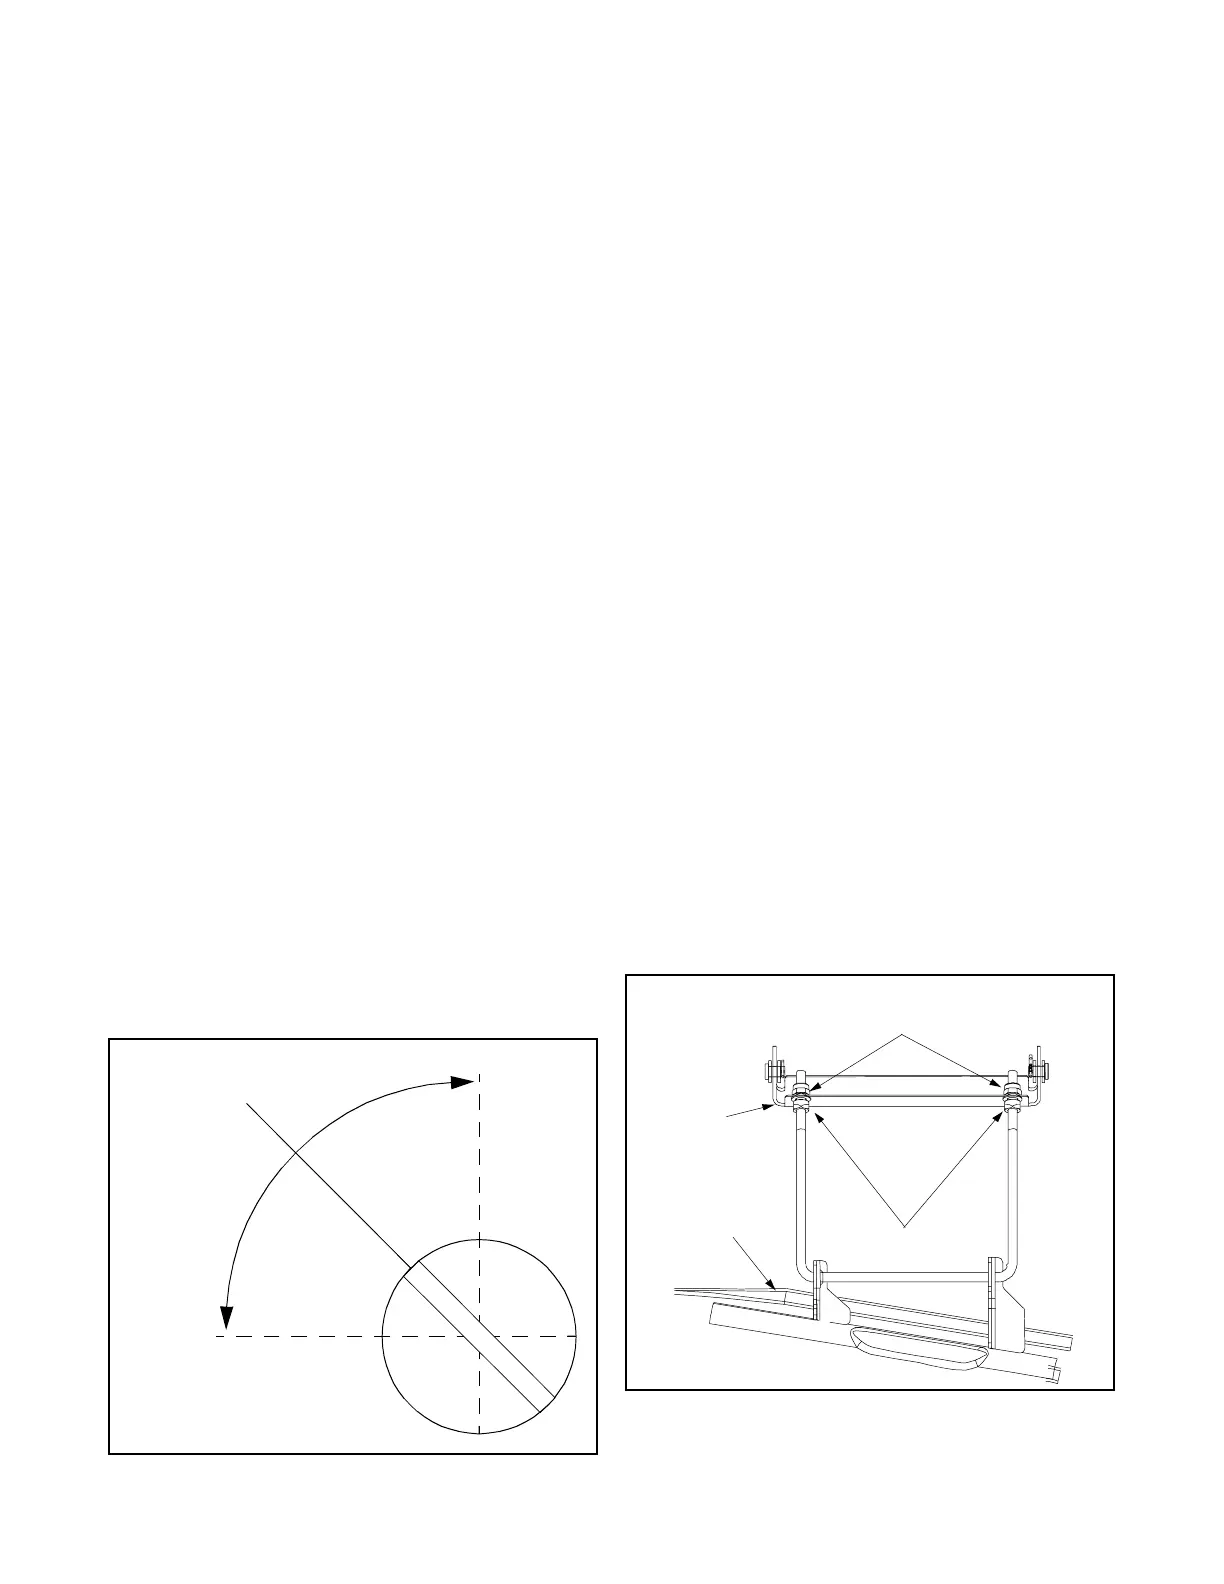
• Loosen the two jam nuts on the rear side of the
deck stabilizer bracket. See Figure 14.
Figure 14
Lean
Rich
Adjust to Midpoint
Jam
Deck
Stabilizer
Bracket
Nuts
Lock
Nuts
Deck
 Loading...