Cutting Deck Removal
To remove the cutting deck, proceed as follows:
brake.
(lowest deck setting).
Lower the deck by moving the deck lift lever into the 2.
bottom notch on the right fender.
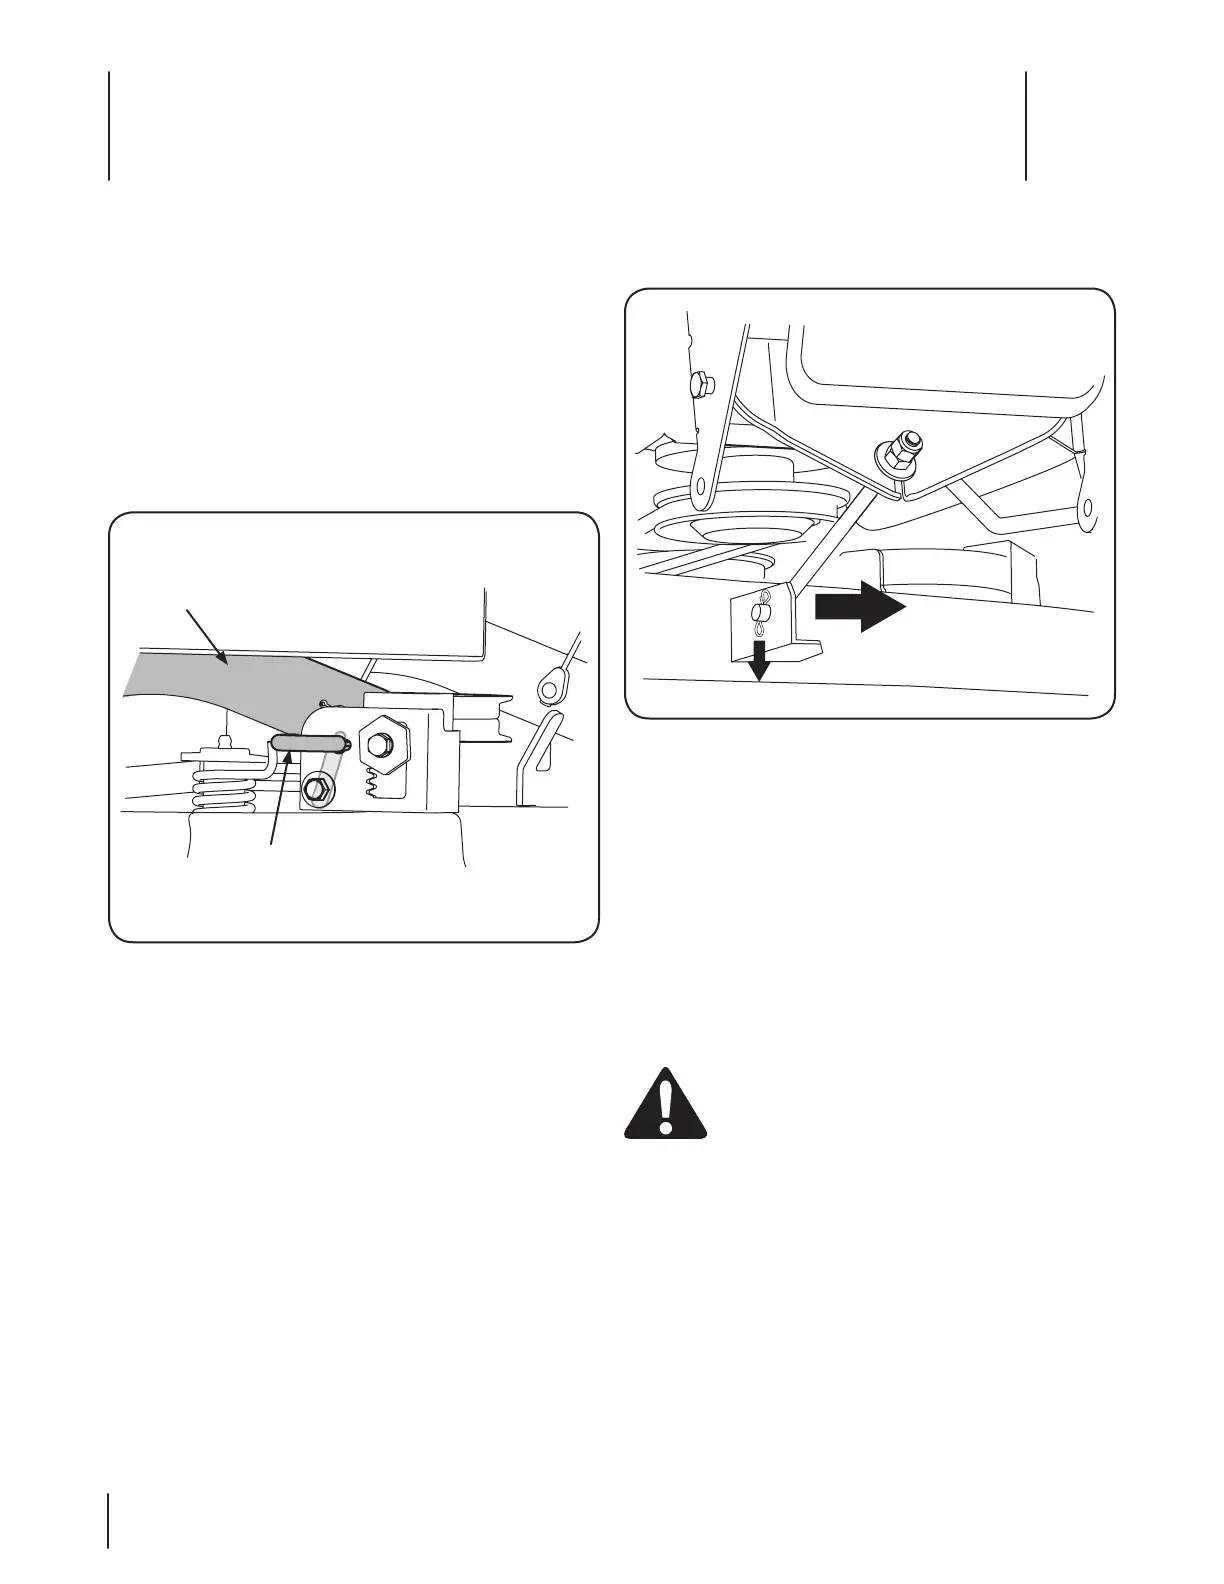
Looking at the cutting deck from the left side of the tractor,
locate the deck support pin on the rear left side of the
4.
Move to the right side of the tractor and repeat the 5.
Move the deck lift lever into the top notch on the right 6.
fender to raise deck lift arms up and out of the way.
Remove the cotter pin from the end of the stabilizer rod 7.
and slide the stabilizer out of the hanger bracket on the
deck. See Fig. 7-2.
8.
bottom of the engine by a belt keeper. From beneath the
front/left side of the tractor, locate the hex tapping screw
securing the left side of the belt keeper to the bottom of
the tractor frame. After first noting the frame hole into
which the right side of the belt keeper is inserted, remove
While holding the front deck hanger rod upward to clear 9.
the deck front hanger bracket, carefully slide the deck out
from the right side of the tractor.
Cutting Blades
Be sure to shut the engine off, remove
ignition key, disconnect the spark plug wire(s) to
prevent unintended starting before removing the
cutting blade(s) for sharpening or replacement.
grasp the cutting blade.
The blades may be removed as follows.
Remove the deck from beneath the tractor, (refer to
Cutting Deck Removal) then gently flip the deck over to
expose its underside.
NOTE: A block of wood may be placed between the deck
housing and the cutting edge of the blade to help in
breaking loose the hex nut securing the blade.
Use a 2. ⁄
the blade to the bottom of the spindle assembly. Secure
the spindle by either holding the blade tightly, or by using
a second wrench to hold the nut at the top of the spindle.
Service
7
24

 Loading...