9
ASSEMBLY
NOTE: Reference to right and left hand side of the tractor is
observed from the operating position.
NOTE: Some components may come already assembled. If they
are already assembled, skip ahead to the next step.
Manually Moving the Tractor
CAUTION
Never tow your tractor. Towing the tractor with the rear
wheels on the ground may cause severe damage to the
drive motors.
The tractor can be moved as long as the parking brake is not set.
The tractor can be pushed slowly.
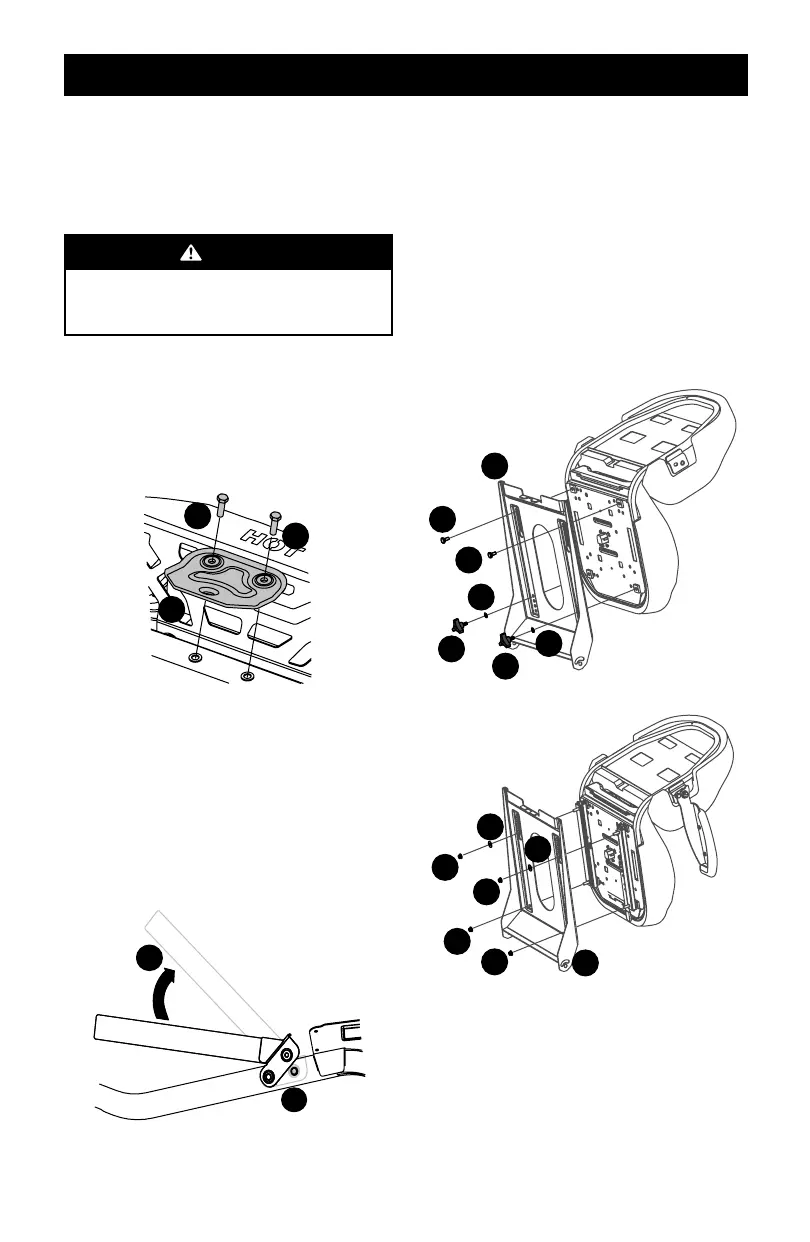
Install Hitch (If Necessary)
1. Locate Hitch (a) and install on the rear of the frame using the
two hex washer screws (b) provided (Figure 1).
NOTE: Hitch and hex washer screws will be in the hardware pack.
a
b
b
Figure 1
Reposition Upper Hoop (If necessary)
The upper hoop may be positioned down for shipping purposes:
1. Remove the two hex washer screws (a) partially installed on
the frame (Figure 2).
2. Rotate the upper hoop (b) into position (Figure 2).
3. Secure hoop in place with the hex washer screws removed
in step 1. Torque the hex washer screws to 179-219 in-lbs
(20-25 N-m).
a
b
Figure 2
Install Operator’s Seat
KNOB ADJUST OR LEVER ADJUST
1. Cut any straps securing the seat assembly to the tractor.
Remove all packing material.
NOTE: Be careful not to cut the seat wiring harness.
2. Install the seat onto the seat pan (a) using hardware
provided.
• For a Knob Adjust seat: insert bolts (b) in the rear holes
and lock washer (c) and knobs (d) in the front. Tighten
securely (Figure 3).
• For a Lever Adjust seat: use flange lock nuts (a) and flat
washers (b) (Figure 4).
a
b
b
c
d
d
c
Figure 3
a
b
b
c
a
a
a
Figure 4
 Loading...