11/2009 - Art. Nr. 4200 1018 3800A22
Servicing
Maintenance
Burner and boiler servicing must only
be carried out by a professionally
qualified heating engineer. The system
operator is advised to take out a
maintenance contract to guarantee
regular servicing. Depending on the
type of installation, shorter
maintenance intervals may be
necessary.
• Switch off the power supply before all
maintenance and cleaning work.
• Use original spare parts.
Work recommended as part of annual
burner maintenance:
- Burner test run, input measurement in
the boiler room
- Clean the combustion components
and replace defective parts if
necessary
- Clean the fan wheel and the blower
- Clean the gas filter; replace it if
necessary
- Visual inspection of the burner's
electrical components; eliminate
malfunctions if necessary
- Check burner start characteristics
- Leakage test
- Burner safety devices function check
(air pressure/gas pressure switches)
- Flame monitor and automatic
combustion control unit function check
- Commissioning the burner
- Check the gas flow
- Correct the adjustment values if
necessary
- Draw up a measurement report
General checks
- Emergency stop button function check
- Visual inspection of gas lines in the
boiler room
Checking the combustion
components
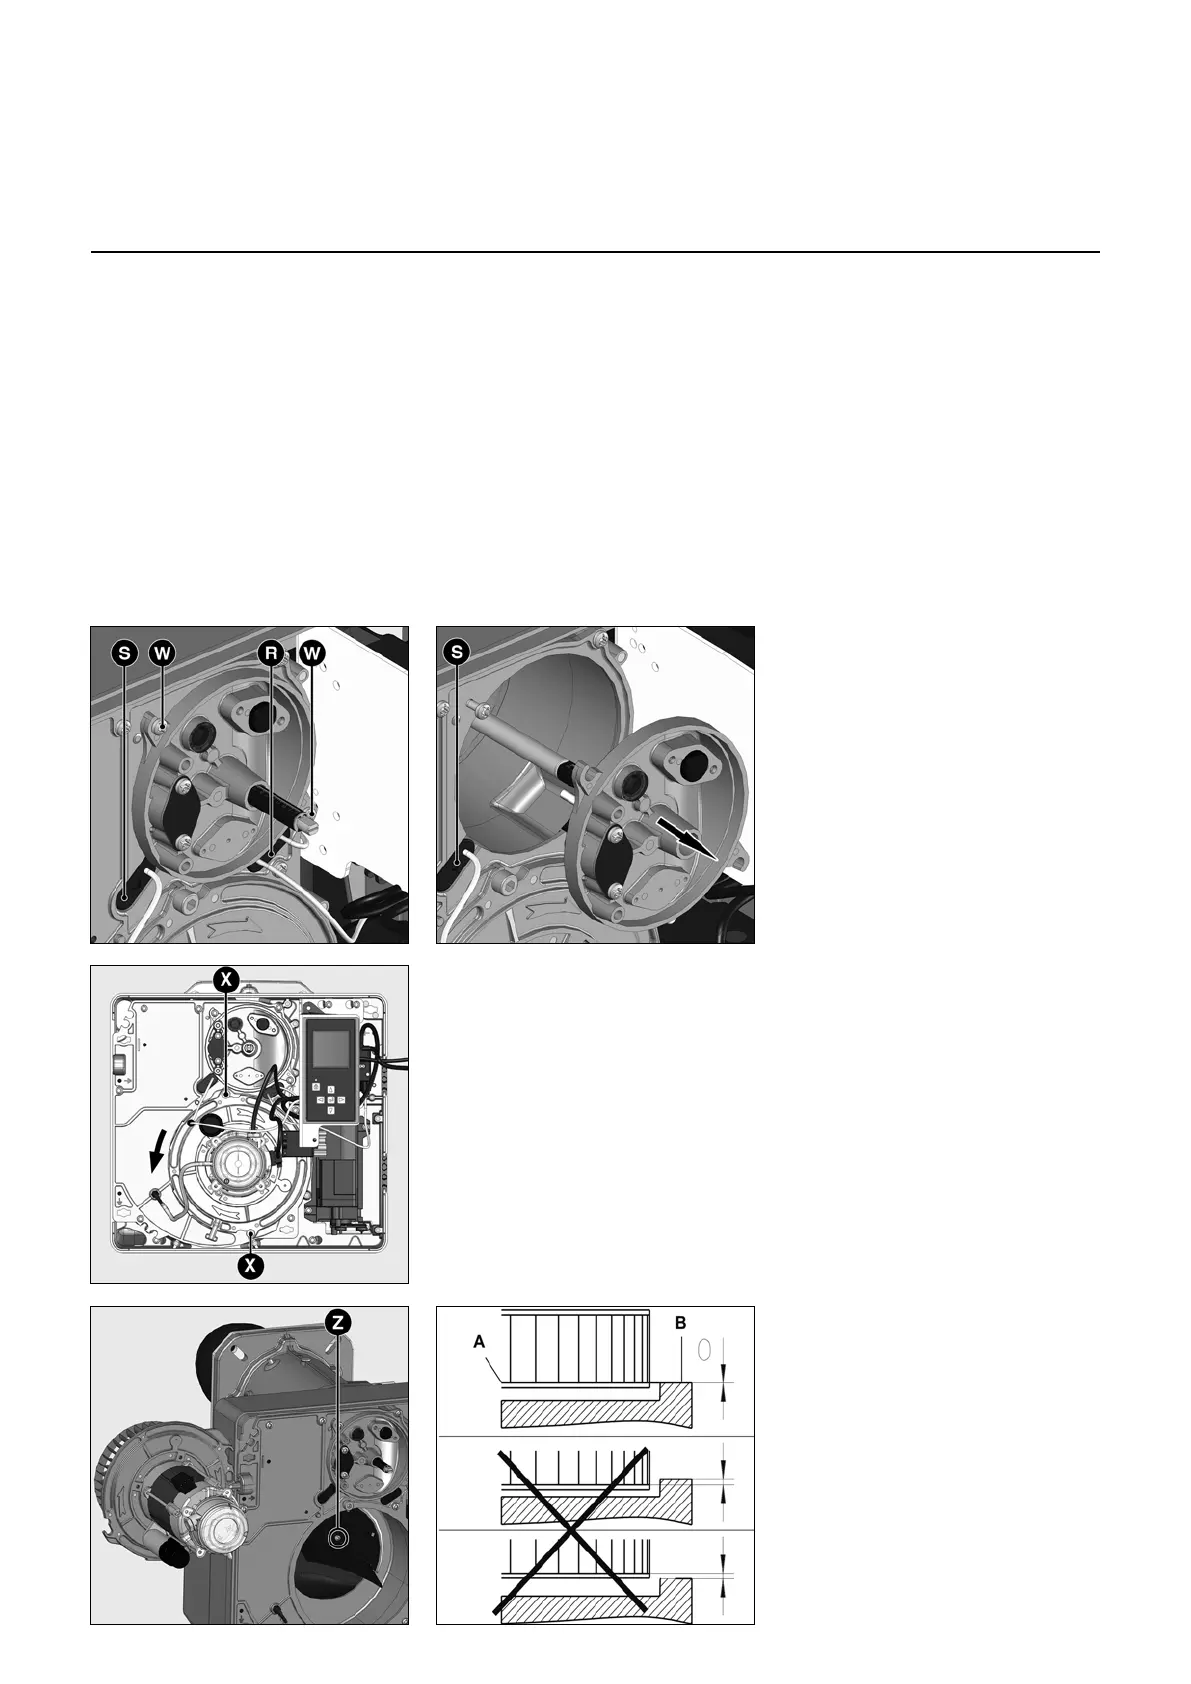
• Remove the burner hood.
• Disconnect the ignition cables H on the
igniter side.
• Remove the two screws W from the
cover.
• Remove the combustion components.
• Check the ignition electrodes and the
ignition cables; replace if necessary.
• Clean the baffle plate.
• Check adjustments and settings
during assembly.
Cleaning the fan wheel
• Remove the plate and attach it in the
service position (see illustration).
• Remove and clean the fan wheel and
replace it if necessary. Refit in the
reverse order.
Removing the plate
• To do this, unscrew but do not remove
the 2 screws
X
securing the motor plate.
• Shift the plate to release the 2 screws
(bayonet mountings).
• Clean the fan wheel, the housing and
the recirculation unit, and check that
they are not damaged.
• To remove the air guiding piece,
remove the screw Z then unclip it.
Fitting the fan wheel
When changing the motor or the fan
wheel, refer to the positioning diagram
opposite. The internal flange A of the fan
wheel must be aligned with plate B.
Insert a ruler between the vanes of the
fan wheel and bring A and B to the same
height. Tighten the cone-point screw on
the fan wheel.
 Loading...