MAKING COFFEE
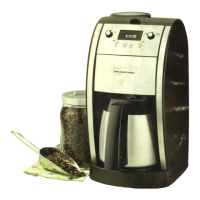
Before you make the first pot of coffee in
your new Cuisinart
®
Grind & Brew Thermal
-
Automatic coffeemaker, we recommend
operating the coffeemaker once, using only
water and a paper filter. This will remove any
dust or residues which remain in the system
from the manufacturing process.
1.
Fill the Water Reservoir
Open the reservoir lid by pushing the release
button and lifting up. Pour the desired
amount of water in the reservoir using the
step water indicator located at the rear of
the reservoir.
2.
Add Beans
Lift the grinder basket lid, using the recess
on either side. Fill the basket with the
desired quantity of beans.
Maximum capacity is 14 level scoops.
Do not overfill or the grinder could
malfunction and/or the coffeemaker
may overflow.
Our suggested recipe (adjust the recipe to
taste): Use 1 level scoop of whole beans per
cup. For 1 to 4 cups, use
11/2
level scoops
per cup.
3.
Open Filter Door
Place a #4 basket paper filter or commercial
style permanent filter in the basket.
Note: When using a commercial style
permanent filter, be sure that the filter
handle is facing away from the grinder
basket. If you do not do so, the handle
may interfere with the flow of ground
coffee into the filter basket. Also note:
A commercial style permanent filter
may allow some ground coffee to flow
into carafe.
The filter holder will help to keep the filter
open, but when using a paper filter, be
sure that the filter is completely open
while touching the side walls and bottom
of the basket.
Place filter basket lid in place. Close filter
door.
4.
Close the Reservoir Lid
5.
Power Unit
When the brewing cycle has been
completed, five beeps will sound. Coffee
will continue to stream from the filter for
several seconds.
After brewing, the unit will automatically shut
itself off. The thermal carafe will keep the
coffee hot for hours.
Bottom of Thermal Carafe is hot to touch
for several minutes after brewing.
Use caution.
The brew-through, pour-through lid allows
coffee to drip from coffeemaker through the
closed lid. When brewing is complete, the
lid seals itself so air stays out and coffee
freshness and temperature are preserved.
No need to turn or adjust the lid before
pouring.
TO MAKE COFFEE WITH
PRE-GROUND BEANS
1.
Fill the Water Reservoir
Open the reservoir lid by pushing the
release button and lifting up. Pour the
desired amount of water in the reservoir
using the water indicator located at the
rear of the reservoir.
2.
Open filter door.
Add ground coffee to
a commercial style permanent gold tone
filter or #4 basket paper filter.
NOTE: The maximum capacity for ground
coffee is 16 level scoops, using either a
paper or commercial style permanent
filter. Exceeding that amount may cause
overflow if the coffee is too finely ground.
Our recipe suggestion: Use 1 level scoop of
ground coffee per cup. Adjust the recipe
according to your individual taste.
3.
Place filter basket lid in place.
Close
filter door.
4.
Follow instructions 4 through 8 from
the "Making Coffee" section.
5.
Press the Grind Off button.
When this
function is activated, an amber LED will
be illuminated. Then rotate and release
the On/Off button clockwise to the
On/Off position.
Press down to lock. The Grind & Brew'
Automatic Coffeemaker is equipped with
a Safety Interlock System. The Grind &
Brew
-
will not operate if the cover of the
unit is open or the grinder cover is left out.
Because grinder blades spin during opera-
tion, the Grind & Brew
-
will not operate if
the cover of the unit is open. If you try to
turn the unit on with the cover open, the
unit will beep continuously until the missing
parts are installed and you close the lid. The
unit will also beep if you open the lid during
the brewing process. The grinder will stop
grinding or, if brewing, the brewing will stop.
Once the missing parts are installed and
the cover is closed, the beeping stops. The
brewing process can be restarted by turning
and releasing the On/Off dial in a clockwise
position. Restarting the process will not
affect coffee results. If you do not want the
grinder to come on again, press the Grind
Off button before rotating the On dial. Once
the lid is closed, the beeping will stop, and
the grind and brew process will start again
from the beginning.
6.
Before Brewing Coffee
Remove thermal carafe lid by turning in the
direction of the "unlock" arrow. Prewarm
carafe by rinsing it out with hot water.
PREWARMING THE CARAFE WILL HELP
KEEP THE COFFEE HOTTER.
Return the carafe lid to the carafe. To lock
the lid, turn in the direction of the "lock"
arrow until it fits tightly on carafe and arrow
lines up in the center of the pour spout.
This ensures lid is closed and in the proper
position for brewing and pouring.
Make sure you have replaced the thermal
carafe in its position on the resting plate
and have placed a filter in the filter basket.
Plug the cord into an electrical outlet.
"12:00" will appear until you set the time.
This will not interfere with the operation
of the coffeemaker. To set clock, see the
"Programming Your Coffeemaker" section,
page 8.
a)
Immediate grinding and brewing:
Rotate the On/Off dial clockwise to the
On/Off position and release. The indicator
will light and the process will begin.
b)
Programmed Brewing:
Rotate the Program Dial clockwise to the
Program Set position and release. The
indicator will light and the display will show
the programmed time. See Programming
Your Coffeemaker on page 8.
7.
Select Cups Setting
The 1-4 cup setting button is used when
you make small amounts of coffee. Normal
coffeemakers will produce a colder batch of
coffee when smaller amounts are made, be-
cause the heater doesn't have enough time
to properly warm up to heat a small amount.
The 1-4 setting double heats the water,
making your smaller amount as piping hot
as a full pot would be.
To use:
When making a smaller amount,
press the 1-4 button on the control panel
after turning on the unit. The indicator light
will illuminate. Note that the 1-4 button can
be set at any time.
8.
During and After Brewing
The Brew Pause" feature allows you to
remove the carafe during mid-brew. The
brewing process does not stop during this
period; only the flow of coffee from the
basket stops.
Do not remove the carafe
for longer than 30 seconds or the coffee
may overflow the basket.
While we offer
this feature, we recommend that you do not
pour coffee before the cycle has reached
completion, since the coffee brewed at the
beginning of the cycle has a flavor profile
which is very different from the coffee made
at the end of the cycle. Removing a cup
during the brewing cycle will alter the flavor
of the finished pot.
Once the coffee has finished brewing, stir it
before serving to blend the flavors. The
coffee at the bottom of the carafe will be
somewhat stronger than the coffee at the top.
1
0
 Loading...
