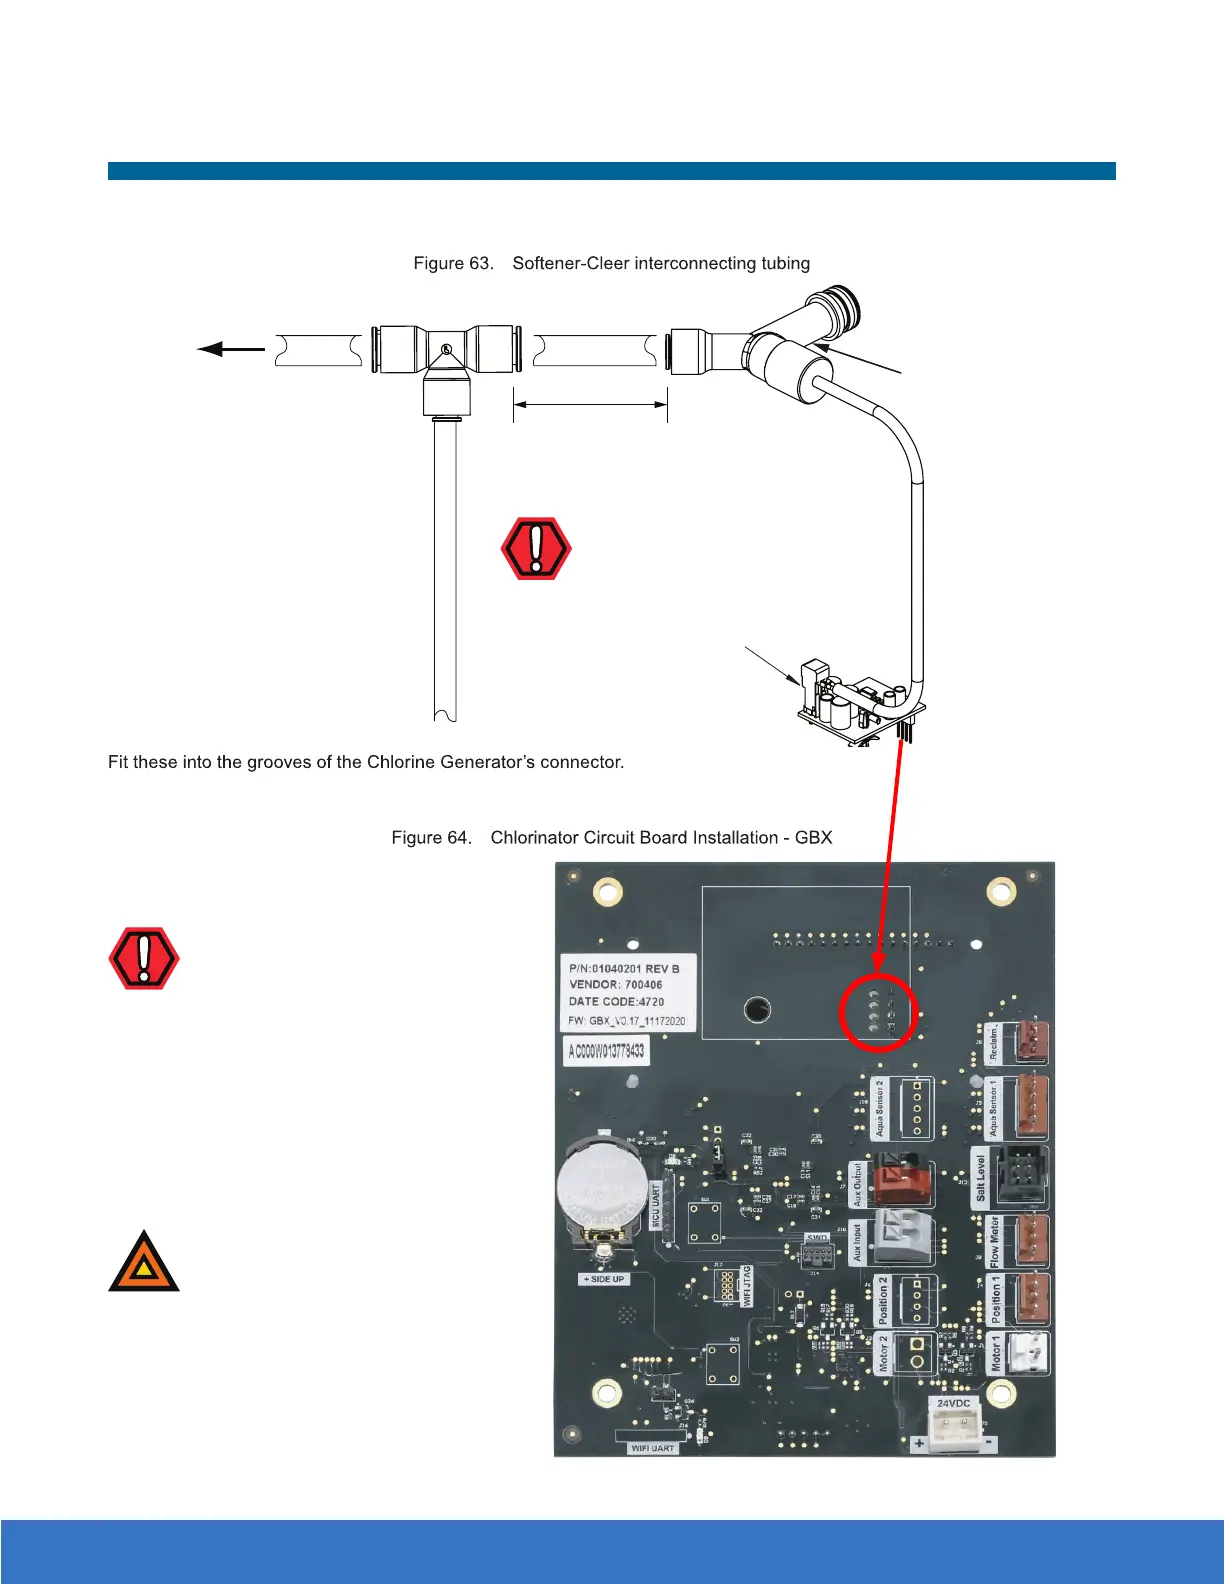
Installing the Chlorine Generator
Chlorine
Generator
3/8" Tubing
Tubing
To
Brine
Valve
Connect
1/4" tubing
to the side of
the solenoid
marked IN.
48" max.
WARNING!
Make sure that the Chlorinator is
positioned in the manner shown.
Failure to do so will cause the
Chlorinator to malfunction and
become damaged.
WARNING!
Make sure that the Chlorine
Generator is positioned with the
board’s connectors fitting into the
grooves on the Chlorine Generator’s
connector. Failure to do so will
cause the Chlorine Generator to
malfunction and be damaged.
CAUTION!
All electrical components should be the
same DC current; this includes the power
supply, Aux Board, and Solenoid.
Manual de Usuario Culligan Smart Softener. Página 74 de 107 Pure Water Technology (2023) Todos los derechos reservados
atencion@purewater.mx purewater.mx 81-1642-7777





 To Next Page