1
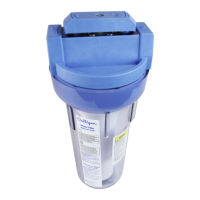
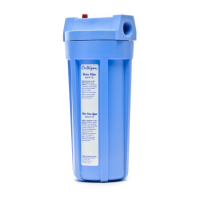
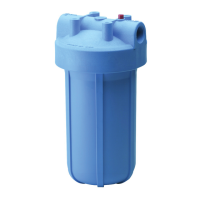
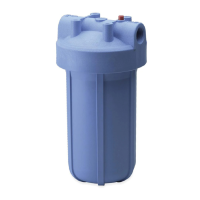
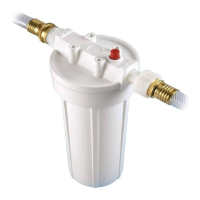
Sediment Water Filter
Installation and Operating Instructions
Model HF-360B
Specifications
Pressure Range: 30 - 100 psi (2.1 - 6.9 bar)
Temperature Range: 40 - 100°F (4.4 - 37.7°C)
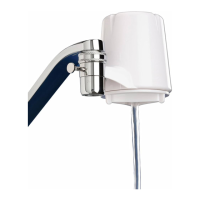
Parts Included
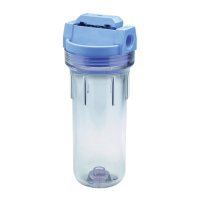
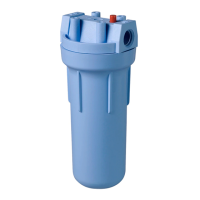
• Valve-in-head cap and clear housing
• SW-2A housing wrench
• Instructions
• P5 filter cartridge
Materials Required (not included)
For 3/4" and 1/2" main water line installation:
• 3/4" compression fittings for copper pipe
• 1/2" adapter fittings for copper pipe
• Teflon
®
tape
Note: Galvanized fittings must be used for installation on galvanized pipe.
Optional Materials (sold separately)
UB-1 mounting bracket, OR-360B replacement O-ring kit
Precautions
Do not use with water that is microbiologically unsafe or of unknown quality
without adequate disinfection before or after the system.
Filter must be protected against freezing, which can cause cracking of the filter and
water leakage.
The rubber O-rings provide the water-tight seal between the cap and the bottom of
the housing. It is important that the O-rings be properly seated in the off-white cap insert grooves
below cap threads or a water leak could occur.
Because of the product’s limited service life and to prevent costly repairs or possible
water damage, we strongly recommend that the bottom of all plastic housings be replaced every
five years for clear and every ten years for opaque. If the bottom of your housing has been in
use for longer than this period, it should be replaced immediately. Date the bottom of any new or
replacement housing to indicate the next recommended replacement date.
Clear housings may crack or craze in time causing failure and leakage if exposed to
organic solvents, such as those found in aerosol sprays for cleaning products and insecticides.
NOTE:
• For cold water use only.
• Do not install where the filter will be exposed to direct sunlight.
• Make certain that installation complies with all state and local laws and regulations.
• The contaminants or other substances removed or reduced by the selected cartridge are not
necessarily in your water. Ask your local water municipality for a copy of their water analysis, or
have your water tested by a reputable water testing lab.
• After prolonged periods of non-use (such as during a vacation) it is recommended that the
system be flushed thoroughly. Let water run for 5 - 6 minutes before using.
• The filter cartridge used with this system has a limited service life. Changes in taste, odor, color,
and/or flow of the water being filtered indicate that the cartridge should be replaced.
• Some harmless bacteria may attack cellulose media cartridges. If your cartridge seems to
disintegrate or develops a musty or moldy odor, switch to a synthetic media cartridge or consult
the manufacturer.
Technical Support: 1-800-721-7360 Mon. - Fri., 8 AM - 5 PM CST
Ayuda Técnica: 1-800-721-7360 de lun. - viern. De 8 AM - 5 PM hora central civil
Filtro de agua para sedimento
Instrucciones para la Instalación y el Funcionamiento
Modelo HF-360B
Especificaciones
Gama de Presión: 30 - 100 psi (2.1 - 6.9 bar)
Gama de Temperatura: 40 - 100°F (4.4 - 37.7°C)
Piezas Incluídas
• Cabezal con válvula y sumidero transparente
• Llave de portafiltro (SW-2A)
• Instrucciones
• Cartucho filtrante P5
Materiales Necesarios (no son incluidos)
Para instalacíon en la tubería principal de 3/4" (19mm) y de 1/2" (13mm):
• Adaptadores de compresión para tubería de cobre de 3/4" (19 mm)
• Adaptadores de compresión para tubería de cobre de 1/2" (13 mm)
• Cinta Teflón
®
Nota: Adaptadores galvánicos tienen que usarse para las instalaciones de tubería galvánica.
Materiales Opcionales (se vende aparte)
Kit de soporte de montaje UB-1, junta tórica de reemplazo OR-360B
Precauciones
No use con agua microbiológicamente contaminada, o si la calidad del
agua es desconocida sin desinfectarla adecuadamente antes o después del filtro.
Este filtro debe de ser protegido contra la congelación para que no se rompe y
derrame agua.
Las juntas tóricas de caucho proveen el sello impermeable entre la tapa y la
parte inferior de la carcasa. Es importante que las juntas tóricas queden bien asentadas en las
muescas del tapón de inserción blanco mate, debajo de la rosca de la tapa, o podría ocurrir una
fuga de agua.
Debido a la duración limitada de este filtro, y para prevenir reparaciones
costosas o posibles daños causados por el agua, nosotros recomendamos que el filtro entero
se reemplazca cada diez años. Si el filtro se ha usado por más de este tiempo, se debe
reemplazarinmediatamente. Se recomienda que se escriba la fecha de instalación en el sumidero
para que usted sepa cuándo cambiarlo.
Los sumideros transparentes pueden gastarse con el tiempo, causando derrames
de agua, sobre todo, si estan expuestos a solventes orgánicos, como los que se encuentran en un
rociador aerosol para productos de limpieza e insecticidas.
NOTA:
• Para uso con agua fria solamente.
• No instale el filtro donde esté expuesto a rayos directos del sol.
• Asegúrese que la instalación vaya conforme con todas las leyes y regulaciones locales y estatales.
• Los contaminantes u otras substancias que se filtran o que son reducidas por los cartuchos filtrantes
que usted selecciona no se encuentran en su agua necesariamente. Pregunte por una copia del
análisis del agua de su municipalidad local, o si usa un pozo privado, tal vez sea necesario que
usted obtenga un análisis realizado por un laboratorio calificado para analizar agua.
• Después de periodos extendidos sin uso (p. ej. durante vacaciones) es aconsejable enjuagar el
filtro dejando correr el agua por 5 - 6 minutos antes de usarlo.
• El cartucho filtrante usado con este sistema tiene una duración limitada. Cambios en el sabor, olor,
color y/o flujo del agua que está filtrando indica que el cartucho filtrante se debe reemplazar.
• Alguna bacteria inocua puede atacar el cartucho hecho con agente celuloso. Si parece que su
cartucho filtrante se desintegra o adquiere un olor a moho, cambie a un cartucho filtrante hecho
con agente sintético o llame al fabricante.
09/21 01042084/01042090 Rev. A
Herramientas Necesarias
• Lápiz
• Fila
• Destornillador
• Cortatubos o sierra para metales
• 2 llaves ajustables
Tools Required
• Screwdriver
• File
• Pencil
• Pipe cutter or hacksaw
• 2 adjustable wrenches