@edimen'e Wu' er Fi|' r
|nsta|lation and Operating instructions
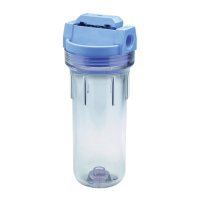
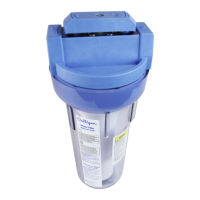
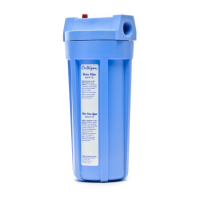
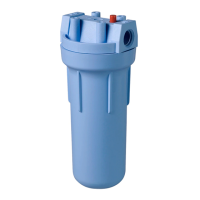
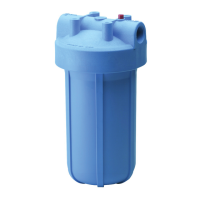
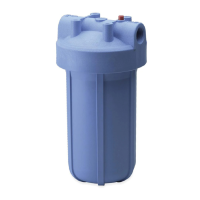
Mode[ HF-360
Specifications
PressureRange: 30 125psi(2.1 8.6bar)
TemperatureRange: 40 IO0°F(4.4 37.7°C)
Purrs included
valve-in-headhousingassembly instructions
IViiMteri_|s Required (not in©|uded)
For3/4"and1/2"mainwaterlineinstallation:
Installation[(it: 3/4-inchcompressionfittingsforcopperpipe
1/2-inchadapterfittingsforcopperpipe
Teflon_'tape
Note:Galvanizedfittingsmustbeusedforinstallationongalvanizedpipe.
TOO|S Required
pencil 2 adjustablewrenches
screwdriver pipecutterorhacksaw file
Pre©Mutio.s
WARNIN6:Donetusewithwaterthatismicrebielegicallyunsafeorofunknownquality
withoutadequatedisinfectionbeforeorafterthesystem.
CAUTION:Filtermustbeprotectedagainstfreezing,whichcancausecrackingofthefilter
andwaterleakage.
CAUTION:TherubberO-ringprovidesthewater-tightsealbetweenthecapandthebottom
ofthehousing.It isimportantthattheO-ringbeproperlyseatedinthegroovebelowthe
threadsofthehousingorawaterleakcouldoccur.
CAUTION:Becauseoftheproduct'slimitedservicelifeandtopreventcostlyrepairsorpossi-
blewaterdamage,suestronglyrecommendthatthebottomofallplastichousingsbereplaced
everyfiveyearsforclearandeverytenyearsforopaque.Ifthebottomofyourhousinghas
beeninuseforlongerthanthisperiod,itshouldbereplacedimmediately.Datethebottomof
anyneworreplacementhousingtoindicatethenextrecommendedreplacementdate.
CAUTION:Clearhousingsmaycrackorcrazeintimecausingfailureandleakageif exposed
toorganicsolvents,suchasthosefoundinaerosolspraysforcleaningproductsandinsecti-
cides.
NOTE:
* Forcoldwateruseonly.
* Donotinstallwheresystemwillbeexposedtodirectsunlight.
Makecertainthatinstallationcomplieswithallstateandlocallawsandregulations.
Thecontaminantsorothersubstancesremovedorreducedbytheselectedcartridgearenot
necessarilyinyourwater.Askyourlocalwatermunicipalityfora copyoftheirwateranaly-
sis,orhaveyourwatertestedbya reputablewatertestinglab.
, Afterprolongedperiodsofnon-use(suchasduringavacation)it isrecommendedthatthe
systembeflushedthoroughly.Letwaterrunfor5 6 minutesbeforeusing.
, Thefiltercartridgeusedwiththissystemhasa limitedservicelife. Changesintaste,odor,
color,and/orflowofthewaterbeingfilteredindicatethatthecartridgeshouldbereplaced.
* Someharmlessbacteriamayattackcellulosemediacartridges.Ifyourcartridgeseemsto
disintegrateordevelopsamustyormoldyodor,switchtoa syntheticmediacartridgeor
consultthemanufacturer.
Filtro de uguu puru sedimente
Instrucdones para la Instalaci6. y el Funcionainiento
Modelo HF-360
Especificuciones
MargendePresi6n: 30-725psi/ 2.1-8.6bar
MargendeTemperatura:40-100°F/ 4.4-37.7°C
Piezus Incluidus
Ensamblajecomp/etoparaelfiltroqueincluyeunavalvulaincorporadaenlatapa
Instrucciones
MotePioles Necesorios (no son induidosJ
Parainstalacfonenlatuberlaprincipalde3/4depulgada/19mm
yde1/2depulgada/13mm
Juegodeartlculosparalainstalaci6n:
AdaptadoresdeCompresi6nparaTuberladeCobrede3/4"depulgada/ 19mm
AdaptadoresdeCompresi6nparaTuberladeCobrede1/2"pulgada/ 13mm
CintaTefl6n@
NOTA:accesoriosgalv6nicostienenqueusarsenpara/asinstalacionesdetuberlagalv6nica.
Ifen'urnienta Necesuriu
kdpiz Cortatubososierraparametales
Destomillador 2klavesalustables Fila
Pi'e¢OUCJOneS
ADVERTENGA:nouseconaguaquetienepeligredernicrobiologla,o lacalidaddelaguaes
desconocidasindesinfedarlaadecuadamenteantesy/odespu_sde/sistemafiltrante.
PREGIIJGON:esteportafiltro(carcaza)tienequeprotegersecontracongelaci6n.Fracasode
hacerlopuederesultarengrietasenelpocillocausandogoteras.
PREG4UOON:laarendelaproveeunselbherm6ticoentre/atapayelpocilb.Esmuyimportantequela
arendelasesientaniveladaen/aranuradelpocilloogoterespuedenocurrir.
PREG_UG6N:debidoa laduraci6n/;tillimitadadeesteproductoyparaprevenirreparos
costososoposiblesda_oscousadosporelagua,nosotrosrecomendamosfuertementequetodos
lospocillospl6sticosdetodoslosportafiltros(carcazas)sereemp/azencadacincoa_oslospod-
lostransparentesycadadiezargoslospocillosopacos.Sielpocillosehausadoporrodsdeeste
tiempo,sedebereemplazarinmediatamente.Marqueelrondodelpocilloconlafechadelpod-
/onuevoo cuandoIoreemplazaparaayudarlearecordarcuando/otienequereemplazar.
PREGIUGON:contiempo,lospocillostransparentessepuedenrajarcausandogoteras,si
estanexpuestosasolventesorgdnicos,comolosqueseencuentranenunrociadoraerosolpara
productosdelimpiezaeinsecticidas.
NOTA:
. Parausoconaguafriasolamente.
. Noinstaleelpotrafiltrodondeest6expuestoa rayosdirectosdelso/.
. AsegOresedequelainstalad6nconformacontodaslasreglasyregulacionesbca/esyestatales.
. Loscontaminantesuotrassubstanciasquesequitano quesonreducidaspotloscartuchosill-
trantesqueustedseleccionanoseencuentranensuaguanecesariamente.Preguntepotuna
copiadelandlisisde/aguadesumunicipalidaddeagualocal,uobtengaunandlisisdesu
pozoprivadoporunlaboratoriorespetabledeanalizaragua.
. Despu6sdeperiodosegendidossinuso(p.el.Durantevacaciones)esrecomendadofluirelsis-
temacompletamente.Dejefluirelaguapot5-6minutosantesdeusarelagua.
. Elcartuchofiltranteusadoconestesistematieneunaduraci6nlimitada.@mbiosenelsabot,olor,
colory/oflujodelaguaqueestdfiltrandoindicaqueelcarluchofiltrantesedebereemplazar.
. Algunabacteriainocuapuedeatacarelcartuchohechoconagenteceluloso.Siparecequesucartu-
chofiltrantesedesintegrao adquiereuno/oramoho,cambiea uncartuchofiltrantehechocon
agentesint6ticooIlamealfabricante.
'1 11/03145052RevF
HF-360