Do you have a question about the Culligan 9" and is the answer not in the manual?
Explains the three basic components and their functions.
Controller tracks water flow to determine regeneration time.
Conductivity probe senses hardness front for efficient operation.
Monitors brine tank conditions for salt needs and issues.
Displays status and allows remote control up to 200 feet away.
Allows remote monitoring, scheduling, and software updates for the system.
Initiates regeneration via control valve or wireless remote.
Uses flow meter to determine optimum regeneration point based on usage.
Used to pre-rinse the softener resin bed or filter media.
Water and regenerate flow downward through the media tank.
Water flows down, regenerate flows up for efficient regeneration.
Uses only enough brine to regenerate exhausted resin for efficiency.
Manual adjustment for variable hardness bypass into softened water.
Soft water benefits for skin and shaving.
Use less soap and rinse easily with soft water.
Washes whiter, cleaner, uses less soap, fabrics last longer.
Soft water improves hair shine and manageability.
Glassware and dishes wash easier and cleaner.
Bathtubs, fixtures clean easily, no scum, saves time and aids.
Reduces scale, saves energy and extends appliance life.
Softened water not recommended for house plants due to sodium.
Benefits include reduction of chlorine taste and odor.
Explains water hardening by limestone and ion exchange process.
Details four types of iron and their removal.
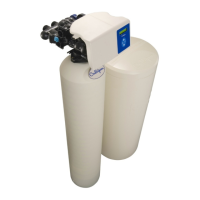
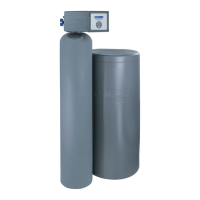
Lists the main components of the water conditioner.
Lists necessary tools and supplies for installation.
Checks water quality (hardness, iron) and pressure requirements.
Details pressure requirements and use of reducing valves.
Recommends installation locations and avoiding freezing.
Specifies space requirements and floor surface considerations.
Requirements for drain connections and air gaps.
Power requirements and transformer usage.
Instructions for positioning the media and brine tanks.
Steps for loading media into tanks and manifold installation.
Measures and installs the sensor cable length and plug.
Instructions for attaching the control valve to the tank adapter.
Recommends flow controls, nozzles, and throats for tank sizes.
Steps to replace the backwash flow control.
Instructions for re-attaching the softener cover.
Setting the manual adjustment for variable hardness bypass.
Details bypass valve connection and optional sweat kits.
Connects meter, bypass valve, and interconnecting pipe.
Details drain line length and height limitations.
Instructions for connecting the brine line tubing.
Filling the salt storage container with water and salt.
Setting the brine valve float level based on salt dosage.
Connecting power supply and Aqua-Sensor wire harness.
Explains the function of UP, DOWN, CHECK MARK, and CANCEL buttons.
The initial screen displayed when the unit is powered on.
Displays menu selections with a ">" symbol indicating the current selection.
Displays the serial number for the Smart Controller.
Displays firmware version and installation date.
Setting the current month for the system.
Setting the current day for the system.
Setting the current year for the system.
Setting the clock format to 12-hour or 24-hour.
Setting the current hour of the day.
Setting the current minute of the hour.
Selecting the type of water treatment unit.
Selecting the control valve type.
Choosing between US Inch and Metric units.
Setting the installation type as Residential or Commercial.
Selecting the brining type for regeneration.
Setting the diameter of the installed tank.
Entering the water hardness in grains per gallon.
System initializes capacity and displays status.
Procedure to update the system's date and time settings.
Displays the salt level status (OK, LOW).
Displays remaining softening capacity as percentage and gallons.
Displays the current water flow rate in gallons per minute.
Displays today's water usage in gallons.
Displays the average daily water usage for the configuration.
Displays the date of the next regeneration.
Displays the total water used for the configuration.
Displays remaining capacity of external filter if used.
Lists triggers for regeneration like meter, sensor, time, or manual selection.
System regenerates at a scheduled time.
System initiates regeneration immediately or on demand.
Initiates manual regeneration or sets bypass duration.
Steps for starting up the unit using the water meter.
Steps for starting up the unit using the Aqua-Sensor.
Checks power cord and outlet for proper connection.
Checks house fuse or circuit breaker panel.
Resets the timer after power interruption or time changes.
Checks if bypass valves are in the correct position.
Checks water supply, pressure, and bypass valve for flow issues.
Reprogramming regeneration schedule for higher water usage.
How errors are displayed and options to clear or view them.
Lists errors, reasons, and comments for clearing them.
Continues listing errors, reasons, and comments for clearing them.
Explains how to use the Cul-Flo-Valv® bypass valve.
Instructions to turn the knob clockwise to bypass the unit.
Instructions to turn the knob counter-clockwise to return to service.
Fields for model, serial numbers, and installation date.
Fields for recharge time, interval, household size, tank size.
Fields for total hardness, iron, and pH.
Diagram and list of parts for the control valve.
Diagrams and lists for remote display and accessories.
Diagrams and lists for tank assemblies.
Diagrams and lists for the brine system.
Diagrams and lists for the brine valve components.
Diagrams and lists for the 24" brine system.
Highlights service and expertise of Culligan dealers.
Emphasizes investment in family well-being and dealer support.
| Brand | Culligan |
|---|---|
| Model | 9" |
| Category | Water Filtration Systems |
| Language | English |