15
01021076
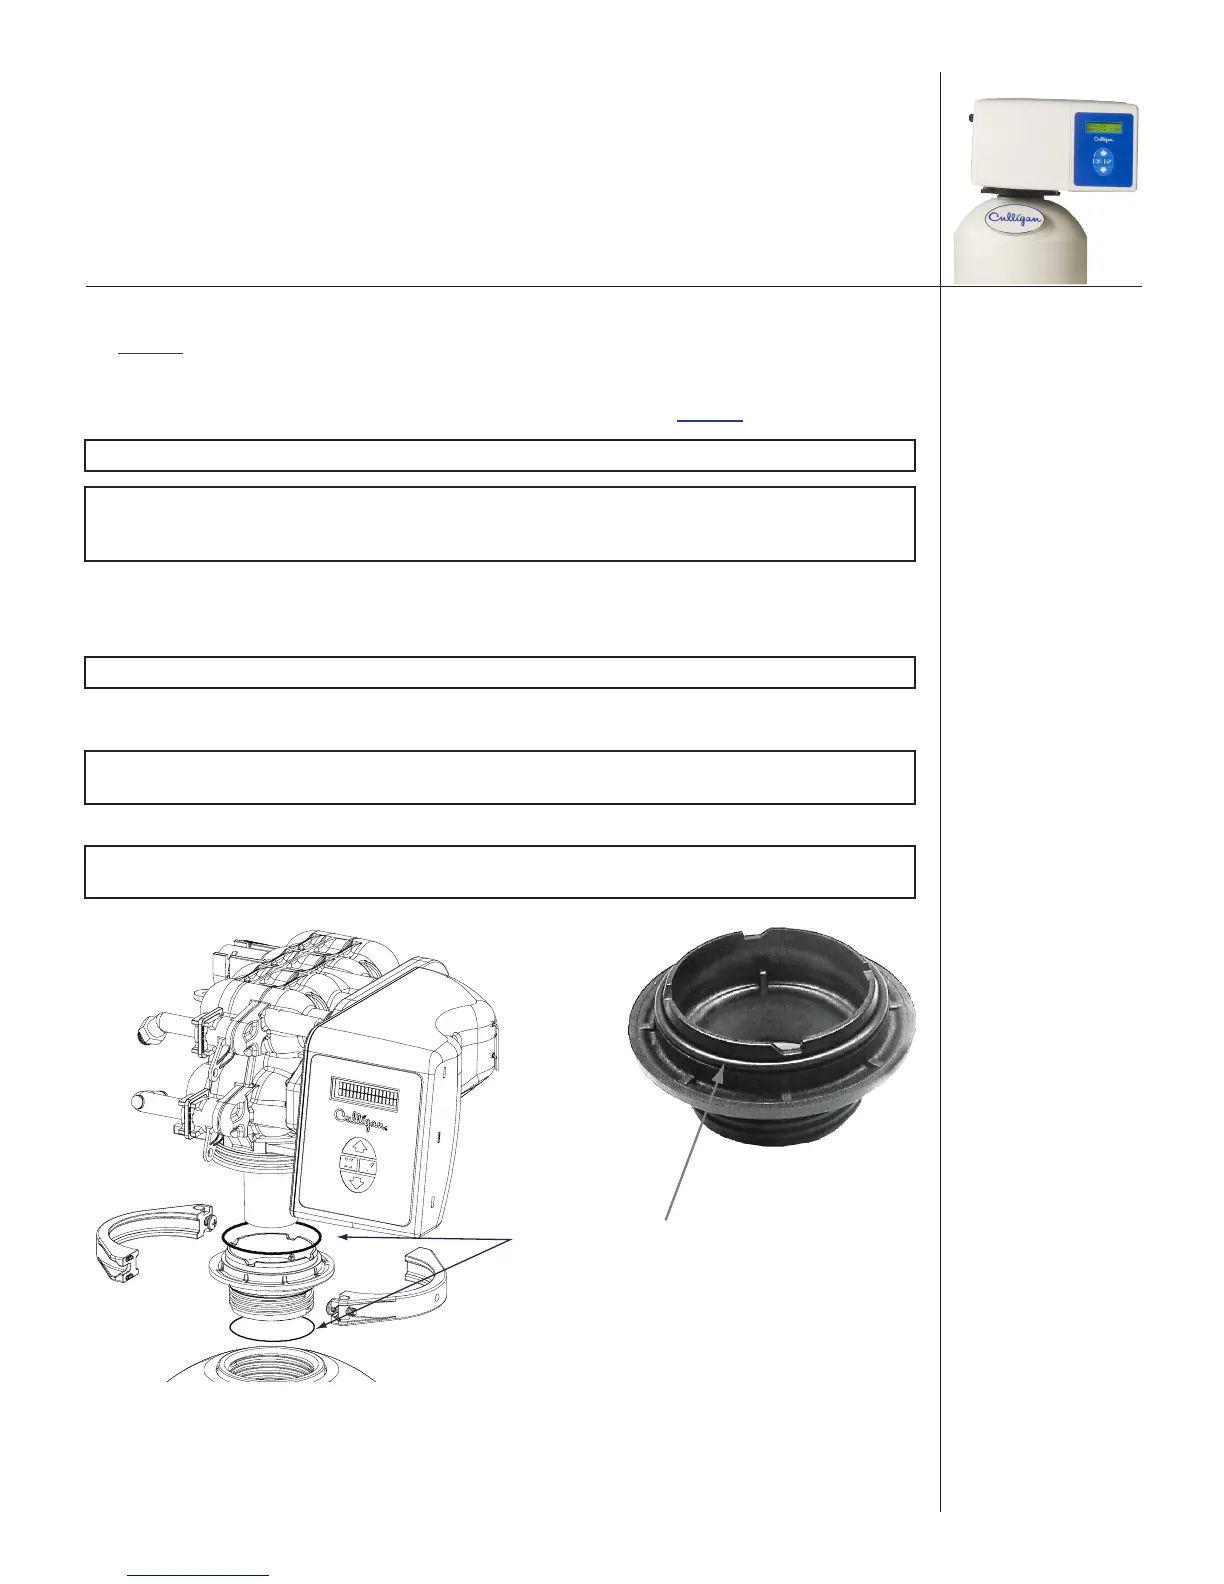
Mount the Control Valve
See Figure 4 for an illustration on mounting the control valve to the tank.
1. Assemble the O-rings, located in the parts pack, to the tank adapter.
2. The valve adapter O-ring sits on the first step on the adapter. See Figure 5.
NOTE Do not push the top O-ring down to the flange surface on the adapter.
NOTE The larger of the two O-rings in the parts should be positioned between the
adapter and the valve. Do not stretch the smaller O-ring onto the top of the
tank adapter.
3. Lubricate only the top o-ring on the tank adapter and the outlet manifold O-ring with silicone
lubricant.
4. Screw the adapter into the tank until the adapter bottoms out on the tank flange.
NOTE The adapter only needs to be tightened hand-tight to the tank flange.
5. Align the manifold with the center opening in the valve, and firmly press the valve onto the
adapter.
NOTE Make sure to push the valve straight down onto the manifold. If the valve is
cocked, it may cause the O-ring to slip off the manifold.
6. Assemble the tank clamp to the control, and tighten the clamp screw.
NOTE The clamp and valve will be able to rotate on the tank until pressure is
applied.
Add O-Rings
Figure 4. Mounting the control valve.
O-Ring
Figure 5. Valve adapter O-ring.