16
01021076
Backwash Flow Control, Eductor Nozzle—Throat
Use the recommended backwash flow control, eductor nozzle, and eductor throat for various size tanks.
See Table 2.
Refer to Figure 6 through Figure 9 and instructions below for changing the backwash flow control, eductor
nozzle, and eductor throat.
Unit Backwash Flow Nozzle Throat Brine Refill Flow
9" Upflow 2.5–3.1 gpm (#2 Brown)* Blue* Gray* 0.45 gpm
10" Upflow 2.5–3.1 gpm (#2 Brown)* Blue White 0.45 gpm
9" Downflow 2.5–3.1 gpm (#2 Brown)* Blue* Light Brown* 0.45 gpm
10" Downflow 2.5–3.1 gpm (#2 Brown)* Beige Light Brown 0.45 gpm
12" Downflow 3.0–3.2 gpm (#3 Green) Beige Light Brown 0.8 gpm
14" Downflow 5.3 gpm (Black) Green Blue 0.8 gpm
* Shipped assembled inside the control standard from factory
Table 2. Flow Restrictors.
NOTE For upflow models, the backwash and fast rinse default times are set at five
(5) minutes.
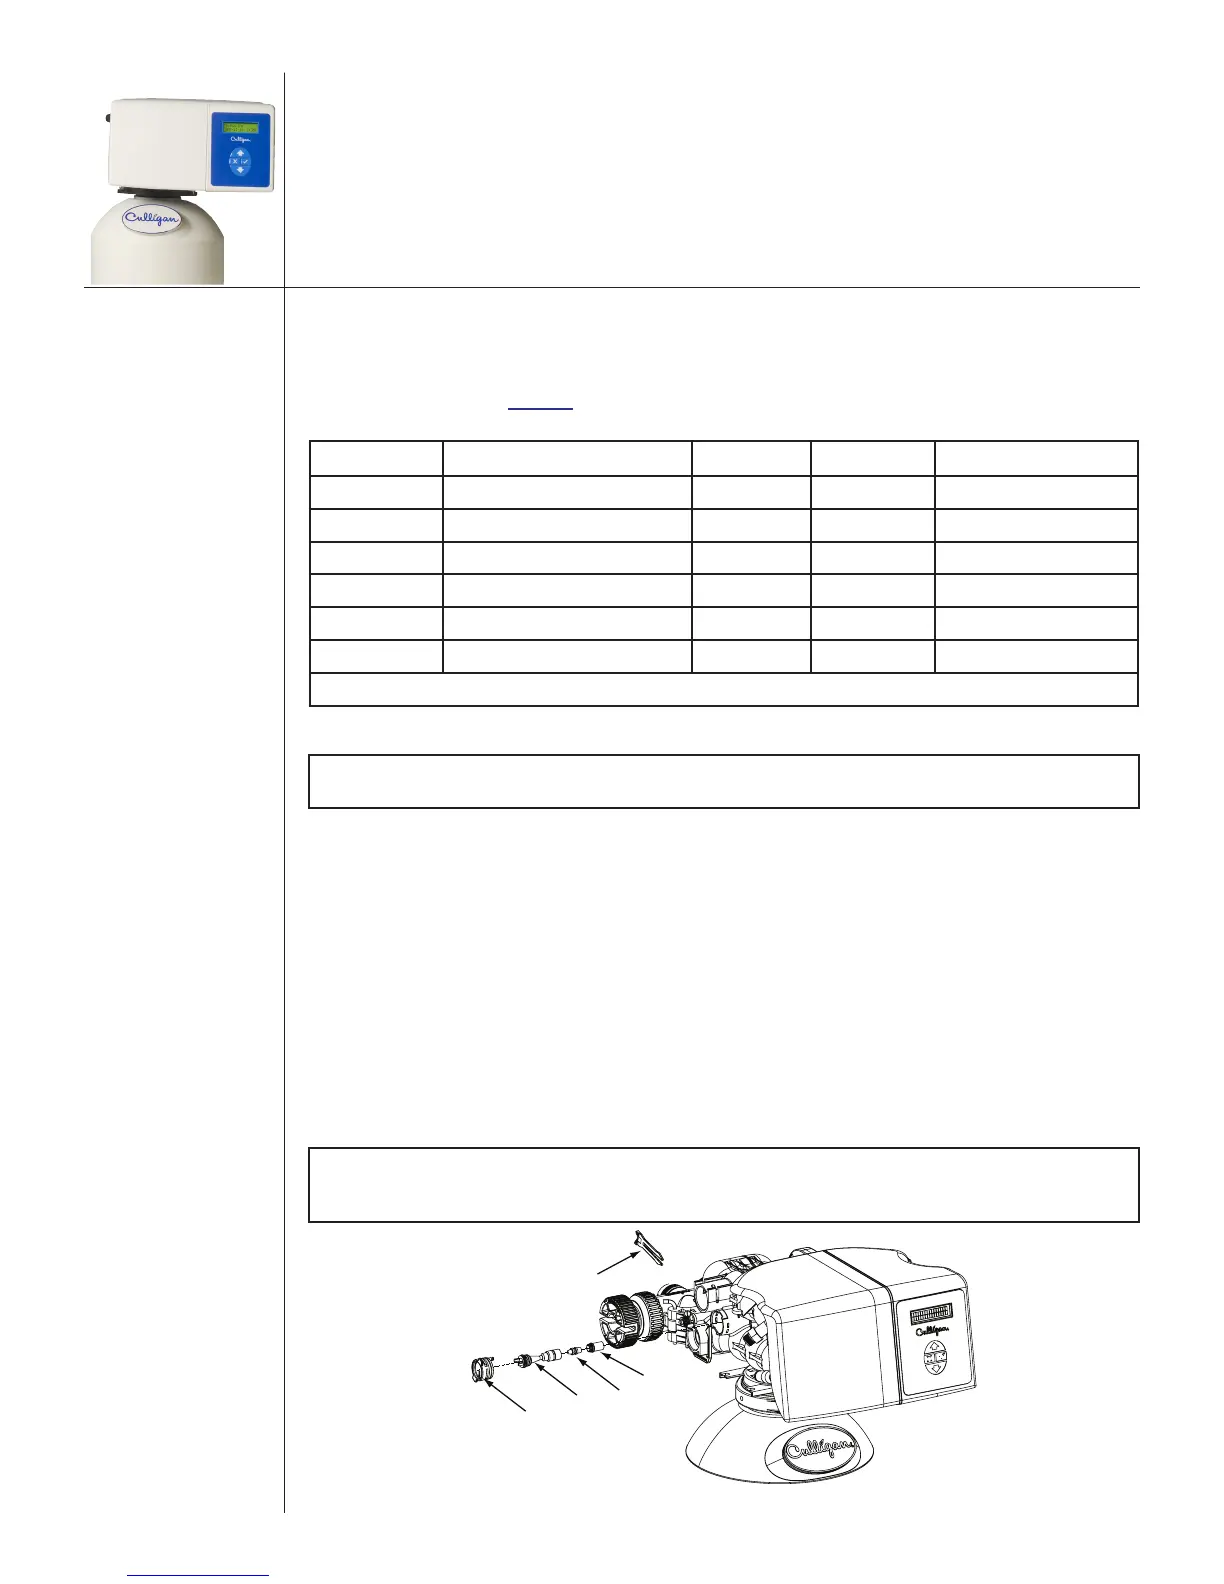
Eductor Nozzle and Throat Replacement
Refer to Figure 6 and the instructions below when changing the eductor nozzle and throat.
1. Remove the eductor cap clip.
2. Remove the eductor cap.
3. Remove the eductor assembly.
4. Remove the eductor screen from the assembly
5. Remove the blue nozzle and replace it with the correct nozzle. See Table 2.
6. Make sure to put the O-ring on the nozzle.
7. Replace the eductor throat if required.
8. Reverse the procedure to reassemble.
NOTE Observe the orientation of the arrow on the eductor cap. The arrow faces
down for downflow regeneration applications; the arrow faces up for
upflow/proportional brining regeneration applications.
Nozzle
Throat
Eductor Cap
Screen
Clip
Figure 6. Removing the eductor nozzle and throat.