12
01021076
Drain Facilities
Choose a nearby drain that can handle the rated drain flow (floor drain, sink or stand pipe). Refer to Ta-
ble 3 “Height of Discharge Above Floor Level Operating.” on page 21, for maximum drain line length.
NOTE Most codes require an anti-siphon device or air gap. Observe all local
plumbing codes and drain restrictions. The system and installation must
comply with all state and local laws and regulations.
Electrical Facilities
A 10-foot cord and wall mount plug-in transformer are provided. The customer should provide a recepta-
cle, preferably one not controlled by a switch that can be turned off accidentally. Observe local electrical
codes.
NOTE The softener works on 24 Volt/60 Hz electrical power only. Be sure to use the
included transformer. Be sure the electrical outlet and transformer are in an
inside location to protect from moisture. Properly ground to conform with all
governing codes and ordinances. Observe all local plumbing codes and drain
restrictions. The system and installation must comply with all state and local
laws and regulations.
NOTE P/N 01020620 and P/N 01018133 plug-in transformer are rated for indoor
installations only.
Placement
NOTE Read this section entirely before starting the installation. Follow all applicable
plumbing and electrical codes.
Refer to Figure 1 for system placement.
1. With the exception of media containers, open the remaining containers, remove all the compo-
nents, and inspect them before starting installation.
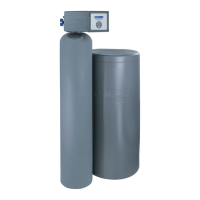
2. Set the media tank on a solid, level surface near water, drain and electrical facilities.
3. Set the brine system on a flat, smooth, solid surface as near the media tank as possible.
Tank Assembly
9” and 10” tanks are filled with media at the factory.
1. Before the unit can be connected to the plumbing, you must insert the manifold and load the
media into the tank for 12" and 14" units.
CAUTION! Do not lay the tank down unless a suitable lifting device
is available. Personal injury and damage to the unit can
result if dropped.