Installation Procedures
WARNING: Maximum water pressure (including any potential pressure spikes) of the water supply line to the system must not
exceed 80 PSI (5.5 bar). Failure to comply will void the warranty. The manufacturer accepts no liability for damage caused by
excessive water pressure.
1. Always check local plumbing codes before tapping into water supply line and drain line. Tap into the supply line with an
approved connector.
2. Once the unit and filtration system flushing procedures are complete, determine the best installation location. Consider
user convenience, electrical access and water access. The unit performs optimally if within 20 feet of a cold-water supply
line. Connect only to a cold water supply. Do not install feed water assembly on the hot water line. Do not place unit where
it will be exposed to rain, freezing temperatures or direct sunlight to the hot water supply.
3. The rear of the unit should be installed at least 2” (5 cm) from any vertical surface to ensure proper air circulation.
4. Use only ¼” OD copper or plastic tubing
to connect your water supply and drain
to the cooler water inlet and drain port.
The inlet and drain ports are quick
connect fittings. Units are shipped with
plugs in each fitting. Remove the plugs
prior to inserting water supply and drain
lines. A water shut off valve is
recommended between the inlet
connection to the cooler and the water
supply connection.
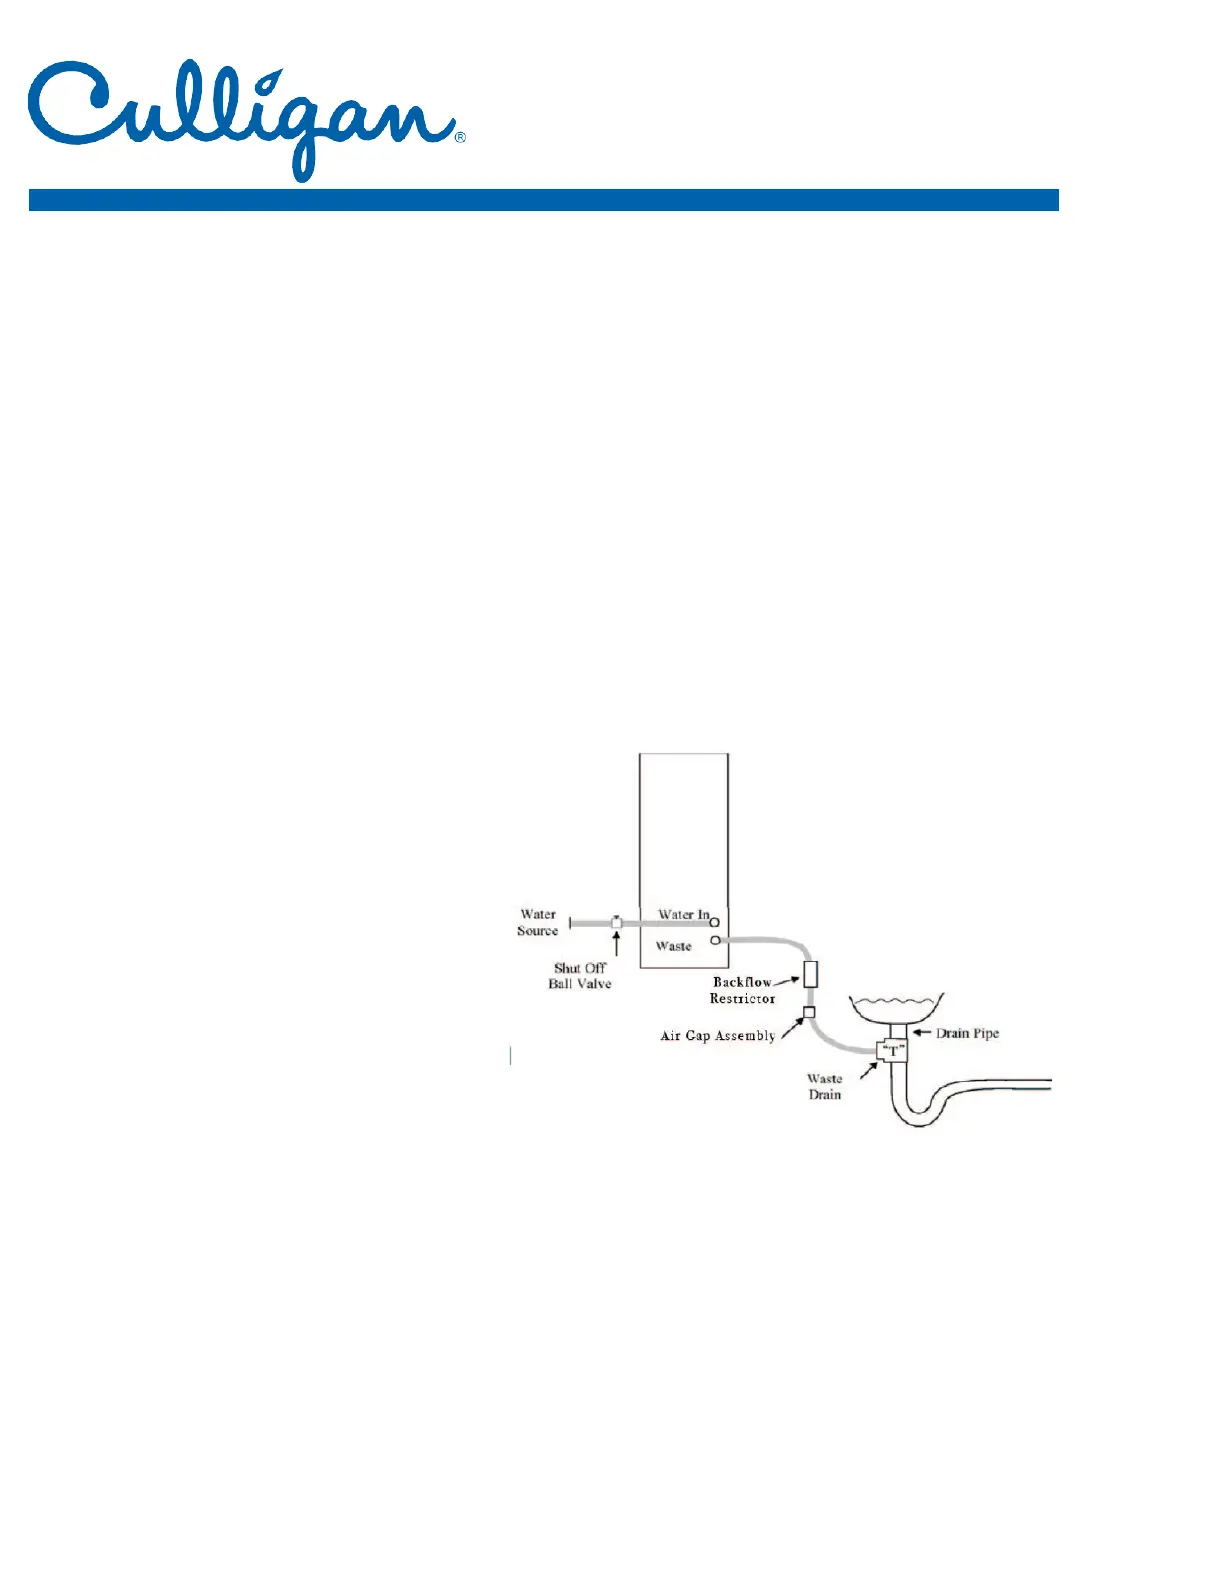
5. The Ascent CT-RO system requires a waste or
drain line for the RO membrane. The drain line should include an Air Gap and back flow restrictor. See diagram.
6. Check the available power supply to assure proper electrical service. In the U.S., the voltage specification is 120 volt 60
hertz. Voltage outside of this specification will affect the system performance.
7. Water filtration
system will begin operating, verify proper water production.
8. Dispense water from hot tank prior to turning the heating system switch on the back of the unit to the “ON” position.
9. Perform final inspection of all installed water lines to ensure a leak free installation.
10. Instruct user on proper system operation.






 To Next Page