Rotate the crankshaft so that two of the connecting rods are at
bottom dead center. Refer to Procedure 000-017 in Section 0.
(/qs3/pubsys2/xml/en/procedures/133/133-000-017.html)
CAUTION
Do not damage the fracture-split surface on the connecting
rod or connecting rod cap while the connecting rod caps are
removed. If the fracture-split surface is damaged, the
connecting rod and connecting rod cap must be replaced to
reduce the possibility of engine damage. Incorrect assembly
can damage the rod.
Do not remove the capscrews at this time.
Loosen the connecting rod capscrews.
Hit the connecting rod capscrews with a rubber hammer to
loosen the rod caps.
CAUTION
Prevent damage to the fracture-split connecting rod. Do not
set the connecting rod or rod cap on the fracture-split
connection. This may cause polishing and damage to the
mating surface.
Remove the capscrews and the rod cap. Note the
corresponding rod and rod cap as well as the orientation of the
rod cap.
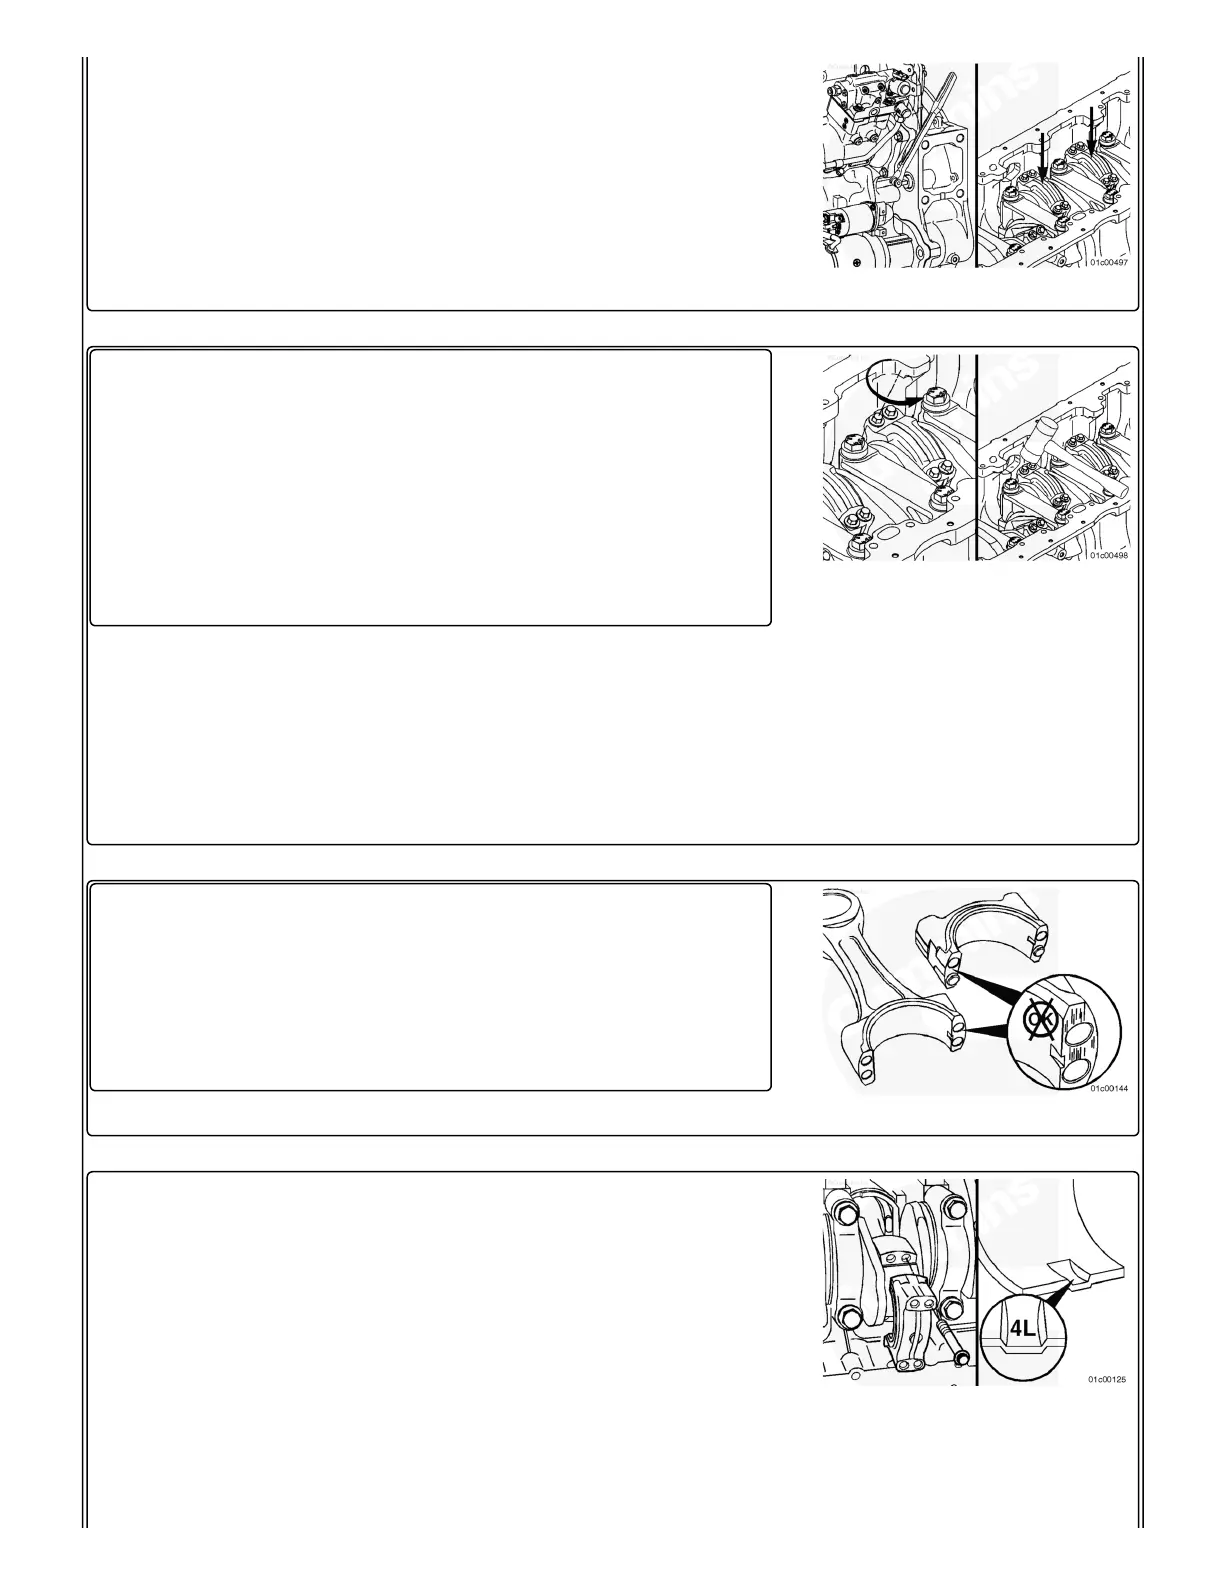
Be careful not to damage the fracture-split connection.
DO NOT set the rod cap down on the fracture-split face.
Note : Both the rod cap and the connecting rod are
serialized on one face to make sure of proper
orientation.