Installation Instructions
Orbit Marine IC PRO LED Light Fixture Installation
Fixture Installation
Step 1. Unpack light fixture and components. Remove any plastic film on light fixture (A).
Step 2. Slide the adjustable docking legs (B) on the side of the light fixture (A) to match the length of
your aquarium. (Refer to Orbit Adjustable Tank Mounting Bracket or Orbit Hanging Kit instructions if
using those instead of sliding docking mounts.)
Step 3. Set fixture on aquarium and ensure docking legs fit snug on edges of aquarium.
INSTALLING LOOP IC CONTROLLER AND IC LIGHT & WAVE PUMP MANIFOLD HUB
Step 4. Choose a location underneath your aquarium cabinet free of excessive moisture and/or
saltwater creep. Note: If you want the LOOP
® IC Cont
r
oller (F) outside cabinet, ensure the mounting
location is 8-12” away from where the IC Light & Wave Pump Manifold HUB (D) will be mounted.
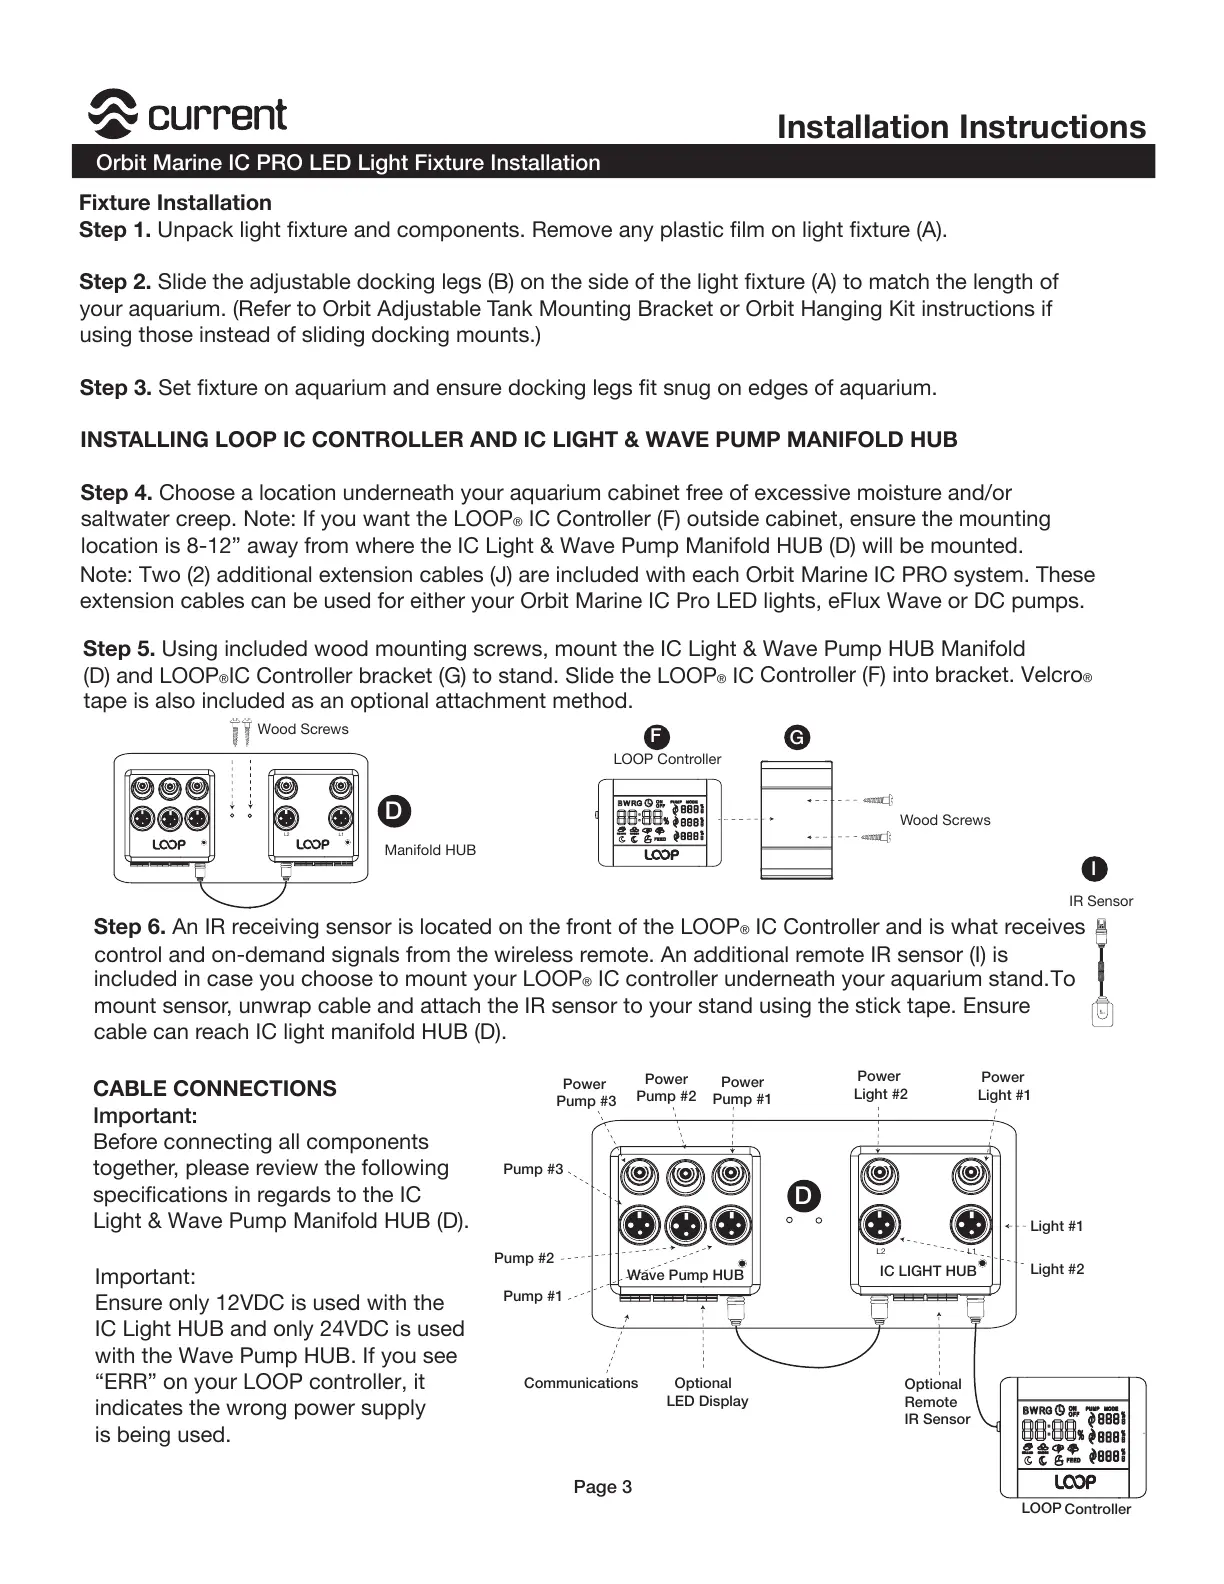
Step 5. Using included wood mounting screws, mount the IC Light & Wave Pump HUB Manifold
(D) and LOOP
®IC Contr
oller bracket (G) to stand. Slide the LOOP
® IC
Controller (F) into bracket. Velcro
®
G
F
LOOP Controller
Manifold HUB
Wood Screws
Wood Screws
!
"
I
IR Sensor
Step 6. An IR receiving sensor is located on the front of the LOOP® IC Controller and is what receives
included in case you choose to mount your LOOP
® IC controller underneath your aquarium stand. To
mount sensor, unwrap cable and attach the IR sensor to your stand using the stick tape. Ensure
cable can reach IC light manifold HUB (D).
CABLE CONNECTIONS
Important:
Before connecting all components
together, please review the following
specifications in regards to the IC
Light & Wave Pump Manifold HUB (D).
IC LIGHT HUB
Port#3= Communications
Page 3
D
L1L2
D
L1L2
Wave Pump HUB
Power
Light #1
Power
Light #2
Power
Pump #1
Power
Pump #2
Power
Pump #3
Light #1
Pump #3
Pump #2
Pump #1
Light #2
Optional
Remote
IR Sensor
LOOP
Controller
Optional
LED Display
Communications
Important:
Ensure only 12VDC is used with the
IC Light HUB and only 24VDC is used
with the Wave Pump HUB. If you see
“ERR” on your LOOP controller, it
indicates the wrong power supply
is being used.
Note: Two (2) additional extension cables (J) are included with each Orbit Marine IC PRO system. These
extension cables can be used for either your Orbit Marine IC Pro LED lights, eFlux Wave or DC pumps.
control and on-demand signals from the wireless remote. An additional remote IR sensor (I) is
tape is also included as an optional attachment method.