EasyManua.ls Logo

Curt Manufacturing 56165 - User Manual

Curt Manufacturing 56165
2 pages
Print Icon
To Next Page IconTo Next Page
Loading...
INSTALLATION INSTRUCTIONS
CUSTOM WIRING HARNESS
WIRING LOCATION GUIDEAPPLICATIONS
NOTICE
WARNING
TOOLS NEEDED
Signal Circuits - 3.0 amps per side
Tail / Running Circuits - 6.0 amps total
Check vehicle owner's manual or contact
the vehicle manufacturer for more information.
Ratchet
10mm socket
Phillips screwdriver
Panel trim removal tool
The battery connection must be fuse-protected, 10-amp max.
Exceeding the product rating can cause loss of warranty,
overheating and potential fire. Do not exceed product rating
or tow vehicle lamp load rating, whichever is lower.
Make Model
Toyota Rav4
WARNING: DO NOT EXCEED PRODUCT RATING OR TOW VEHICLE LAMP LOAD RATING, WHICHEVER IS LOWER
SUVS, MINI & FULL-SIZED VANS
(
S
)
Representative vehicle shown below
S3 - Behind driver side rear access panel
S4 - Behind passenger side rear access panel
S3 S4
All steps must be followed to ensure the wiring harness
will function properly. Once installed, test for proper function
by using a test light or connecting a properly wired trailer.
PAGE 1 • 56165-INS-RB
Question and Answer IconNeed help?

Do you have a question about the Curt Manufacturing 56165 and is the answer not in the manual?

Summary

Vehicle Applications

Wiring Location Guide

S3 - Driver Side Rear Access Panel

Location for driver side rear access panel wiring.

S4 - Passenger Side Rear Access Panel

Location for passenger side rear access panel wiring.

Important Notices and Tools

Critical Safety Warnings

Installation Steps

Step 1: Panel Removal

Remove rear scuff panel, trunk floor coverings, storage covers, and privacy screen.

Step 2: Locate Wiring Harness

Pull out rear trim panels to locate vehicle taillight wiring harness connectors.

Step 3: Separate Connectors (Driver Side)

Carefully separate taillight housing connectors on the driver side.

Step 4: Insert Harness (Driver Side)

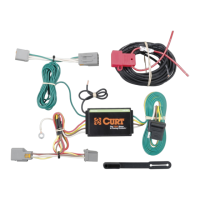
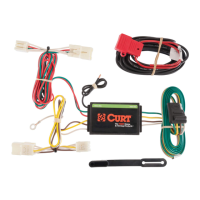
Insert yellow wire end of harness between separated connectors, ensuring secure fit.

Step 5: Ground Wire Installation

Find a suitable ground point and secure the white ground wire with a ring terminal.

Step 6: Route Harness to Passenger Side

Route green wire end to passenger side and repeat steps 3 & 4.

Step 7: Route Power Wire

Route the black power wire from the vehicle battery as instructed.

Step 8: Mount Converter Box

Adhere the black converter box to a flat spot near the taillight.

Step 9: Route 4-Flat Connector

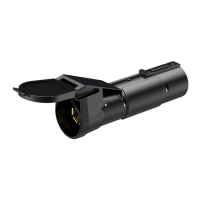
Route the 4-flat connector for use and secure any loose wires.

Step 10: Reinstall and Protect

Reinstall removed items and install dust cover to prevent corrosion.

Curt Manufacturing 56165 Specifications

General IconGeneral
BrandCurt Manufacturing
Model56165
CategoryAutomobile Accessories
LanguageEnglish

Related product manuals