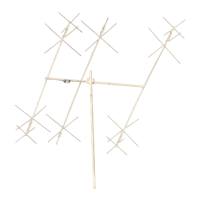
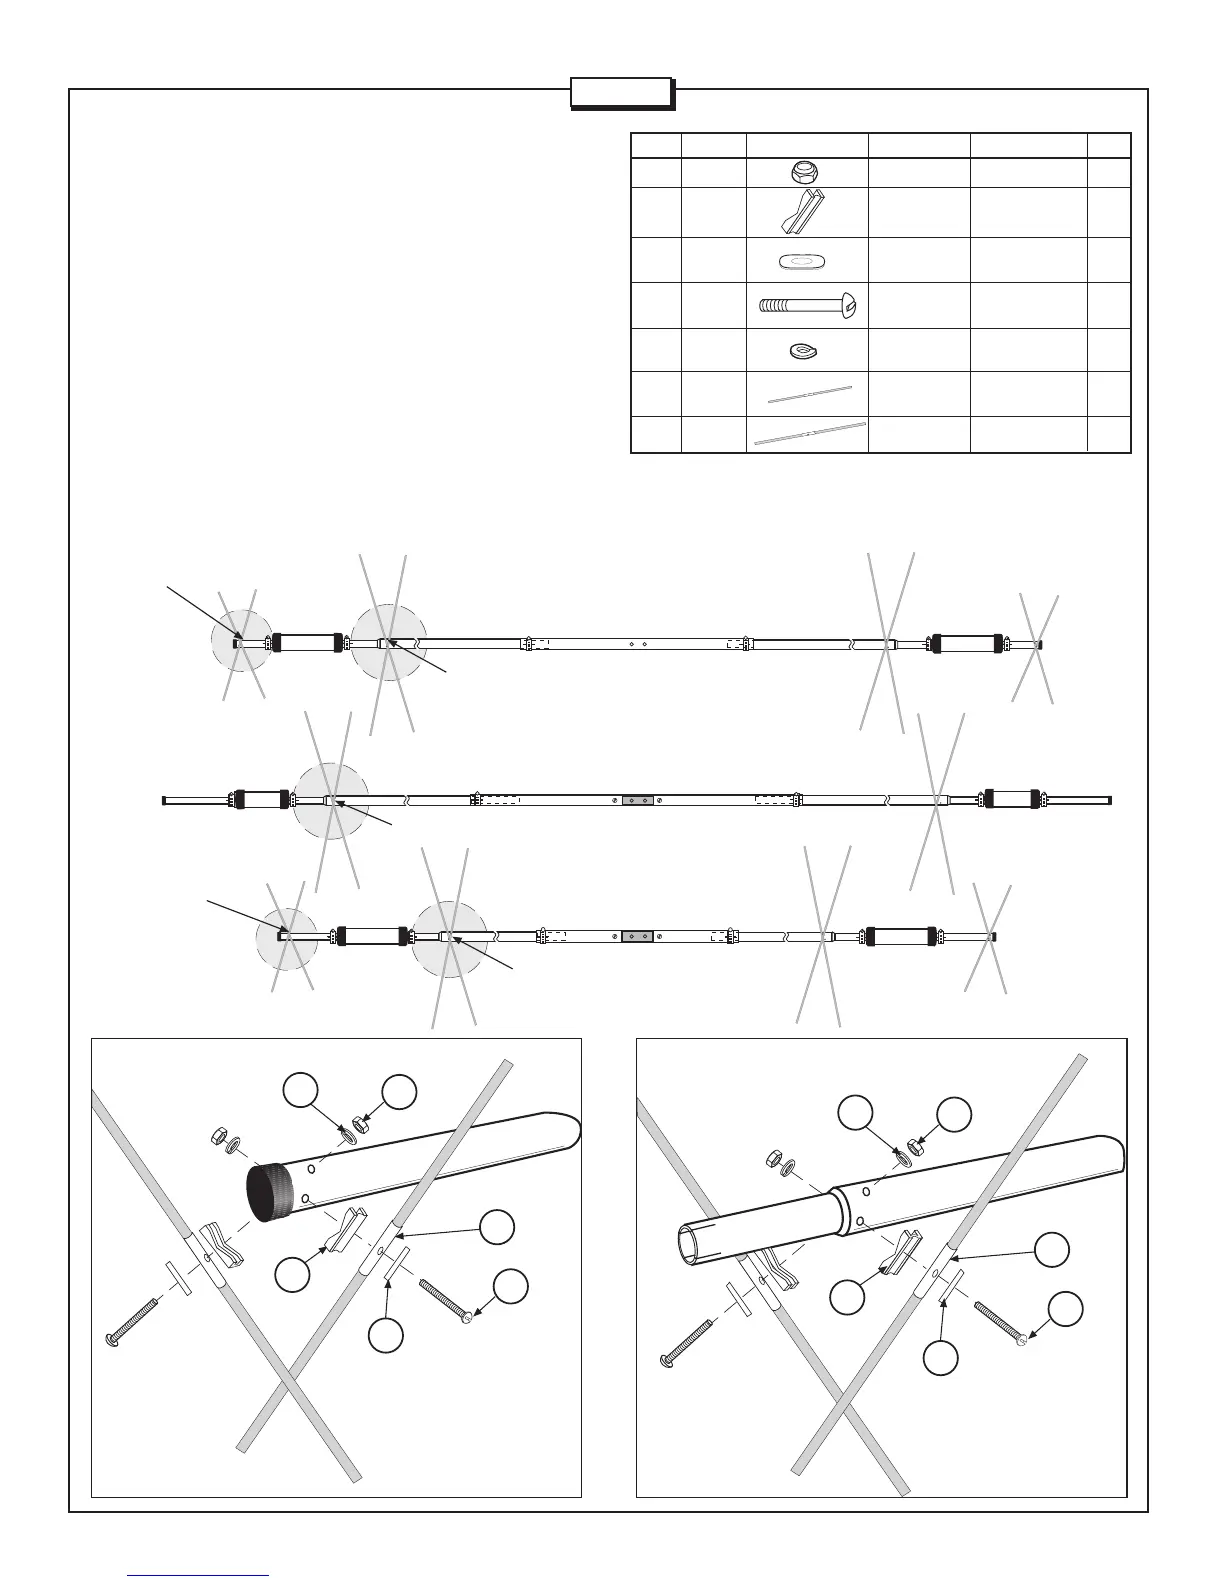
Raise each element assembly off the ground to attach the X-hats to the
elements. For element #1, place the 41-inch X-hat rods (X41) and element
brackets (26) on elements EB as shown in Figure 3B. Fasten the rods
and brackets in place using 8-32 machine screws (31), half washers (28),
lock washers (41), and hex nuts (11). Place the 26-inch X-hat rods (X26)
and element brackets (26) on elements EC as shown in Figure 3A. Fasten
the rods and brackets in place using 8-32 machine screws (31), half
washers (28), lock washers (41), and hex nuts (11).
For element #2, place the 41-inch X-hat rods (X41) and element brackets
(26) on elements EB as shown in Figure 3B. Fasten the rods and brackets
in place using 8-32 machine screws (31), half washers (28), lock washers
(41), and hex nuts (11).
.
3-X-HAT ASSEMBLY
X41
11
41
31
28
26
2 PLACES
2 PLACES
2 PLACES
2 PLACES
2 PLACES
2 PLACES
X26
11
41
31
28
26
2 PLACES
2 PLACES
2 PLACES
2 PLACES
2 PLACES
2 PLACES
FIGURE 3A
FIGURE 3B
SEE FIGURE 3B
SEE FIGURE 3A
SEE FIGURE 3B
SEE FIGURE 3A
SEE FIGURE 3B
KEY P/N DISPLAY DESC SIZE QTY
11 010011 SS HEX NUT 8-32 20
26 190026 ELEMENT 7/8" x 7/8” 20
BRACKET (.2.2 x 2.2 cm)
28 190028 HALF 1-1/8” x 3/8”" 20
WASHER (2.9 x 1 cm)
31 010231 SS SCREW 8-32 x 1-3/4" 20
(3.81 cm)
41 011941 SS LOCK 8-32 20
WASHER
X26 XHR26 ALUMINUM ROD 3/16” x 26” 8
(0.5 x 66 cm)
X41 XHR41 ALUMINUM ROD 3/16” x 41” 12
(0.5 x 104.1 cm)
For element #3, place the 41-inch X-hat rods (X41) and element brackets (26) on elements EB as shown in Figure 3B. Fasten the rods and brackets
in place using 8-32 machine screws (31), half washers (28), lock washers (41), and hex nuts (11). Place the 26-inch X-hat rods (X26) and element
brackets (26) on elements EC as shown in Figure 3A. Fasten the rods and brackets in place using 8-32 machine screws (31), half washers (28),
lock washers (41), and hex nuts (11)
ELEMENT #3
ELEMENT #2
ELEMENT #1
Page 6
MA5B