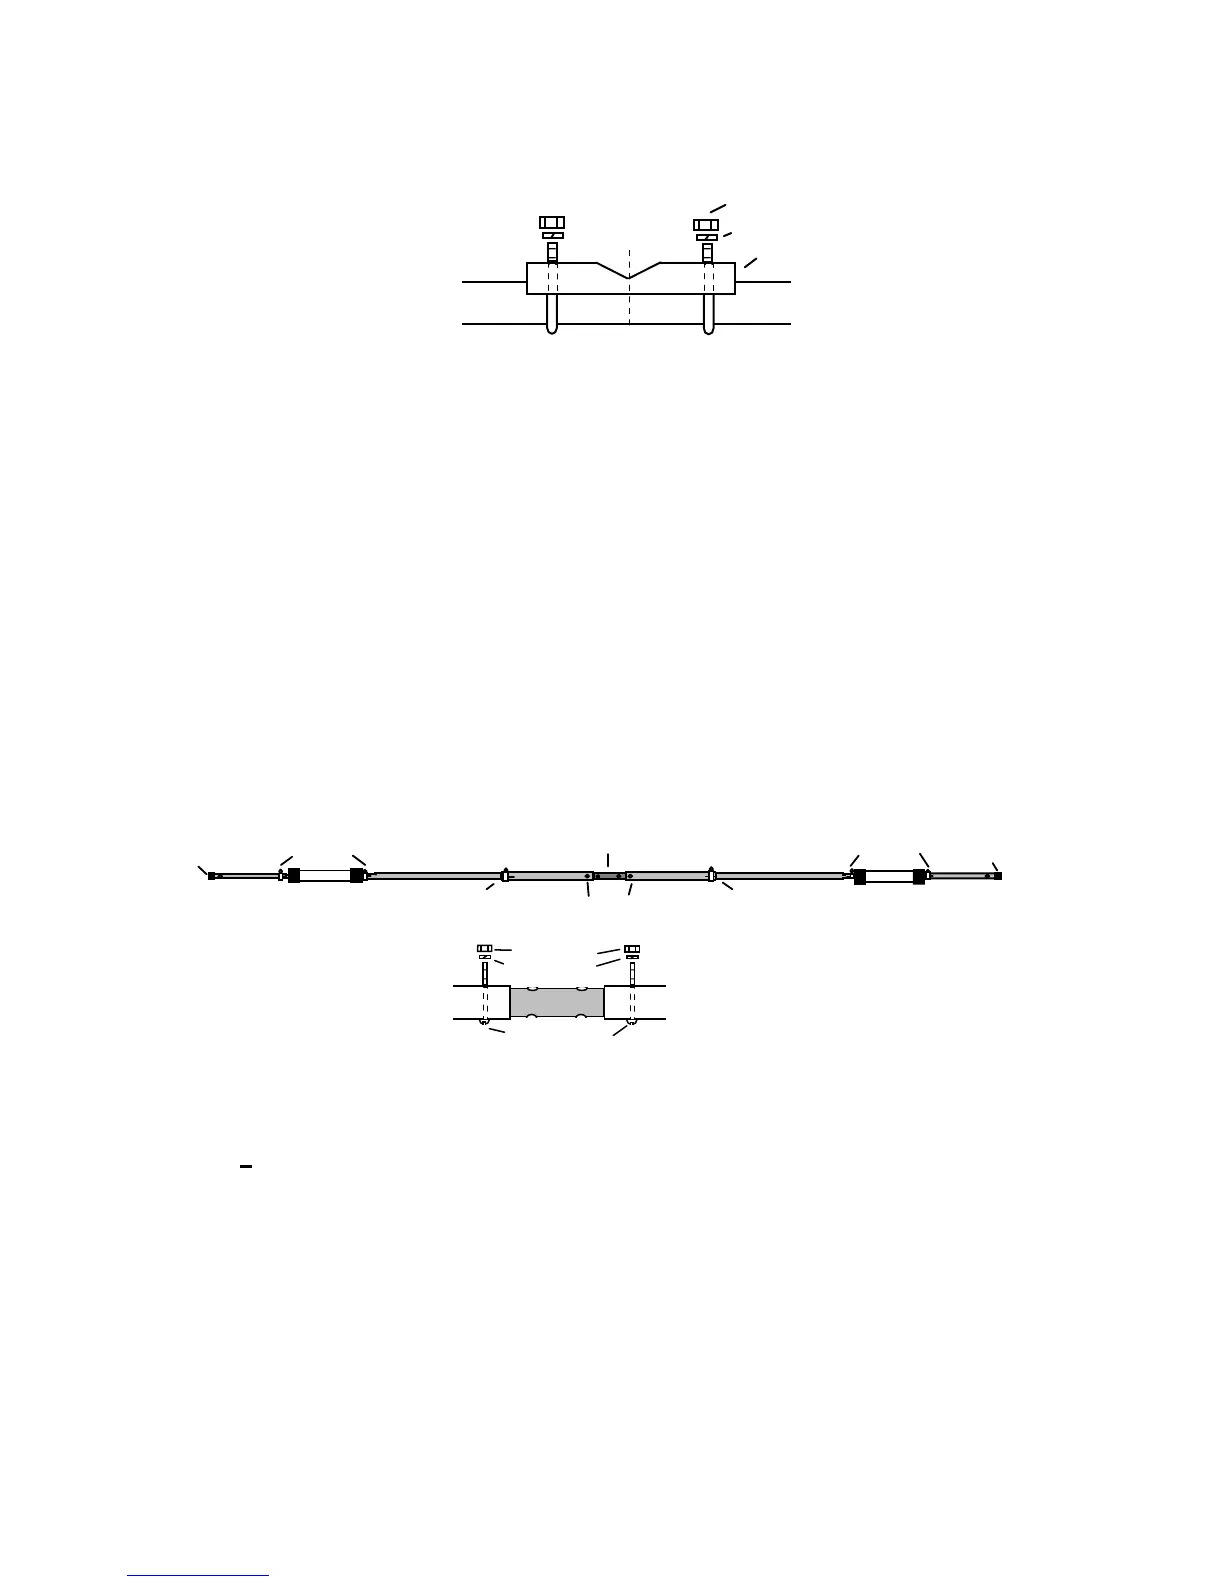
Top View, Mast-to-Boom Plate Installation
Boom
3" U-Bolt (2)
Boom-to-Mast Plate (1)
5/16" Lockwasher (4)
5/16" x 18 Nut (4)
57" mark
Step-2. Assemble the 20/15/10-Meter Driven Element using parts listed below:
[ ] 2 Element Tube, 1-1/8" OD x 34", slot one end, drilled other end (MA5BEA)
[ ] 2 Element Tube, 1" swaged to 7/8" x 36", slotted one end (MA5BEB)
[ ] 2 Element Tube, 7/8" OD x 7" slotted one end, drilled other end (MA5BEC)
[ ] 2 Trap, 21/28 MHz driven element, MT1
[ ] 1 Driven-element insulator, fiberglass, 1" OD x 10"
[ ] 4 Worm clamp, 7/8" to 1"
[ ] 2 Worm clamp, 1" to 1-1/4"
[ ] 2 8-32 x 1-3/4" Screw
[ ] 2 #8 Lock washer
[ ] 2 8-32 Nut
[ ] 2 7/8" Plastic end cap
20/15/10 Driven Element Assembly
EA
EA
EB
EB
EC EC
MT1
MT1
<
>
7/8"-1" worm clamp (2)
End Cap
7/8"-1" worm clamp
End Cap
Insulator
8-32 x 1-3/4" screw (2)
(Insert 4") (Insert 4")
1" to 1-1/4"
Worm Clamp
1" to 1-1/4"
Worm Clamp
1-3/4" 8-32 Screw
8-32 Hex Nut
#8 Lockwasher
Insulator
Installation Notes: Insert the insulator attachment screws in same direction and tighten
securely (these screws will become the connection points for the feedline). Insert EB
tubes 4 inches into EA tubes. Install all traps with the arrow pointing away from the
boom. Install end caps on EC tubes.