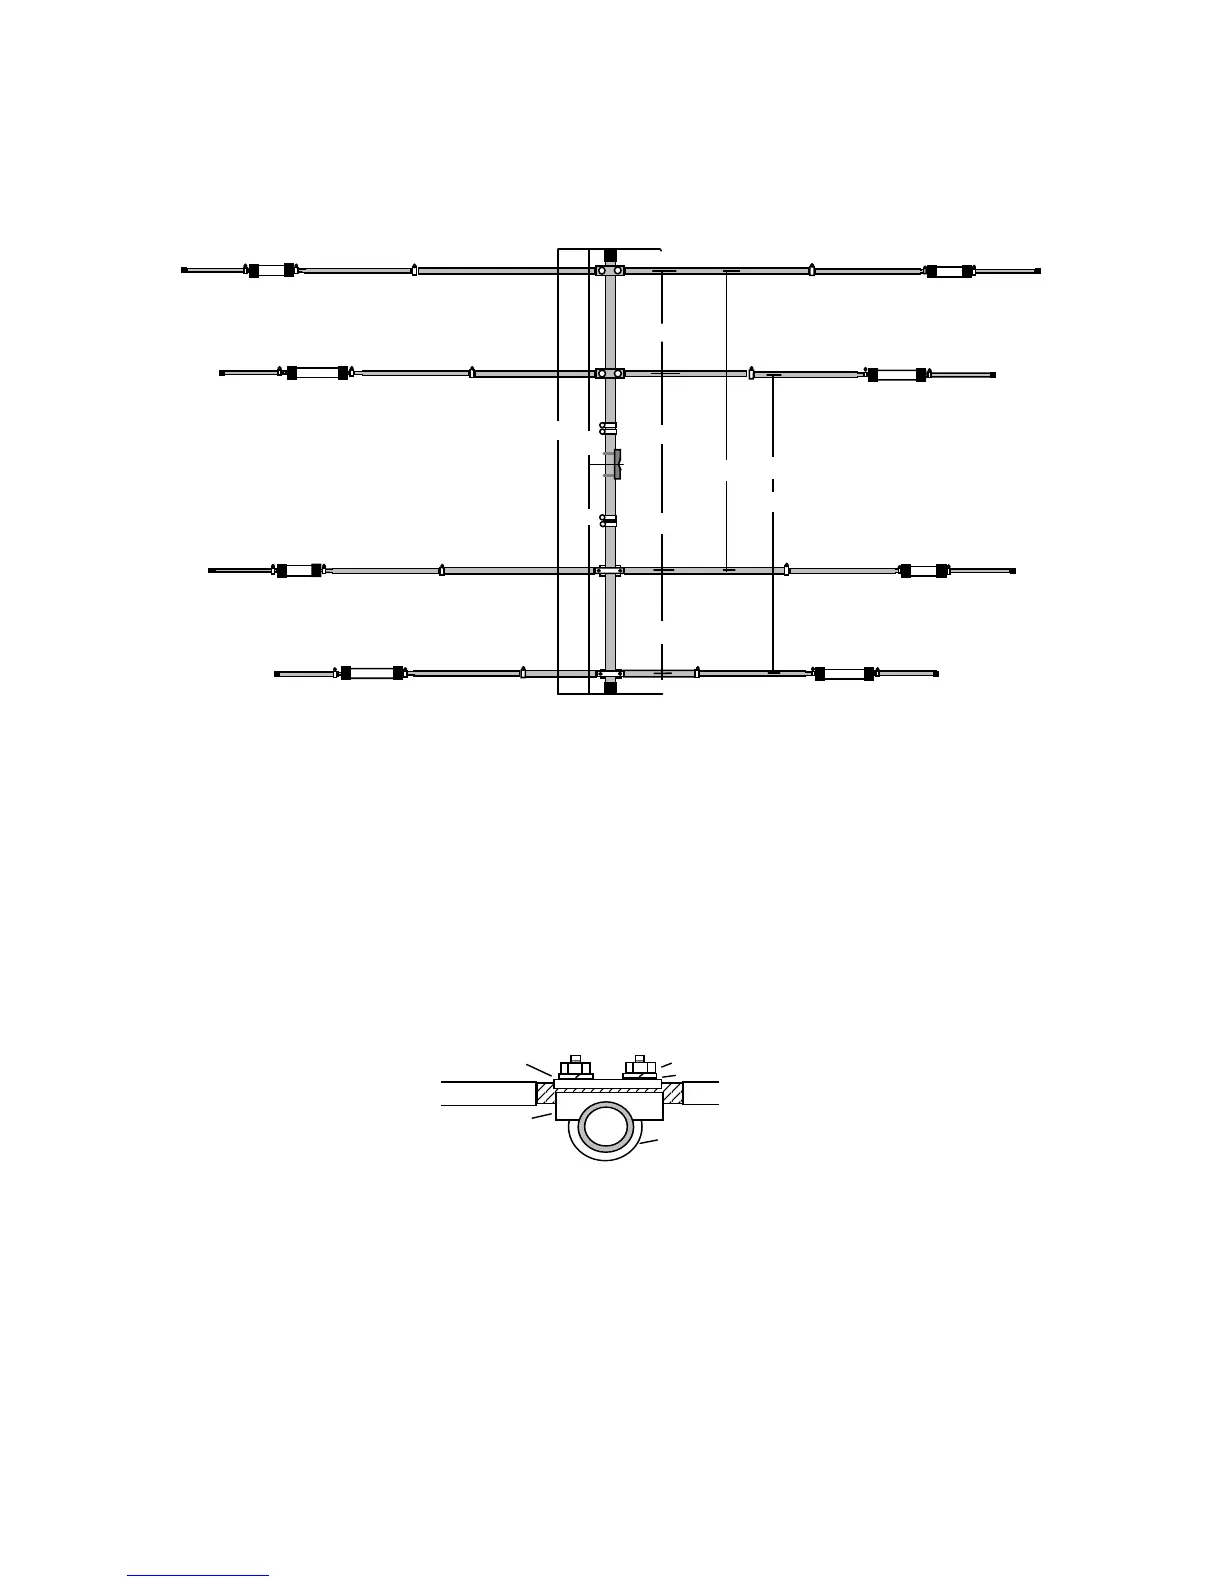
Element Spacing
<
<
<
<
>
>
>
>
17/12 DE
20/15/10 DE
20/15/10 REF
29"
53"
29"
111" Total
82" - 17/12M Spacing
82" - 20/15/10M Spacing
117" Boom
3"
60"
57"
3"
CG
17/12 REF
Installation Notes: Measure and mark each element location before installing the
element (see diagram above). Install the elements on top of the boom and, once
secured in place, rotate the traps so their drain holes face straight up (when the
completed antenna is installed, it will be flipped over and the drain holes will face the
ground). Refer to the Element Mounting Diagram below for details:
Element Mounting Diagram
Driven Element
1/4-20 Hex Nut (2)
1/4" Lockwasher (2)
Backing Plate
Element-to-Boom
1/4-20 x 1-1/2" x 3-3/4" U-Bolt (1)
Clamp
Boom
Step-7. Install X-hats on the HF elements: Before installing X-hats, double-check all
element measurements against the diagram below and correct as needed. Also, ensure
all elements are aligned parallel to each other and the boom-to-mast plate is
perpendicular to the elements by 90 degrees: