Step-3. Assemble the 17/12-Meter Driven Element using parts listed below:
[ ] 2 Element Tube, 1-1/8" OD x 46", slot one end, drilled other end (MA5BED)
[ ] 2 Element Tube, 1" swaged to 7/8" x 36", slotted one end (MA5BEB)
[ ] 2 Element Tube, 7/8" OD x 12" slotted one end (MA5BEE)
[ ] 2 Trap, 24.9 MHz driven element, MT2
[ ] 1 Driven-element insulator, fiberglass, 1" OD x 10"
[ ] 4 Worm clamp, 7/8" to 1"
[ ] 2 Worm clamp, 1" to 1-1/4"
[ ] 2 8-32 x 1-3/4" Screw
[ ] 2 #8 Lock washer
[ ] 2 8-32 Nut
[ ] 2 7/8" Plastic end cap
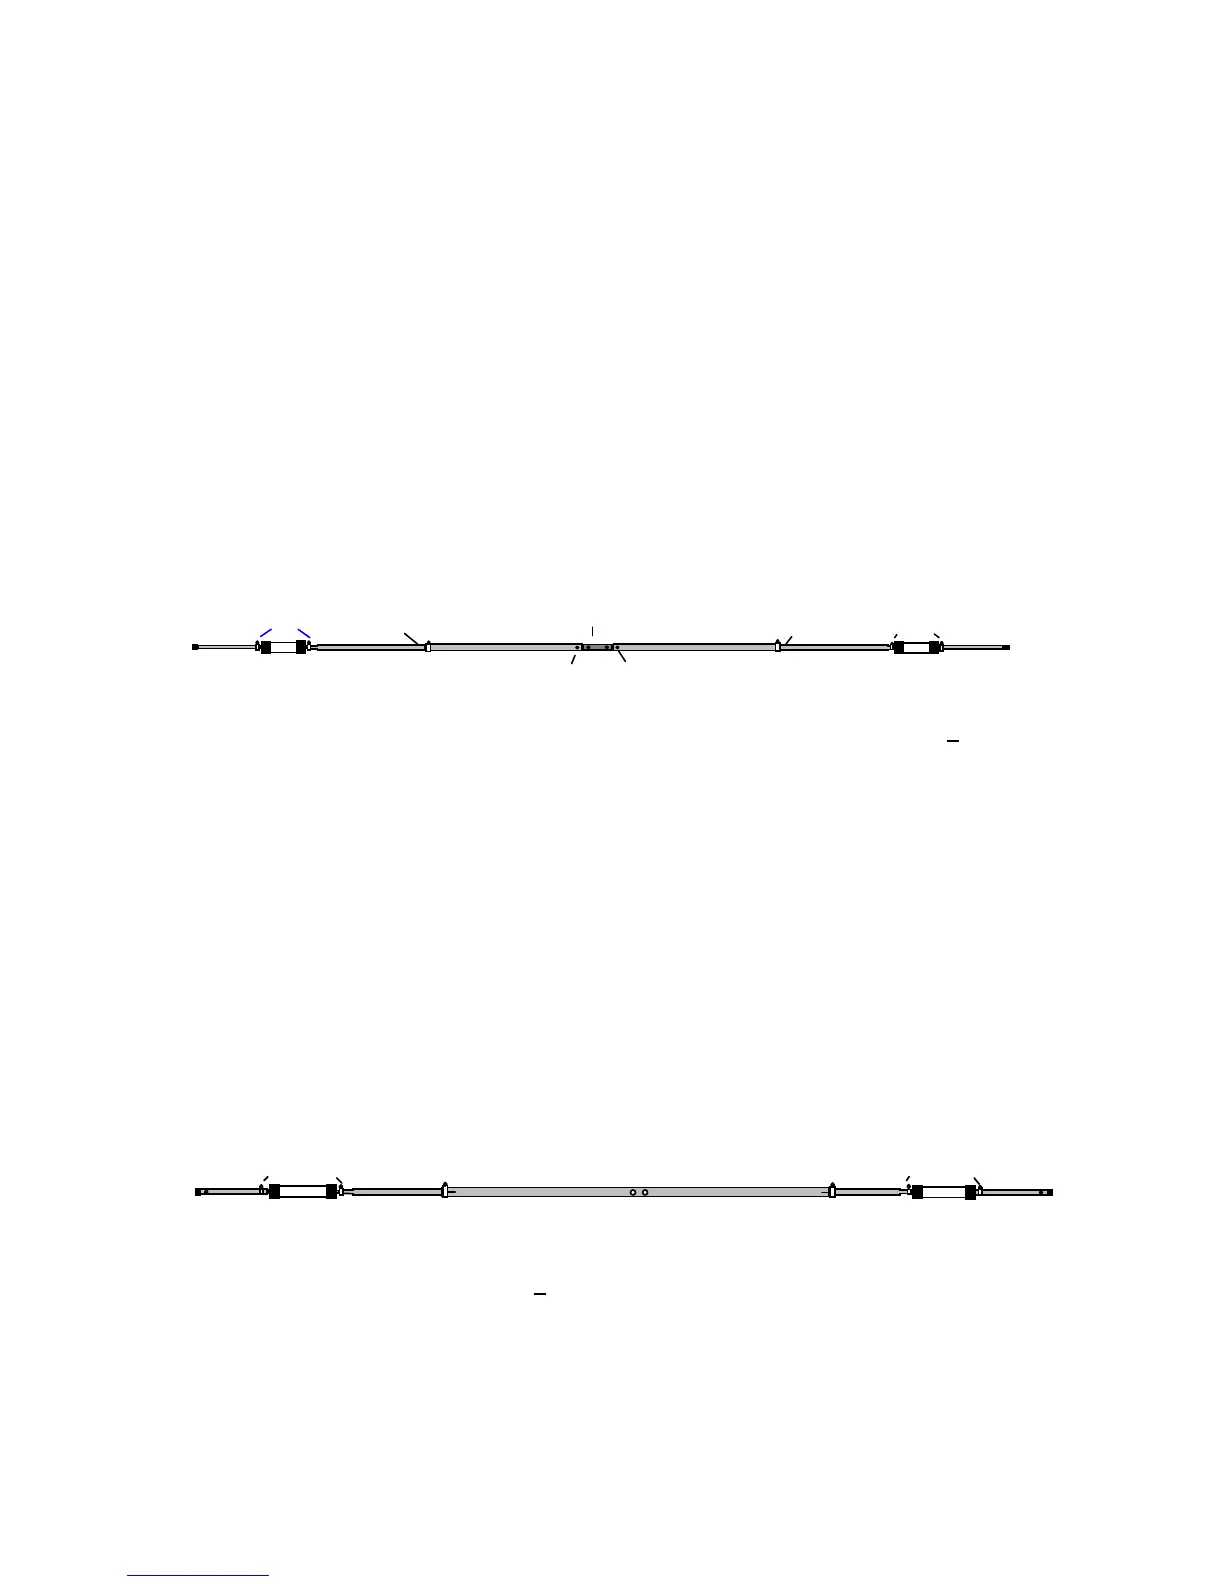
17/12-Meter Driven Element Assembly
EE
EE
EBEB
ED
ED
MT2
MT2
1" to 1-1/4"
7/8" to 1"
<
>
End Cap
Worm Clamp
Worm Clamp
End Cap
1" to 1-1/4"
Worm Clamp
7/8" to 1"
Worm Clamp Insulator
8-32 x 1-1/2"
Screw
Insert 5"
Insert 5"
Installation Notes: Follow the same procedure as Step-4, but insert EB tubes 5 inches
into ED tubes for this element.
Step-4. Assemble the 20/15/10-Meter Reflector using parts listed below:
[ ] 1 Element Tube, 1-1/8" OD x 84", slotted both ends (MA5BEF)
[ ] 2 Element Tube, 1" swaged to 7/8" x 36", slotted one end (MA5BEB)
[ ] 2 Element Tube, 7/8" OD x 7" slotted one end, drilled other end (MA5BEC)
[ ] 2 Trap, 21/28 MHz reflector element, MT3
[ ] 4 Worm clamp, 7/8" to 1"
[ ] 2 Worm clamp, 1" to 1-1/4"
[ ] 2 7/8" Plastic end cap
20/15/10-Meter Reflector Assembly
EB
EB
EF
EC
MT3
EC
MT3
<
>
1" to 1-1/4"
Worm Clamp
1" to 1-1/4"
Worm Clamp
(4" insert)
(4" insert)
7/8" to 1"
Worm Clamp
7/8" to 1"
Worm Clamp
End Cap
End Cap
Installation Notes: Insert EB tubes 4 inches into EF for this element.