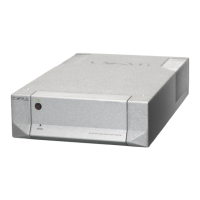
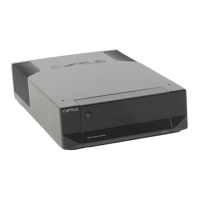
Cyrus Mono X User Instructions
2
GB
GB
Welcome to the world of Cyrus!
Congratulations on your choice of Cyrus Hi-fi products. Our state-of-the-art design
technology and outstanding quality of manufacture has won countless awards
around the world. We are confident that you will derive great pleasure from
owning a product from one of the most recognised and respected
manufacturers of hi-fi equipment.
Please read these instructions carefully before commencing installation. They
provide full guidance to help you install your Mono X safely and correctly.
Preparations for Installation
Before installing the Mono X check that the following items are included in the
accessory box.
• Power Cable
• 4 Loudspeaker plugs (certain markets only)
• 2 MC-Bus cables
After removing these items, please retain the packaging.
Install the Mono X in a well ventilated location away from sources of high
temperature, dust or humidity. Never stand the Mono X under another unit or
on any surface likely to hamper its cooling or ventilation.
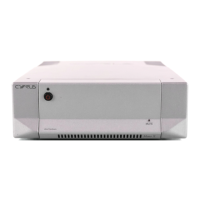
INSTALLATION
Key to the rear panel drawing (Fig.1):
1. + Speaker Outputs 7. Chain Output
2. - Speaker Outputs 8. MC-Bus connections
3. Cooling Fan 9. IEC Power Inlet
4. Balanced (BAL) Input 10. Mains Fuse Holder
5. RCA (phono)/BAL Input Selector 11 Power Switch
6. Unbalanced RCA (phono) Input
Connecting to the AC Mains Supply
Connect the socket on the AC Power cable to the Power inlet i on the rear panel of
the Mono X. Now connect the cable to a suitable AC power point.
The mains power switch
1) on the rear panel of the Mono X should be left on
for normal operation, except when left unattended for a long period when it
should be switched off or disconnected from the AC supply.
Identifying System Channels
Each Mono X drives a single speaker. In a stereo system two Mono Xs are
necessary, in an AV system, up to 5 Mono X amplifiers will be necessary.
Before proceeding to connect your amplifiers, take some time to organise your
system so that you can easily identify which amplifier will be connected to
each speaker.
Connecting a Pre-Amplifier or Surround Decoder
Phono (RCA) f and Balanced input connectors d are available to link the
Mono X to a pre-amplifier or surround decoder.
Phono (RCA) connections are recommended unless the Mono Xs are a long
distance from the pre-amplifier/decoder, or beside a loudspeaker, then
balanced XLR connections
d may give improved performance.
All Mono X’s must use the same method of input connection.
Input Connection via phono (RCA) interconnects
Set the input selector switch e to RCA. Connect a single phono interconnect
from the phono input
f of each Mono X to the corresponding output of the
pre-amplifier/decoder.
In the system illustration Fig.4a, a Cyrus preamplifier is connected to two
Mono X amplifiers, one for the left channel and one for the right channel. Input
connections are shown using phono interconnects.
Input Connection using Balanced XLR cables
Set the input selector switch e to BAL. Connect a 3-pin XLR cable from the
balanced input
d of each Mono X to the corresponding XLR output of the pre-
amplifier/decoder.
Connecting Loudspeakers
Fitting the loudspeaker plugs
Check for polarity indicators (+ and -) on the loudspeaker cable and fit the
plugs provided. Observe any signal directionality markings indicated on the
cable. If an arrow is printed on the cable it should point toward the speaker.
If additional or replacement loudspeaker plugs are required for the Mono X
ensure that the correct ‘BFA’ type are purchased.
Connecting the cables
After checking all the assembled cables for polarity they can be plugged into
the loudspeakers and amplifiers. The ‘+’ and ‘-’ terminals of each loudspeaker
must be connected to the matching ‘+’ and ‘-’ terminals of each amplifier as
follows-
Connect the left loudspeaker to the rear panel sockets
a (red speaker plug)
and
b
(black speaker plug) of the left channel Mono X. Connect the right
loudspeaker to the rear panel sockets
a red speaker plug) and b
(black
speaker plug) of the right channel Mono X.
Dual outputs are provided for the convenient connection of bi-wiring speaker
cables. Fig.4a shows a wiring schematic for a bi-wired stereo system.
Chain Output
The Chain output g allows more than one Mono X to be connected to each
channel of a pre-Amplifier or decoder.
Note: The Chain output is operational whether phono (RCA) or Balanced XLR
input connection is made to the Mono X.
Bi-Amplification
The Chain facility can be used with two or more Mono X amplifiers per
channel, for Bi/Tri-amping by connecting the Chain output of the first Mono X
to the phono inputs of the next Mono X. Such a bi-amplified system provides
the sonic benefits of totally separate power amplification for the bass and
treble units of the loudspeakers.
In the bi-amplified system illustration Fig.4b, a Cyrus preamplifier is connected
to four Mono X amplifiers - two for the left channel and two for the right
channel. Phono input connections are shown.
Note: The Chain output is operational whether phono (RCA) or Balanced XLR
input connection is made to the Mono X.
Gain Matching
All Cyrus power amplifiers, and all power amplifier stages in Cyrus integrated
amplifiers have the same voltage gain characteristics. This means that you
can use the Mono X in conjunction with any Cyrus amplifier for bi-amping, etc.
without any set-up adjustments being required.
MC-Bus System Connection (Optional)
Connecting the MC-Bus sockets h of the Mono X in an MC-Bus system
provides unified system power control. An MC-Bus loop is established by
connecting single phono cables from the MC-Bus output of one unit to the MC-
Bus input of another in a daisy-chain. Complete the loop by returning the MC-
Bus output of the final component to the MC-Bus input of the first (see
example system connections in Fig.3).
With MC-Bus established you can control the power function of the system
from the front panel or remote control of the main Cyrus amplifier or Surround
Processor.
 Loading...