2
DAP-2610 Quick Installation Guide
ENGLISH
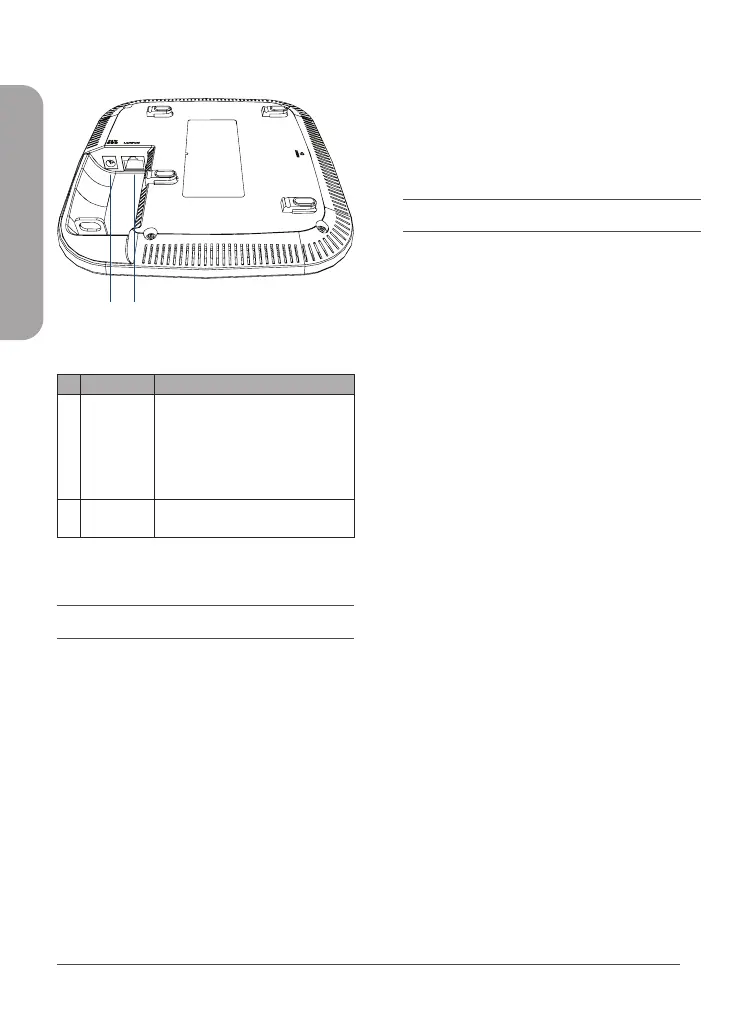
Interface Connectors
Figure 2: Rear Connectors
# Connector Description
1
Power
Input
Input for the power adapter,
however the device can be
powered over Ethernet.
Note: An 802.3af PoE injector is not
included in the package contents,
but can be purchased separately.
2
LAN(PoE)
Port
Gigabit RJ-45 port for data and
Power over Ethernet (PoE) power.
Table 2: Interface Description
Installation
The DAP-2610 can be powered using one of the
following two methods:
Using Power over Ethernet (PoE)
1. Use a standard Ethernet cable to connect
the LAN port on the DAP-2610 to a PoE
power source device such as an 802.3af
PoE switch or 802.3af PoE injector.
1 2
Using a Power Adapter (Optional)
1. Connect the power connector of the
adapter to the power input on the
DAP-2610 and plug the adapter into a
nearby power outlet.
Conguration
Using Nuclias Connect
The DAP-2610 is designed to be managed
through Nuclias Connect. Refer to the Nuclias
Connect Manual for detailed configuration
instructions.
Manual Conguration
Note: D-Link recommends manually configuring
the device before mounting it. The management
computer, DHCP server and DAP-2610 must be
in the same subnet.
Use one of the following methods to access the
web user interface:
Connecting through Ethernet
1. Use an Ethernet cable to connect the
DAP-2610 to the management computer,
or to the switch or router the management
computer is connected to.
2. Manage the access point from a computer.
Enter dap2610.local in the address field
of your browser.
3. Log in to the administration user
interface. The default login information is
Username: admin
Password: admin
 Loading...