5
Floor-Mounting the Anti-Tip Bracket
WARNING
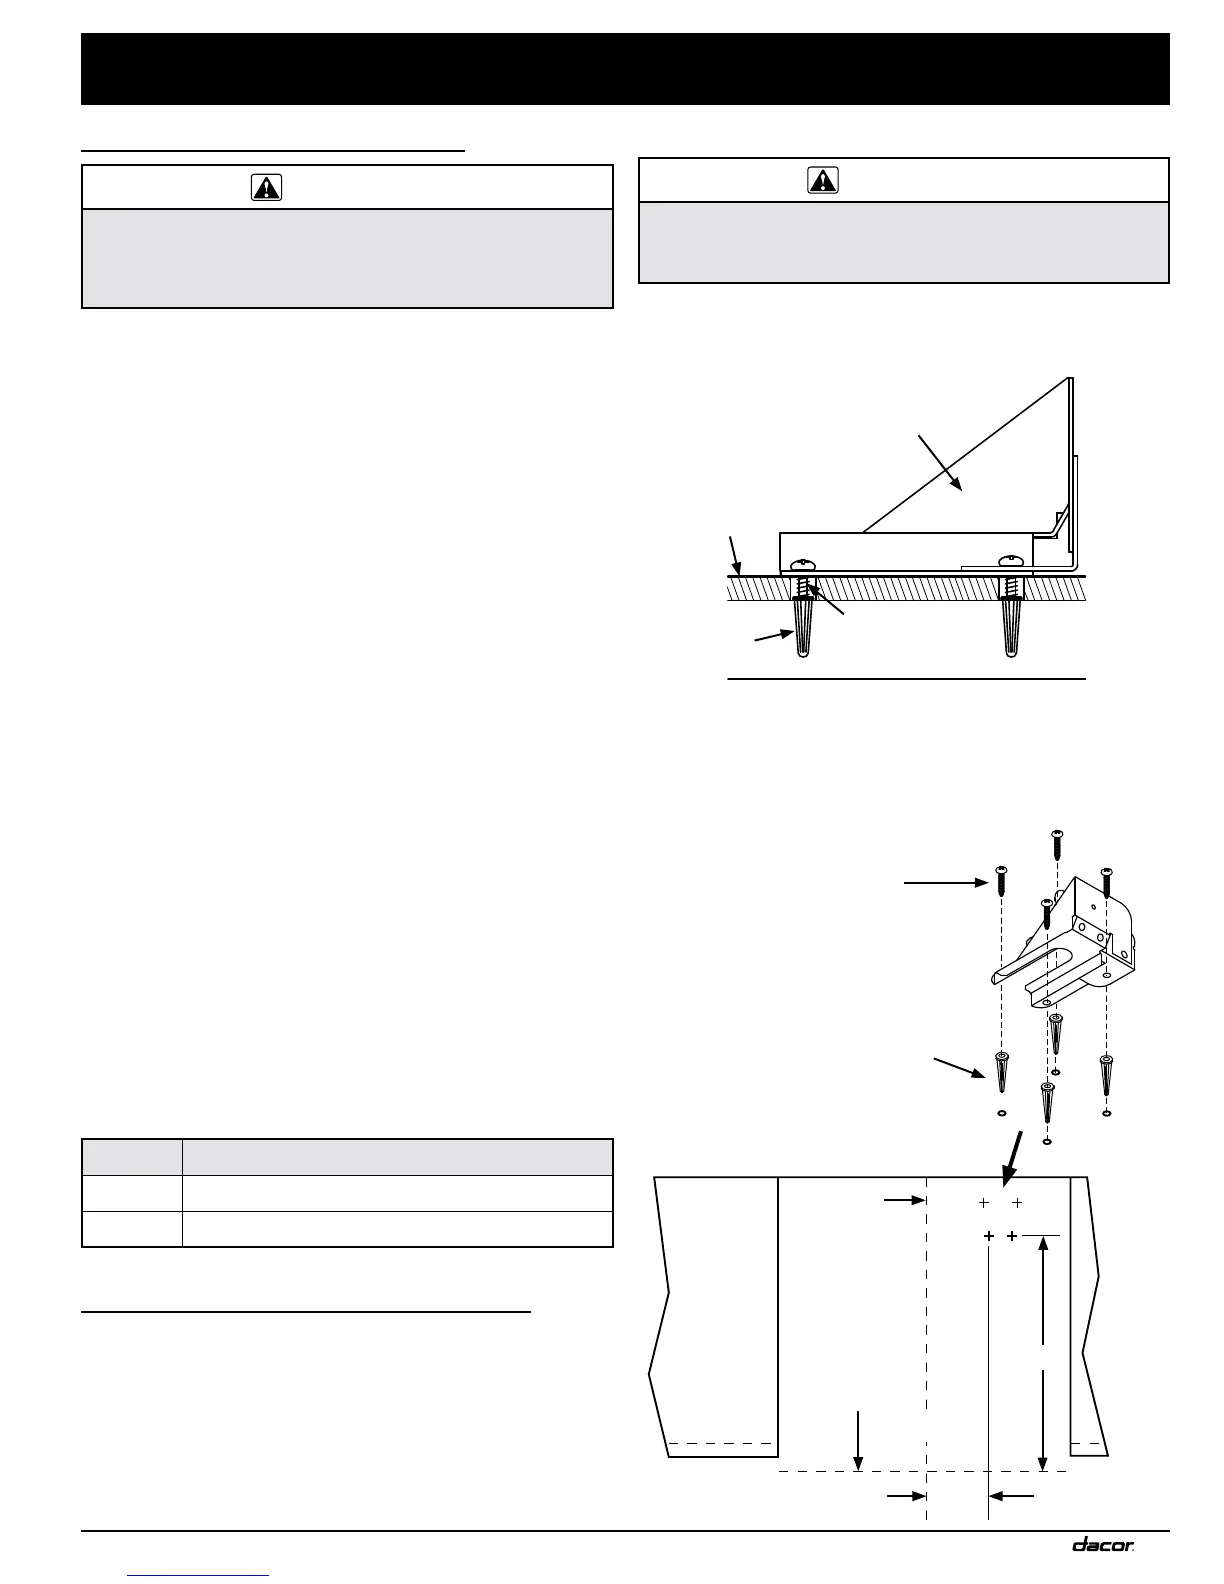
The anti-tip bracket must be attached as instructed to the concrete
slab or wood sub-floor below any flooring (including cement
board). Do not attach the bracket directly to floor coverings.
Four plastic anchors are provided with three sizes (4 each) of
#8 or #12 Phillips-head screws. Use the anchors and four of the
screws only if attaching the bracket to a concrete sub-floor.
1. Determine the location of the range center line and front
panel for the range’s final position based on the Product
Dimensions (Pg. 5) and the actual cabinet/cutout dimensions.
2. Determine the required position of the anti-tip bracket. Mark
the four (4) mounting hole locations on the floor with a pencil.
Preparing for Installation
WARNING
• If the home gas/electric service does not meet product
specifications, postpone installation until the gas supplier/
licensed electrician makes the appropriate modifications.
• Before installing the range, install the anti-tip bracket.
IMPORTANT: In the Commonwealth of Massachusetts, the range
must be installed by a licensed plumber or gas fitter.
Unpacking the Range
Unpack the parts box, and verify that all components are present.
If anything is missing/damaged, contact your dealer immediately.
Do not install a damaged/incomplete range.
Parts List
- 3 Grates
- 8 Standard burner caps (4 brass, 4 porcelain)*
- 4 Standard burner rings
- 4 SimmerSear burner caps (2 brass, 2 porcelain)*
- 2 SimmerSear burner rings
- 2 SimmerSear burner heads
- 2 GlideRack™ oven racks
- 1 Standard rack
- 2 GlideRack™ 18” wide oven racks (RNRP48G only)
- 1 18” wide standard oven rack (HGPR48S only)
- Knobs (4 Standard cooktop, 2 cooktop MAX GRIDDLE, 1 oven
for HGPR36S, 2 oven for HGPR48S)
- Anti-tip bracket with screws and anchors
- Griddle
- Wok ring
- Stainless steel cleaner
- Literature kit
- Broiler pan/grill
*Two types of burner caps are provided to suit customer
preference. Brass discolors with use; performance is unaffected.
Installing a Backguard (Optional)
Before making the gas/electrical connections, install the backguard
per backguard kit instructions. Approved kits for this range:
Model Description
APB36D9 9” high backguard for range model HGPR36S
APB48D9 9” high backguard for range model HGPR48S
Installation Instructions
Installing the Anti-Tip Bracket
Install the anti-tip bracket in one of two ways:
• Floor mounting (preferred)
• Wall mounting (alternate—if floor mounting is unsuitable). If the
range’s front panel (excluding bull nose) is over 27” (68.6 cm)
from the back wall – or – if the flooring is too thick (see Wall-
Mounting the Anti-Tip Bracket), floor-mounting must be used.
Sub-floor
Screws threaded
into anchors
Anti-tip bracket
Floor
covering
Anchor
C
L
B
Anchor, 4 places:
use for concrete
floor only
Range
center line
Range front
panel*
TOP VIEW
#8 x 1”
#8 x 1 1/4” or
#12 x 1 3/4
screw,
4 places
(see text)
A
 Loading...