5
• Step 1 - Prepare Components For Installation
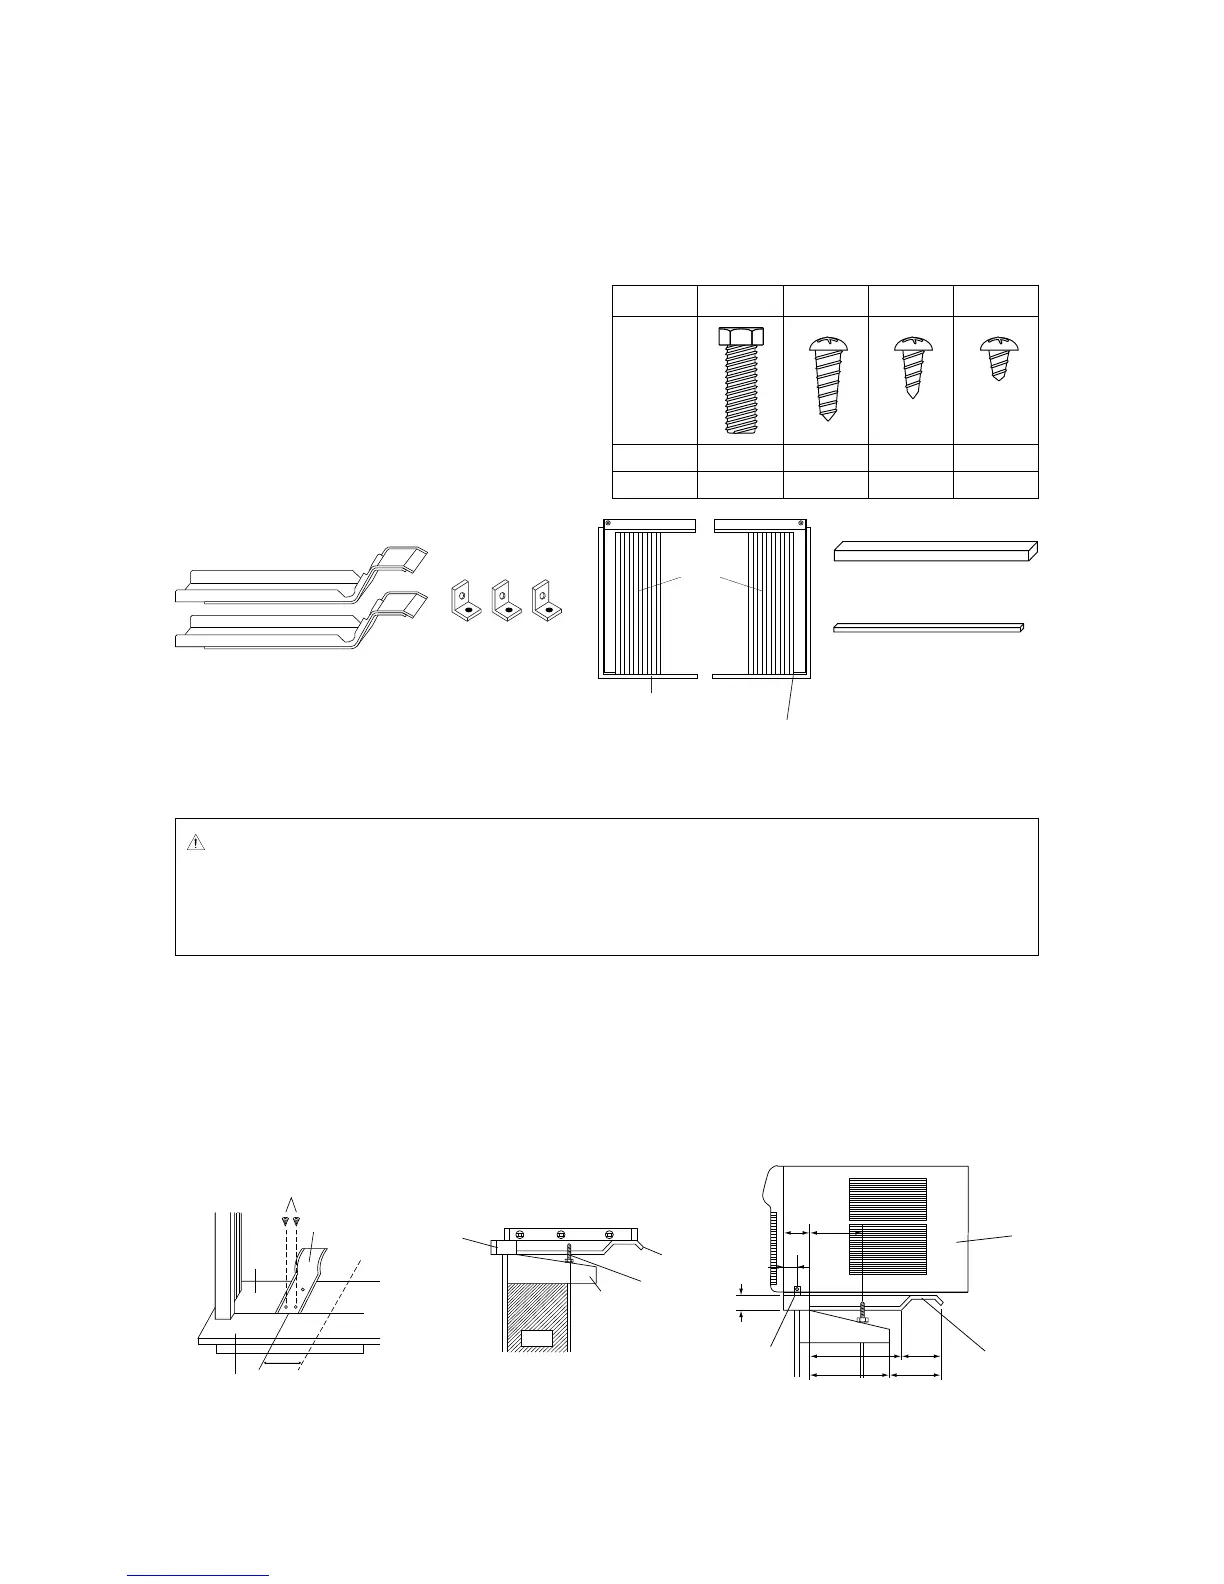
Components for installation as follows.
• Sill Bracket (2 pieces)
• Window Shutter (2 pieces)
• Sash Bracket (3 pieces)
• Window Kit Frame - Left side (1 piece)
• Window Kit Frame - Right side (1 piece)
• Leveling Screw - M8 x 45 (2 pieces)
• 1 inch Screw - M5 x 30 (4 pieces)
• 5/8 inch Screw - M4 x 16 (7 pieces)
• 3/8 inch Screw - M4 x 10 (6 pieces)
• Window Seal A, B (2 pieces)
• Step 2 - Prepare Window For Installation
1. Inspect window track, sash and sill to be sure they are strong enough to hold an air conditioner.
2. Measure width between window frame to be sure instant mount will fit in the window. Instant mount models
are designed for windows 22 in (559mm) to 36 in (915mm) wide.
3. Mark the center of window sill with a pencil.
4. Insert Screws (Type A) into the sill bracket.
5. Attach Sill bracket to window sill using Screws (Type B).
(The outside edge of window bracket should be 5.9 in (150mm) from center line)
6. Place the carpenter’s level on the sill and the outdoor end of Sill Bracket.
Turn Screw (Type A) until the level’s bubble is centered.
WARNING :
1.To reduce the risk of electric shock, personal injury or death, turn the fan control to the OFF position
and unplug the unit from the wall outlet before installing or removing this unit.
2.The window where the air conditioner is to be installed should have enough strength to bear the
weight of the air conditioner.