User's Manual
8
◇
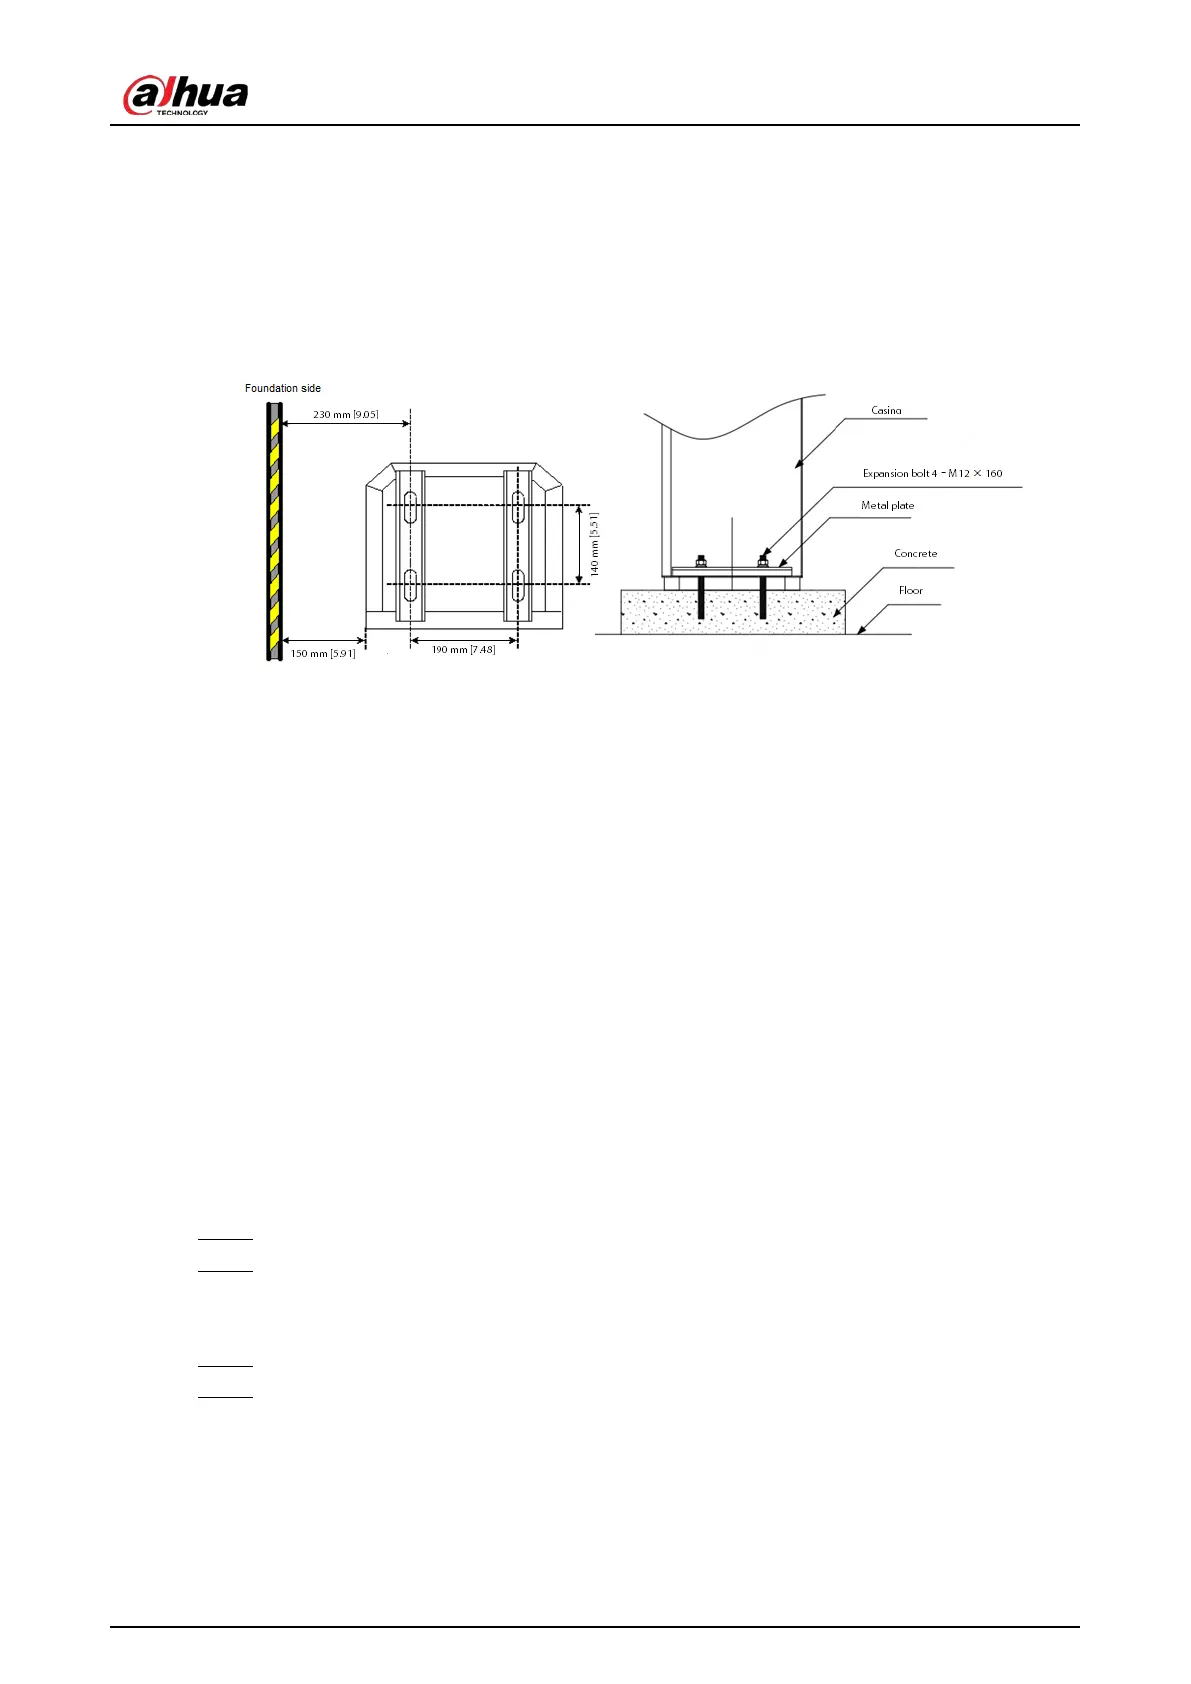
After the concrete foundation hardens, drill 4 holes with a diameter of 16 mm (0.63'') to install
the Barrier.
◇
Use M12 expansion bolts. Make sure that the thread length of the expansion bolt is longer
than 80 mm (3.15''), and its total length is more than 150 mm (5.91'').
◇
The drilled holes and the installation position should meet the requirements shown in Figure
3-4 to facilitate installing the metal plates and fixing the Barrier.
Figure 3-4 Install expansion bolt (top view) (mm [inch])
●
Thread the power cable and the signal cable separately through two 1-inch PVC pipes (buried in
the foundation) to the cable holes next to the foundation.
●
After installation, make sure that when opening the Barrier, there are no obstacles within a 90°
vertical range.
3.2 Installing the Barrier
3.2.1 Installing the Casing
Prerequisites
●
Read the manual carefully before installation. Refer to the barrier drawing attached to the casing
to know how the Barrier works and how to wire it.
●
Check whether the power cable, signal cable, or internal wiring is loose or disconnected. If yes,
securely connect the cables before installation.
Procedure
Step 1 Unpack the packaging box.
Step 2 Place the casing on the foundation, and set the working direction of the arm vertical to the
vehicle movement direction (we recommend placing a layer of 3mm rubber under the
casing to reduce vibrations).
Step 3 Use the key to open the door, and then place metal plates on the foundation bolts.
Step 4 Adjust the horizontal and vertical positions of the casing, and then tighten the nuts with a
wrench.
 Loading...