Q-222-036
6
1S
AUX.SUPPLY
S1
UUVV
P1
3
0
2
1
K
(+)B
S2
A(-)
E
OUTPUT
2L2S
0 P3
3S1L 3L
LOAD
LK
LK
L
Input current
terminal
1S, 1L
Input voltage
terminal
P1, P2
Ground
terminal
E
Input current
terminal
1S,
1L,
3S,
3L
Input voltage
terminal
P1, P2, P3
Ground
terminal
E
Input current
terminal
1S, 1L, 3S, 3L
2S, 2L
Input voltage
terminal
P1, 0, P3
Ground
terminal
E
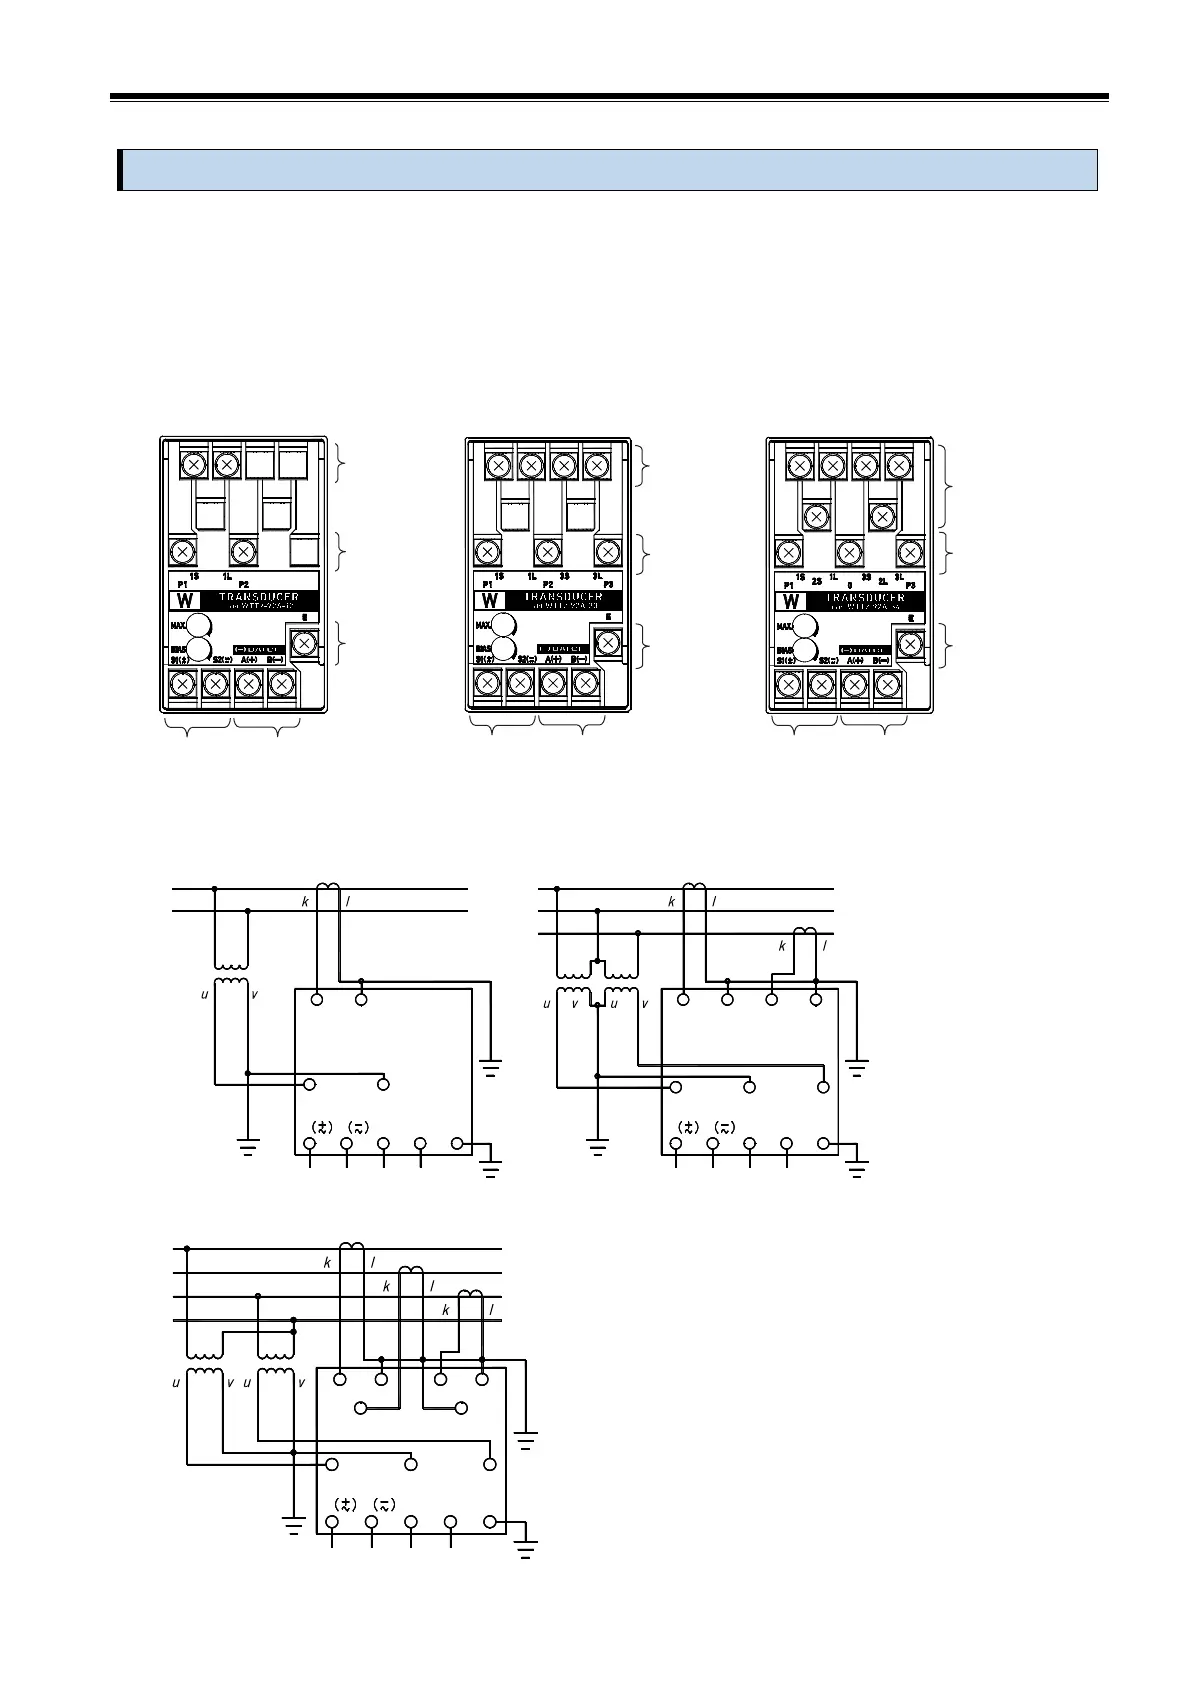
5. Connection
Refer to the terminal name on the front name plate of the main unit, and connect according to the wiring
diagram below or the wiring diagram name plate on the lower side of the main unit.
Use the included M4 screws to connect the auxiliary power supply, input voltage, input current, output,
and ground terminals.
〔Applicable solderless terminal〕 Solderless terminal for M4 screw
Outer diameter of terminal, 8.5mm or less
Tightening torque:1.0 to 1.3 N・m
WTT2-92A-12 WTT2-92A-13 / WTT2-92A-33 WTT2-92A-34
■ Connection diagram
WTT2-92A-12 WTT2-92A-13 / WTT2-92A-33
AUX.SUPPLY
1
S1
P1
1S
U
2
V
K
1
LOAD
1S
AUX.SUPPLY
E
A(-)B
(+)
S2
OUTPUT
P2
S1
P1
1L
UV U V
3
2
E
A(-)B
(+)
S2
OUTPUT
P2 P3
LOAD
3S1L 3L
KL
L KL
WTT2-92A-34
・Grounding is class D grounding (grounding resistance
100Ω or less).
・If there is a power line that causes noise or a sharp
voltage fluctuation, separate the output wiring as
much as possible. In addition, use twisted cable or
shielded twisted cable.
・This product will not be damaged even if the output
terminal is left open in the current output
specifications.
・After completing the wiring work, attach the terminal
cover.
Output terminal
A(+), B(-)
Auxiliary
supply terminal
S1( ), S2( )
+
~
-
~
Output terminal
A(+), B(-)
Auxiliary
supply terminal
S1( ), S2( )
+
~
-
~
Output terminal
A(+), B(-)
Auxiliary
supply terminal
S1( ), S2( )
+
~
-
~
 Loading...