Troubleshooting for Outdoor Unit SiBE121123_A
183 Service Diagnosis
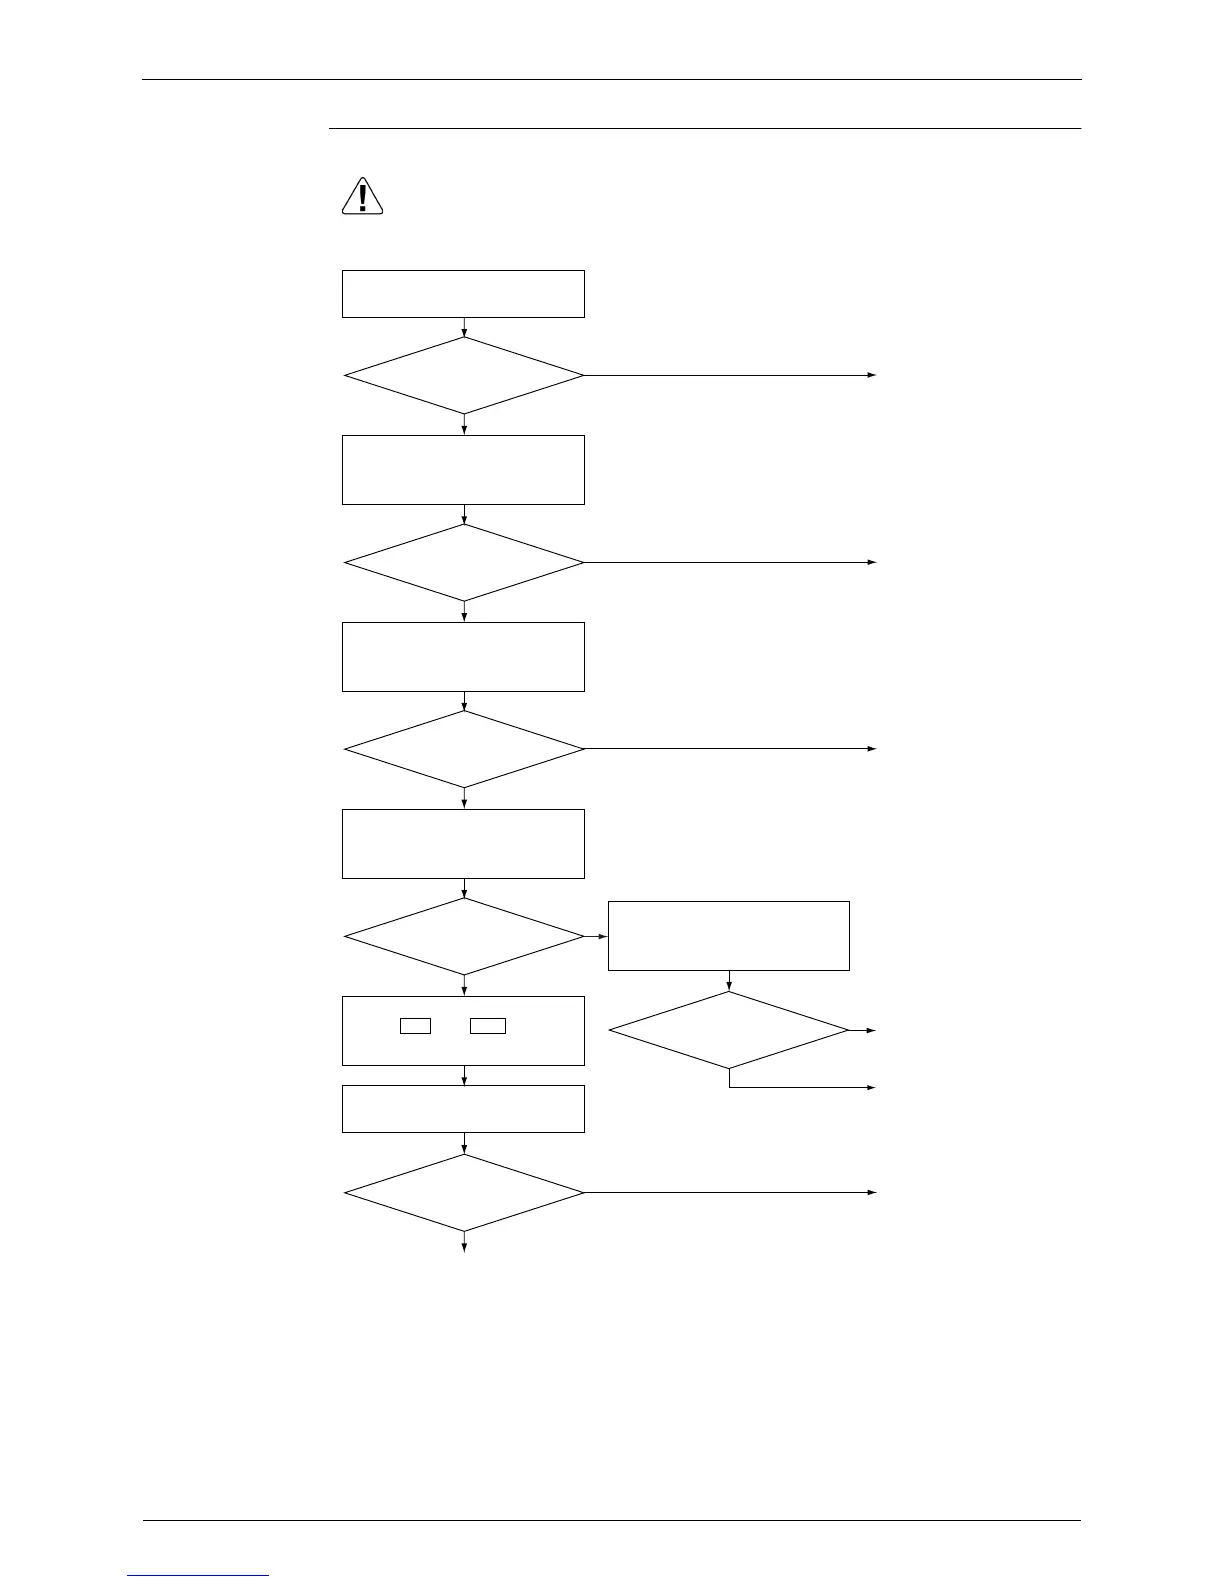
Troubleshooting
YES
(R18131)
Caution
Check the power supply voltage.
Check indoor unit also, because a communication circuit fault
may be caused by the problem related to the indoor unit.
Rated voltage?
NO
NO
Firmly connected?
NO
NO
Check the varistor on the outdoor
unit PCB.
Damaged?
YES
YES
Check the fuse on the outdoor
unit PCB.
Check the terminal board
connecting wire for proper
connection.
Does the fuse have
continuity?
NO
YES
Wait for more than 10 sec.
Check the thermal fuse on the
terminal board.
Does the fuse have
continuity?
YES
Continued to the next page
(1)
YES
5 V ± 0.5 V
NO
Check +5V and GND on the
outdoor unit PCB.
Power on again.
Rectify the power supply.
Replace the varistor.
Replace the fuse.
Replace the thermal fuse
on the terminal board.
Reconnect the terminal
board connecting wire
properly. Replace the
terminal board. Replace
the thermal fuse on the
terminal board.
Replace the outdoor unit
PCB.
Be sure to turn off the power switch before connecting or disconnecting
connectors, or parts may be damaged.
 Loading...