Removal of Electrical Box Si12-793
4 Removal Procedure
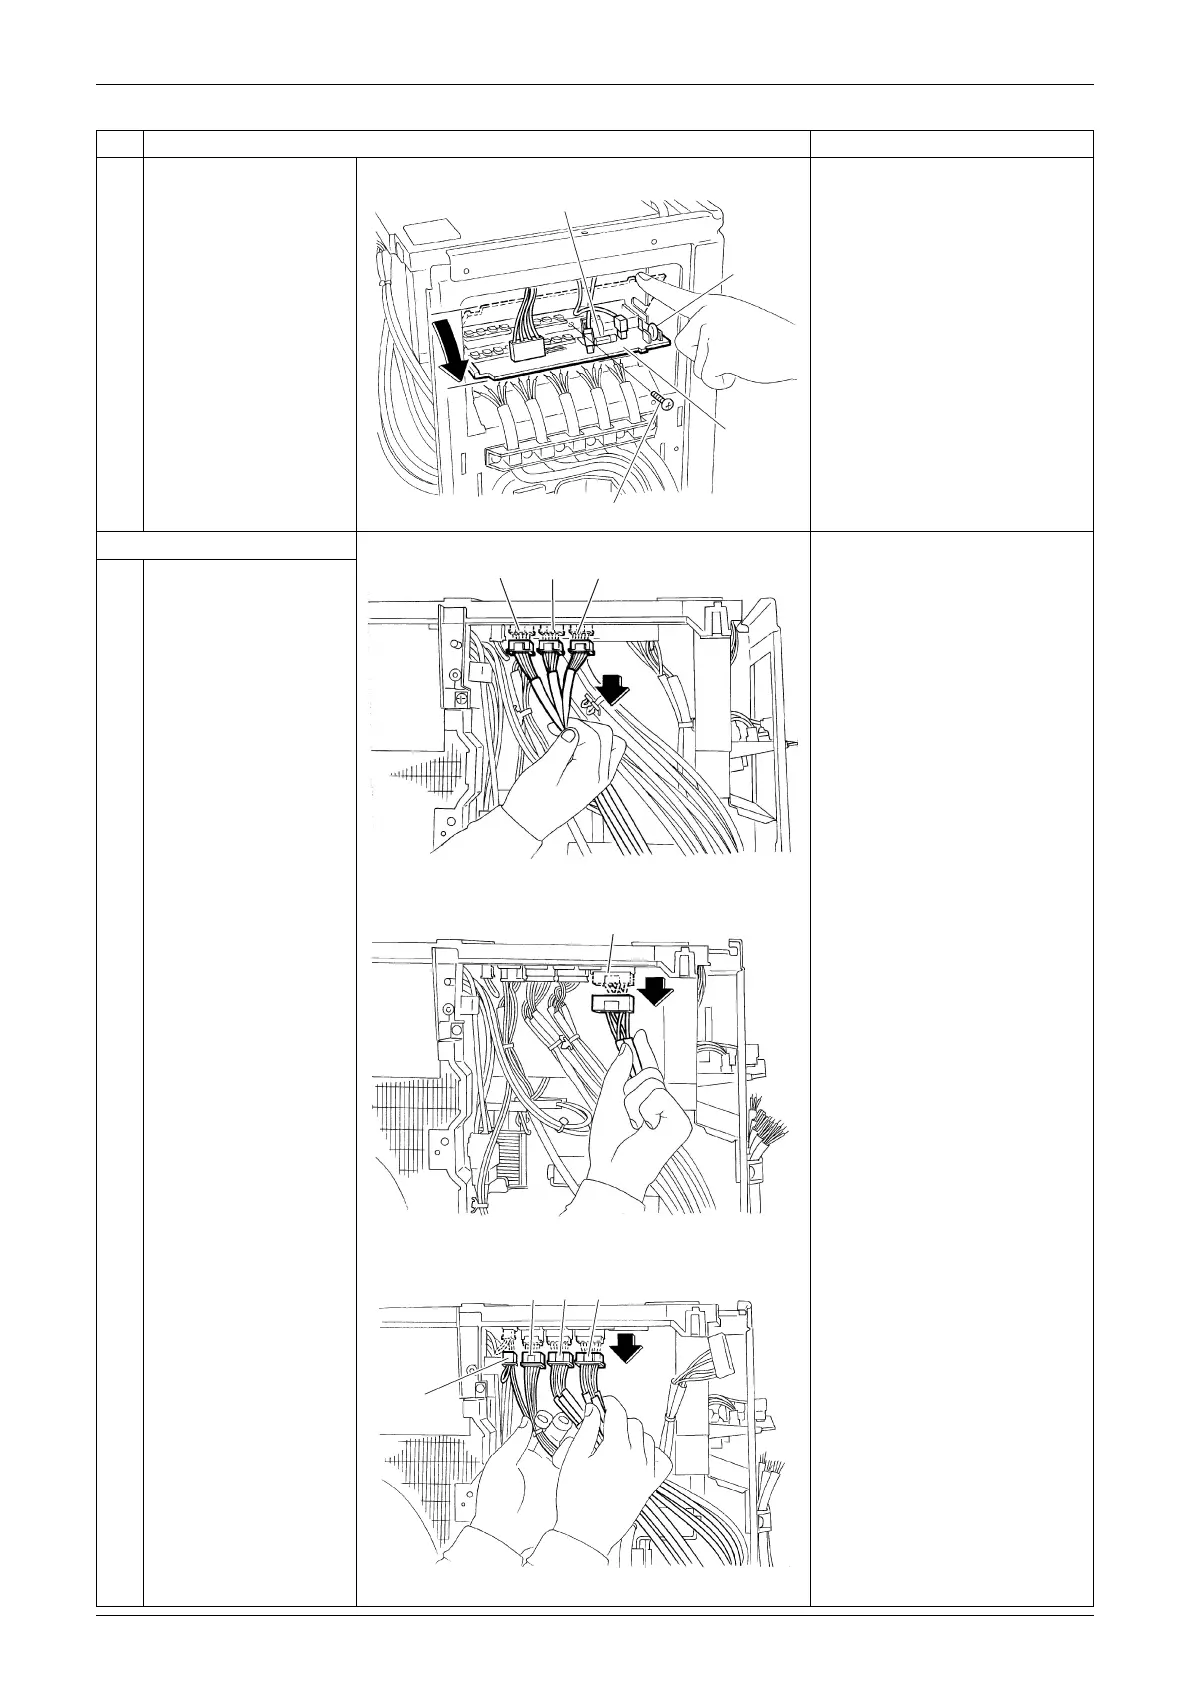
3
Pull out the terminal
board to open.
Glass tube fuse and varistor
cannot be replaced
individually because lead-
free soldering is provided.
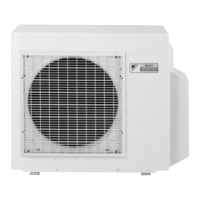
2. Remove the harnesses.
1
Disconnect the
connectors for the
electronic expansion
valve coils. [S20] [S21]
[S22].
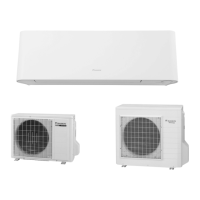
2
Remove the connector
for the four way valve
coil [S80].
The cooling only models do
not have the harness for
[S80].
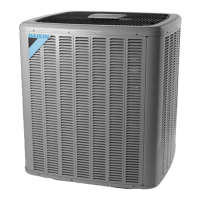
3
Disconnect the
connectors for the
thermistors [S90] [S92]
[S93] and the connector
for the overload
protector [S40].
[S40]: Overload protector
[S90]: Thermistor
(outdoor temperature,
outdoor heat exchanger,
discharge pipe)
[S92]: Gas pipe thermistor
[S93]: Liquid pipe thermistor
Step
Procedure Points
(R2165)
Varister
Glass tube fuse
Screw
Terminal
board
[S20] [S21] [S22]
(R16025)
(R11729)
[S80]
[S40]
(R2168)
[S90] [S92] [S93]