9 Technical data
Installation manual
17
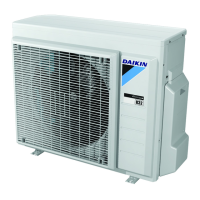
ERRA08~12E
Daikin Altherma 3 R MT
4P708481-1 – 2023.02
9.2 Wiring diagram: Outdoor unit
The wiring diagram is delivered with the unit, located at the inside of
the service cover.
English Translation
Electronic component assembly Electronic component assembly
Front side view Front side view
Indoor Indoor
OFF OFF
ON ON
Outdoor Outdoor
Position of compressor terminal Position of compressor terminal
Position of elements Position of elements
Rear side view Rear side view
(a)
Right side view Right side view
See note *** See note ***
(a)
Only for *W1 models.
Notes:
1 Symbols:
L Live
N Neutral
Protective earth
Noiseless earth
Field wiring
Option
Terminal strip
Terminal
Connector
Connection
2 Colours:
BLK Black
RED Red
BLU Blue
WHT White
GRN Green
YLW Yellow
PNK Pink
ORG Orange
GRY Grey
BRN Brown
3 This wiring diagram applies only to the outdoor unit.
4 When operating, do not short-circuit protective devices Q1,
S1PH, S2PH and S1PL.
5 Refer to the combination table and the option manual for how
to connect the wiring to X5A
(a)
, X77A
(a)
and X41A.
6 The factory setting of all switches is OFF, do not change the
setting of the selector switch (DS1).
(a)
Only for *W1 models.
Legend in case of W1 models:
A1P Printed circuit board (main)
A2P Printed circuit board (noise filter)
BS1~BS3 (A1P) Push button switch
C1~C7 (A1P) Capacitor
DS1 (A1P) DIP switch
F1U Field fuse (field supply)
F1U~F4U (A2P) Fuse (T 6.3A / 250V)
F5U (A1P) Fuse (T 5.0A / 250V)
HAP (A1P) Light-emitting diode (service monitor is
green)
K1R (A1P) Magnetic relay (Y1S)
K2R (A1P) Magnetic relay (Y2S)
K3R (A1P) Magnetic relay (Y3S)
K4R Magnetic relay (Y4S)
K6R~K84R (A1P) Magnetic relay
K1M~K2M (A1P) Magnetic contactor
L1R~L5R (A1P, A2P) Reactor
M1C Compressor motor
M1F Fan motor
PS (A1P) Switching power supply
Q1DI Earth leakage circuit breaker (30mA) (field
supply)
Q1 Thermal overcurrent protector
R1~R9 (A1P) Resistor
R1T Thermistor (outdoor air)
R2T Thermistor (compressor discharge)
R3T Thermistor (compressor suction)
R4T Thermistor (air heat exchanger, liquid pipe)
R5T Thermistor (air heat exchanger, middle)
R7T Thermistor (injection)
R11T Thermistor (fin)
RC (A1P) Signal receiver circuit
S1NPH High pressure sensor
S1PH, S2PH High pressure switch
S1PL Low pressure switch
SEG* (A1P) 7‑segment display
TC (A1P) Signal transmission circuit
V1D~V3D (A1P) Diode
V1R~V2R (A1P) Diode module
V3R~V5R (A1P) Insulated Gate Bipolar Transistor (IGBT)
power module
X1M Terminal strip
Y1E Electronic expansion valve (main)
Y3E Electronic expansion valve (injection)
Y1S Solenoid valve (4‑way valve)
Y2S Solenoid valve (low pressure bypass)
Y3S Solenoid valve (hot gas bypass)
Y4S Solenoid valve (liquid injection)
Z1C~Z10C Noise filter (ferrite core)
Z1F~Z5F (A1P, A2P) Noise filter
Legend in case of V3 models:
A1P Printed circuit board (main)
A2P Printed circuit board (noise filter)
A5P Printed circuit board (flash)
BS1~BS4 (A1P) Push button switch
C1~C4 (A1P, A2P) Capacitor
DS1 (A1P) DIP switch
F1U Field fuse (field supply)
F1U~F4U (A2P) Fuse (T 6.3A / 250V)
F6U (A1P) Fuse (T 5.0A / 250V)

 Loading...