6 Preparation
Installer reference guide
22
ERLQ004~008CA + EHVH/X04+08S18+26CB
Daikin Altherma – Low temperature split
4P384973-1A – 2016.02
P
h
Produced heat
C
e
Consumed energy
A Outdoor unit
B Booster heater
C Backup heater
a Limited outdoor unit operation
b Full outdoor unit operation
c Booster heater turned ON
d Backup heater step1 turned ON
e Backup heater step2 turned ON
5.7 Setting up an external temperature
sensor
You can connect one external temperature sensor. It can measure
the indoor or outdoor ambient temperature. Daikin recommends to
use an external temperature sensor in the following cases:
Indoor ambient temperature
▪ In room thermostat control, the user interface is used as room
thermostat and it measures the indoor ambient temperature.
Therefore, the user interface must be installed on a location:
▪ Where the average temperature in the room can be detected
▪ That is NOT exposed to direct sunlight
▪ That is NOT near a heat source
▪ That is NOT affected by outside air or air draught because of,
for example, door opening/closing
▪ If this is NOT possible, Daikin recommends to connect a remote
indoor sensor (option KRCS01-1).
▪ Setup: For installation instructions, see the installation manual of
the remote indoor sensor.
▪ Configuration: Select room sensor [A.2.2.B].
Outdoor ambient temperature
▪ In the outdoor unit, the outdoor ambient temperature is measured.
Therefore, the outdoor unit must be installed on a location:
▪ At the north side of the house or at the side of the house where
the most heat emitters are located
▪ That is NOT exposed to direct sunlight
▪ If this is NOT possible, Daikin recommends to connect a remote
outdoor sensor (option EKRSCA1).
▪ Setup: For installation instructions, see the installation manual of
the remote outdoor sensor.
▪ Configuration: Select outdoor sensor [A.2.2.B].
▪ During suspend (see "8 Configuration" on page 46), the outdoor
unit is turned down to reduce the standby energy losses. As a
result, the outdoor ambient temperature is NOT read out.
▪ If the desired leaving water temperature is weather dependent, the
full time outdoor temperature measurement is important. This is
another reason to install the optional outdoor ambient temperature
sensor.
INFORMATION
The external outdoor ambient sensor data (either averaged
or instantaneous) is used in the weather-dependent control
curves and in the automatic heating/cooling changeover
logic. To protect the outdoor unit, the internal sensor of the
outdoor unit is always used.
6 Preparation
6.1 Overview: Preparation
This chapter describes what you have to do and know before going
on-site.
It contains information about:
▪ Preparing the installation site
▪ Preparing the refrigerant piping
▪ Preparing the water piping
▪ Preparing the electrical wiring
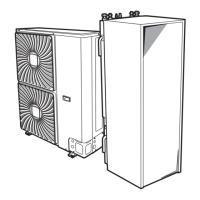
6.2 Preparing installation site
Do NOT install the unit in places often used as work place. In case
of construction works (e.g. grinding works) where a lot of dust is
created, the unit must be covered.
Choose the installation location with sufficient place for carrying the
unit in and out of the site.
6.2.1 Installation site requirements of the
outdoor unit
INFORMATION
Also read the following requirements:
▪ General installation site requirements. See the
"General safety precautions" chapter.
▪ Refrigerant piping requirements (length, height
difference). See further in this "Preparation" chapter.
Mind the following spacing guidelines:
≤1200
>250
>250
>250
>350
>350
(mm)(mm)
a
b
b
a
a Air outlet
b Air inlet
See "14.2 Dimensions and service space" on page 84 for more
detailed information about spacing guidelines.
NOTICE
▪ Do NOT stack the units on each other.
▪ Do NOT hang the unit on a ceiling.
Strong winds (≥18km/h) blowing against the outdoor unit’s air outlet
causes short circuit (suction of discharge air). This may result in:
▪ deterioration of the operational capacity;
▪ frequent frost acceleration in heating operation;
▪ disruption of operation due to decrease of low pressure or
increase of high pressure;

 Loading...